Flashbang placements on the Anubis map in CS2

Anubis has many narrow exits, so a well-timed flashbang is often more useful than an unnecessary firefight. Here is a collection of flashbang placements for mid, cone, water, A, and B.
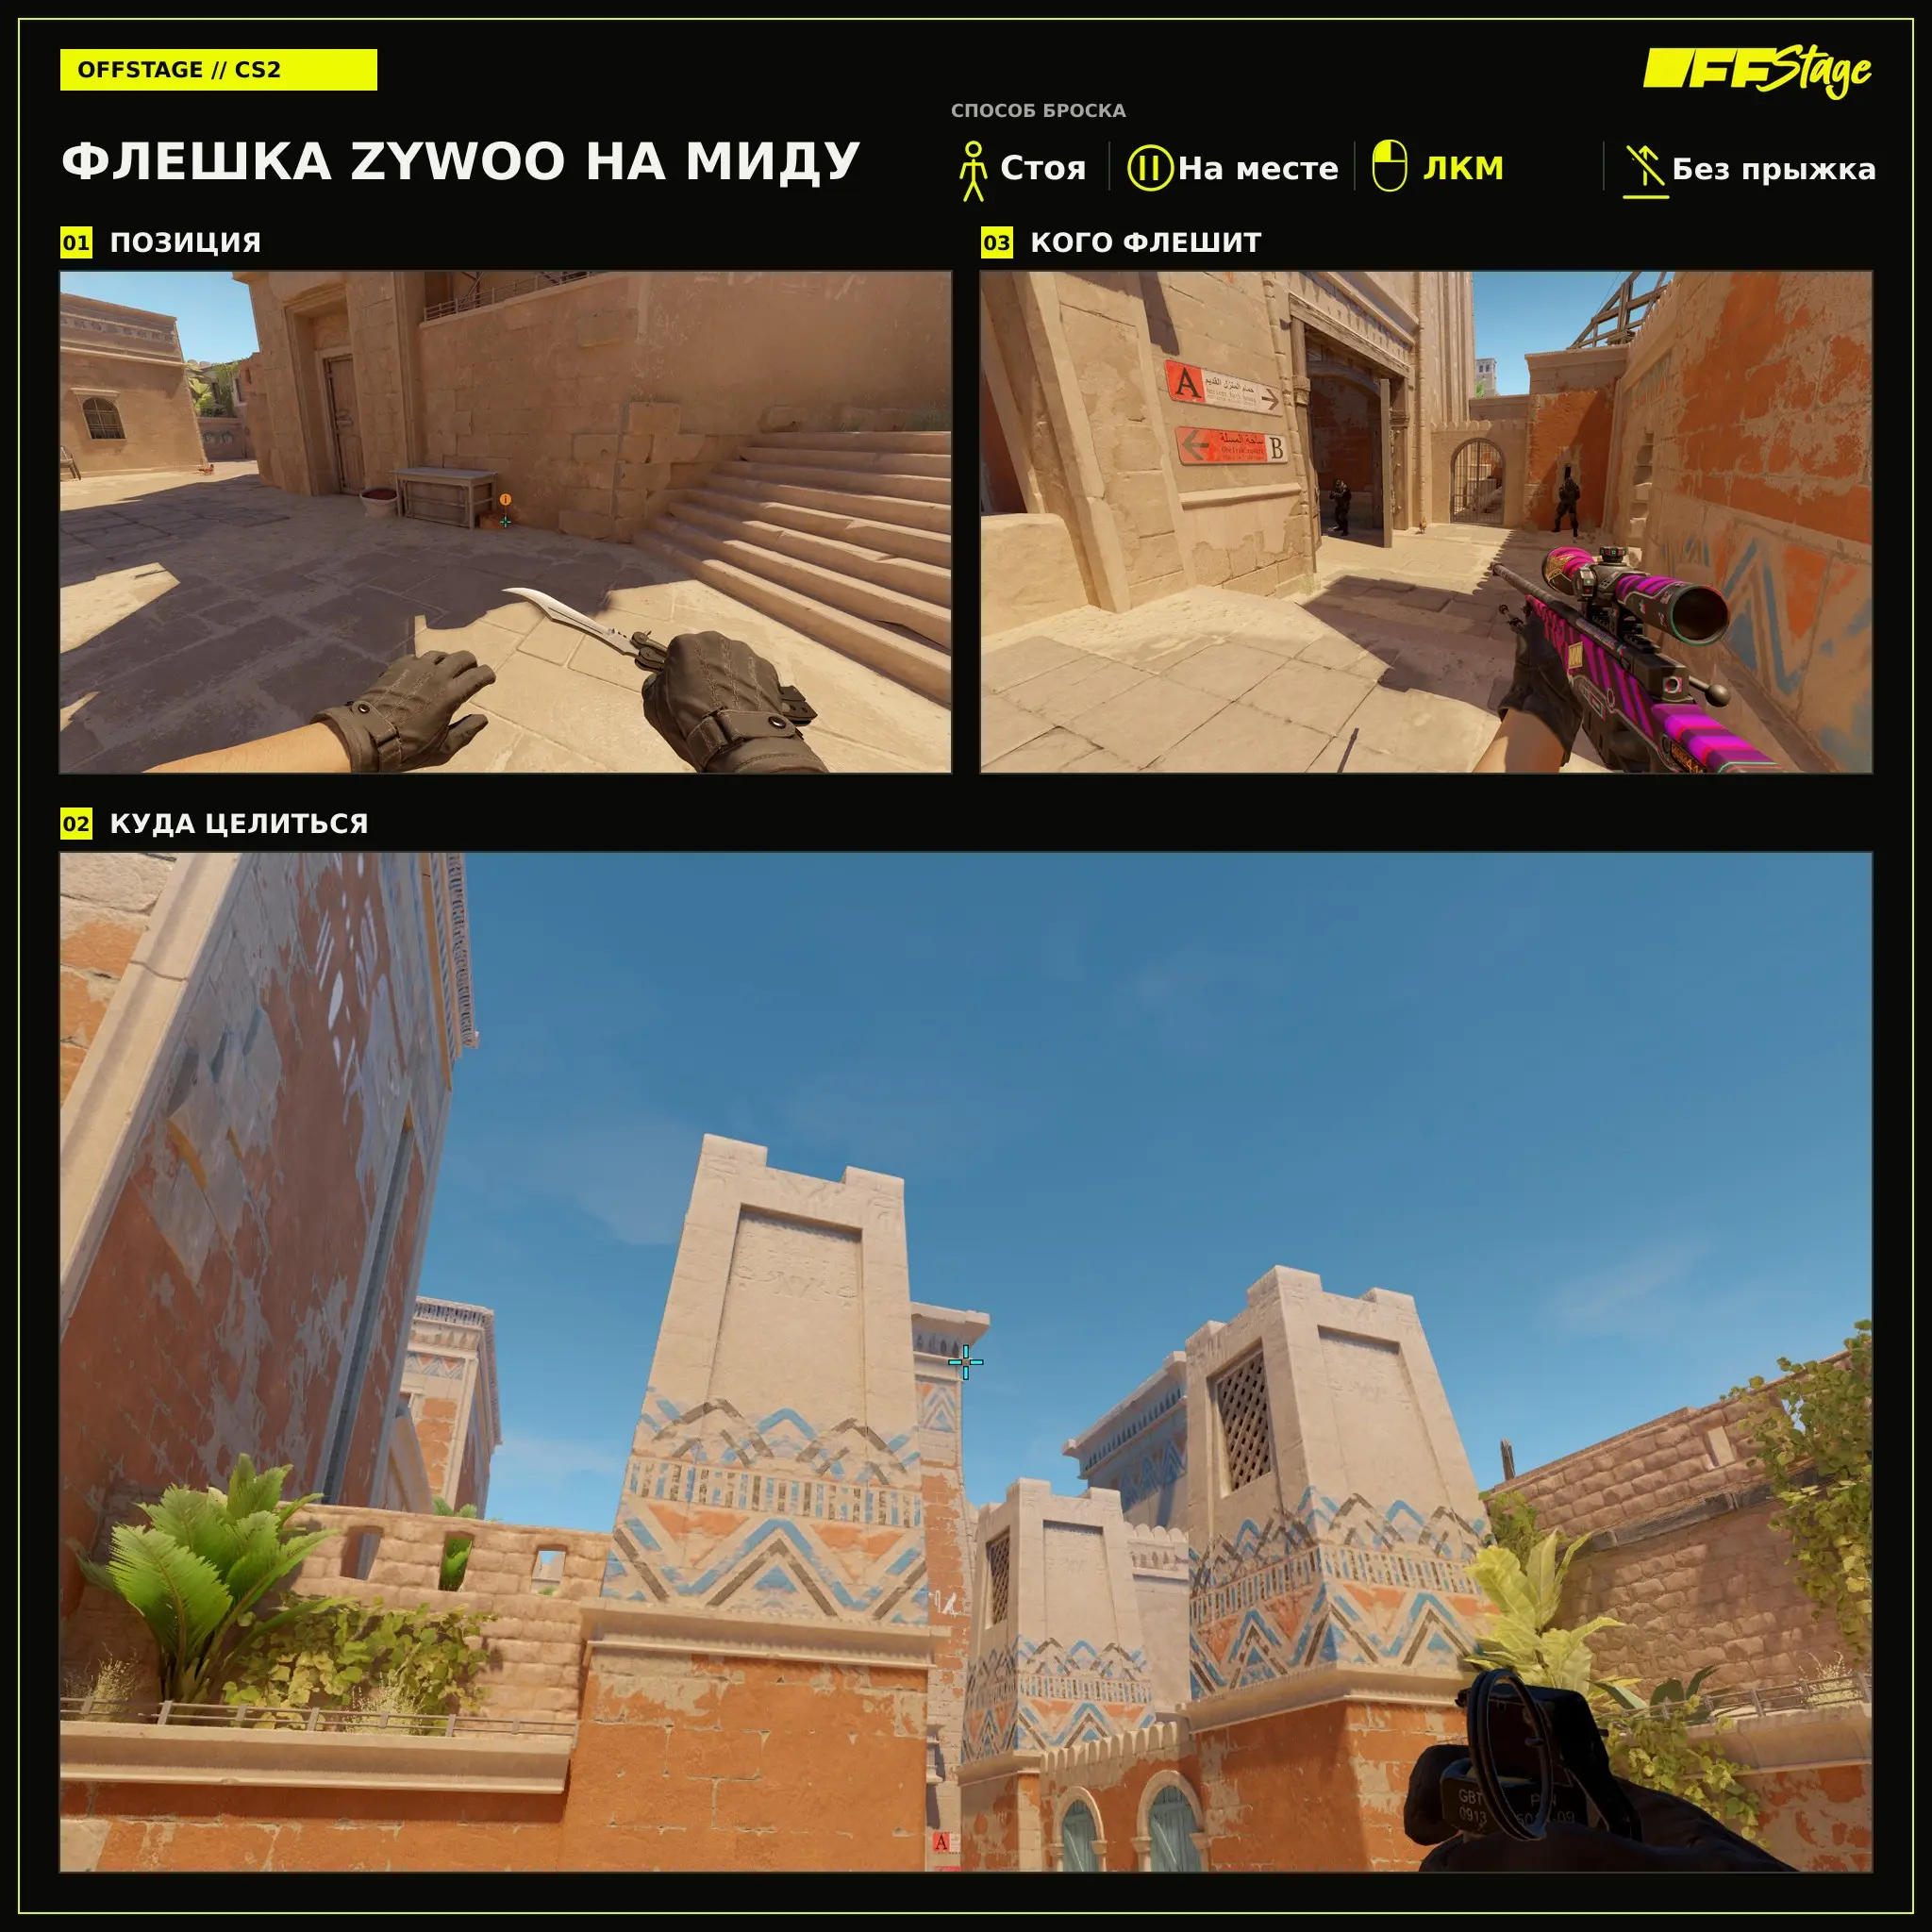
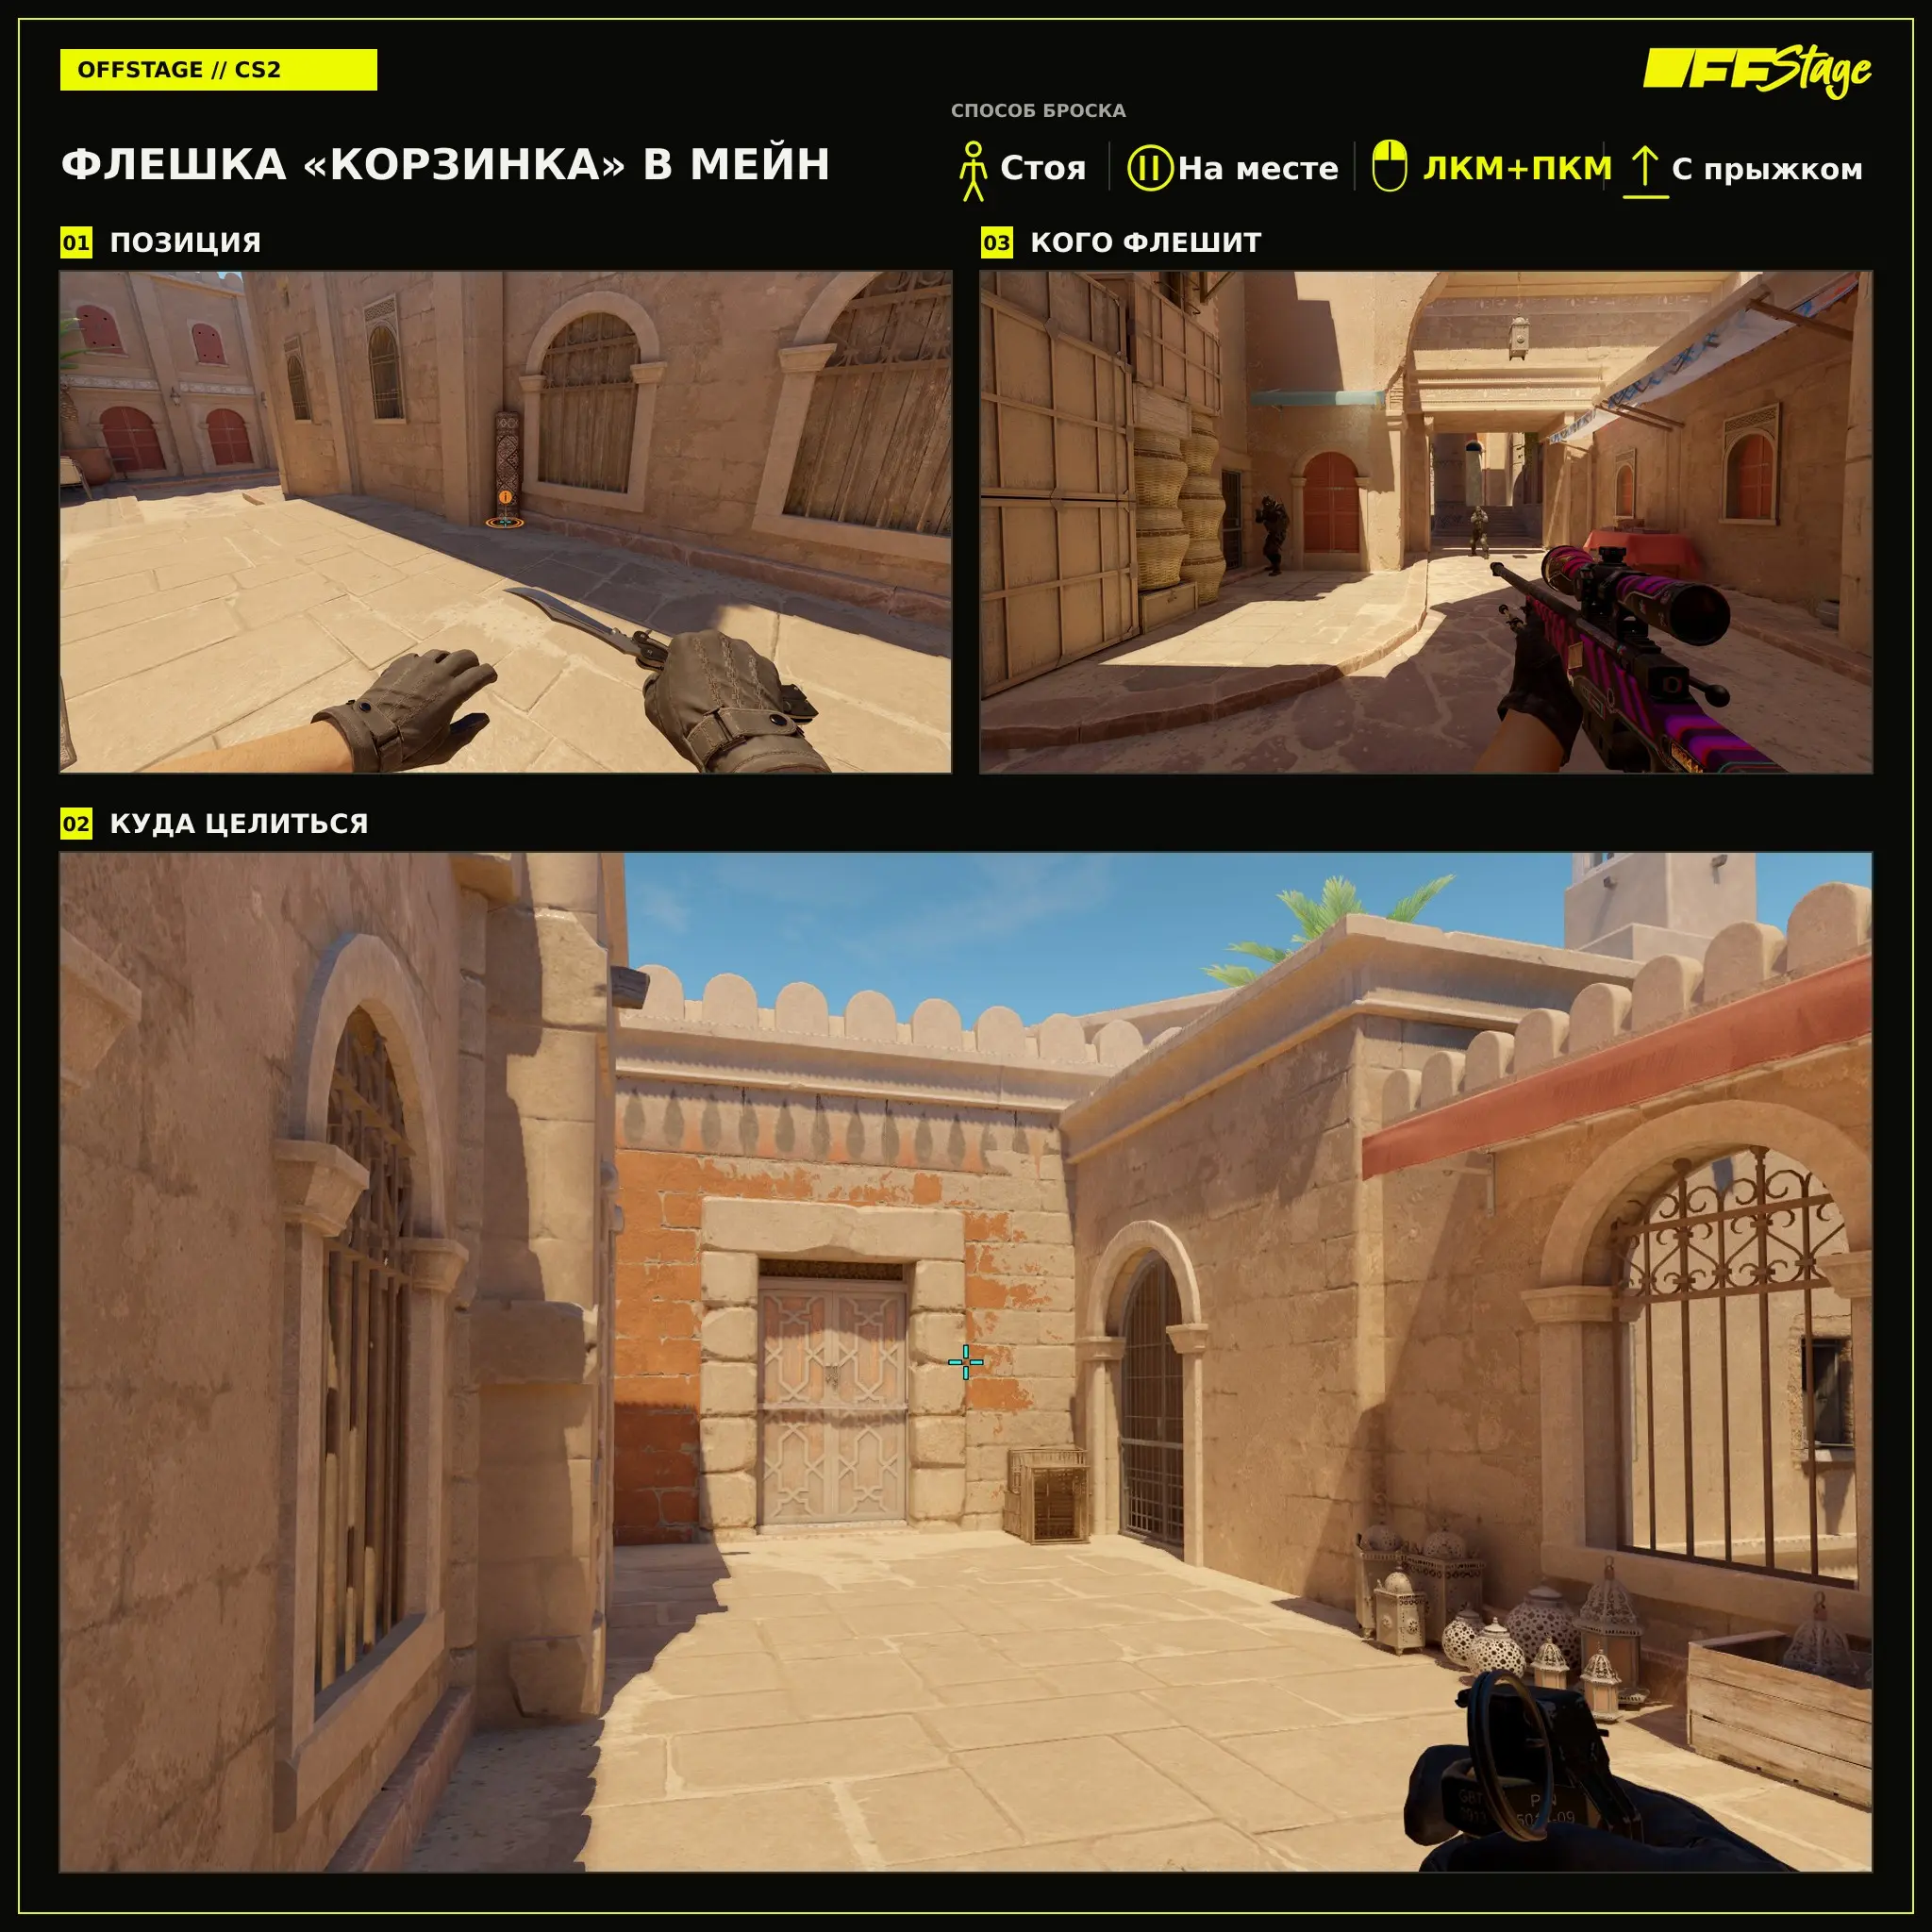
Each diagram shows the position, a magnified reference point, and the view of the player who is blinded by the flashbang. These screenshots illustrate how to throw the flashbang and who it affects. It’s easier to memorize flashbang placements on Anubis by role. Choose two options for attack and two for defense, then add the remaining CS2 flashbangs as needed.
Attack Flash Placements
Attackers need flashbangs that go off behind walls and buy them time to get through a narrow exit. Below are options for mid, cone, and both flanks.
ZywOo’s Flash on Mid
This option, associated with Mathieu “ZywOo” Erbo, helps attackers initiate a push through mid and hides the throw from the opponent. Stand as shown in the first frame, aim at the indicated landmark, and throw the flashbang with the left mouse button without jumping.
“Basket” Flashbang into the Main Lane
The “Basket” flashbang is designed for a teammate who is ready to continue moving through the main. From a standing position, hold down the left mouse button and the right mouse button, then perform a jump throw.
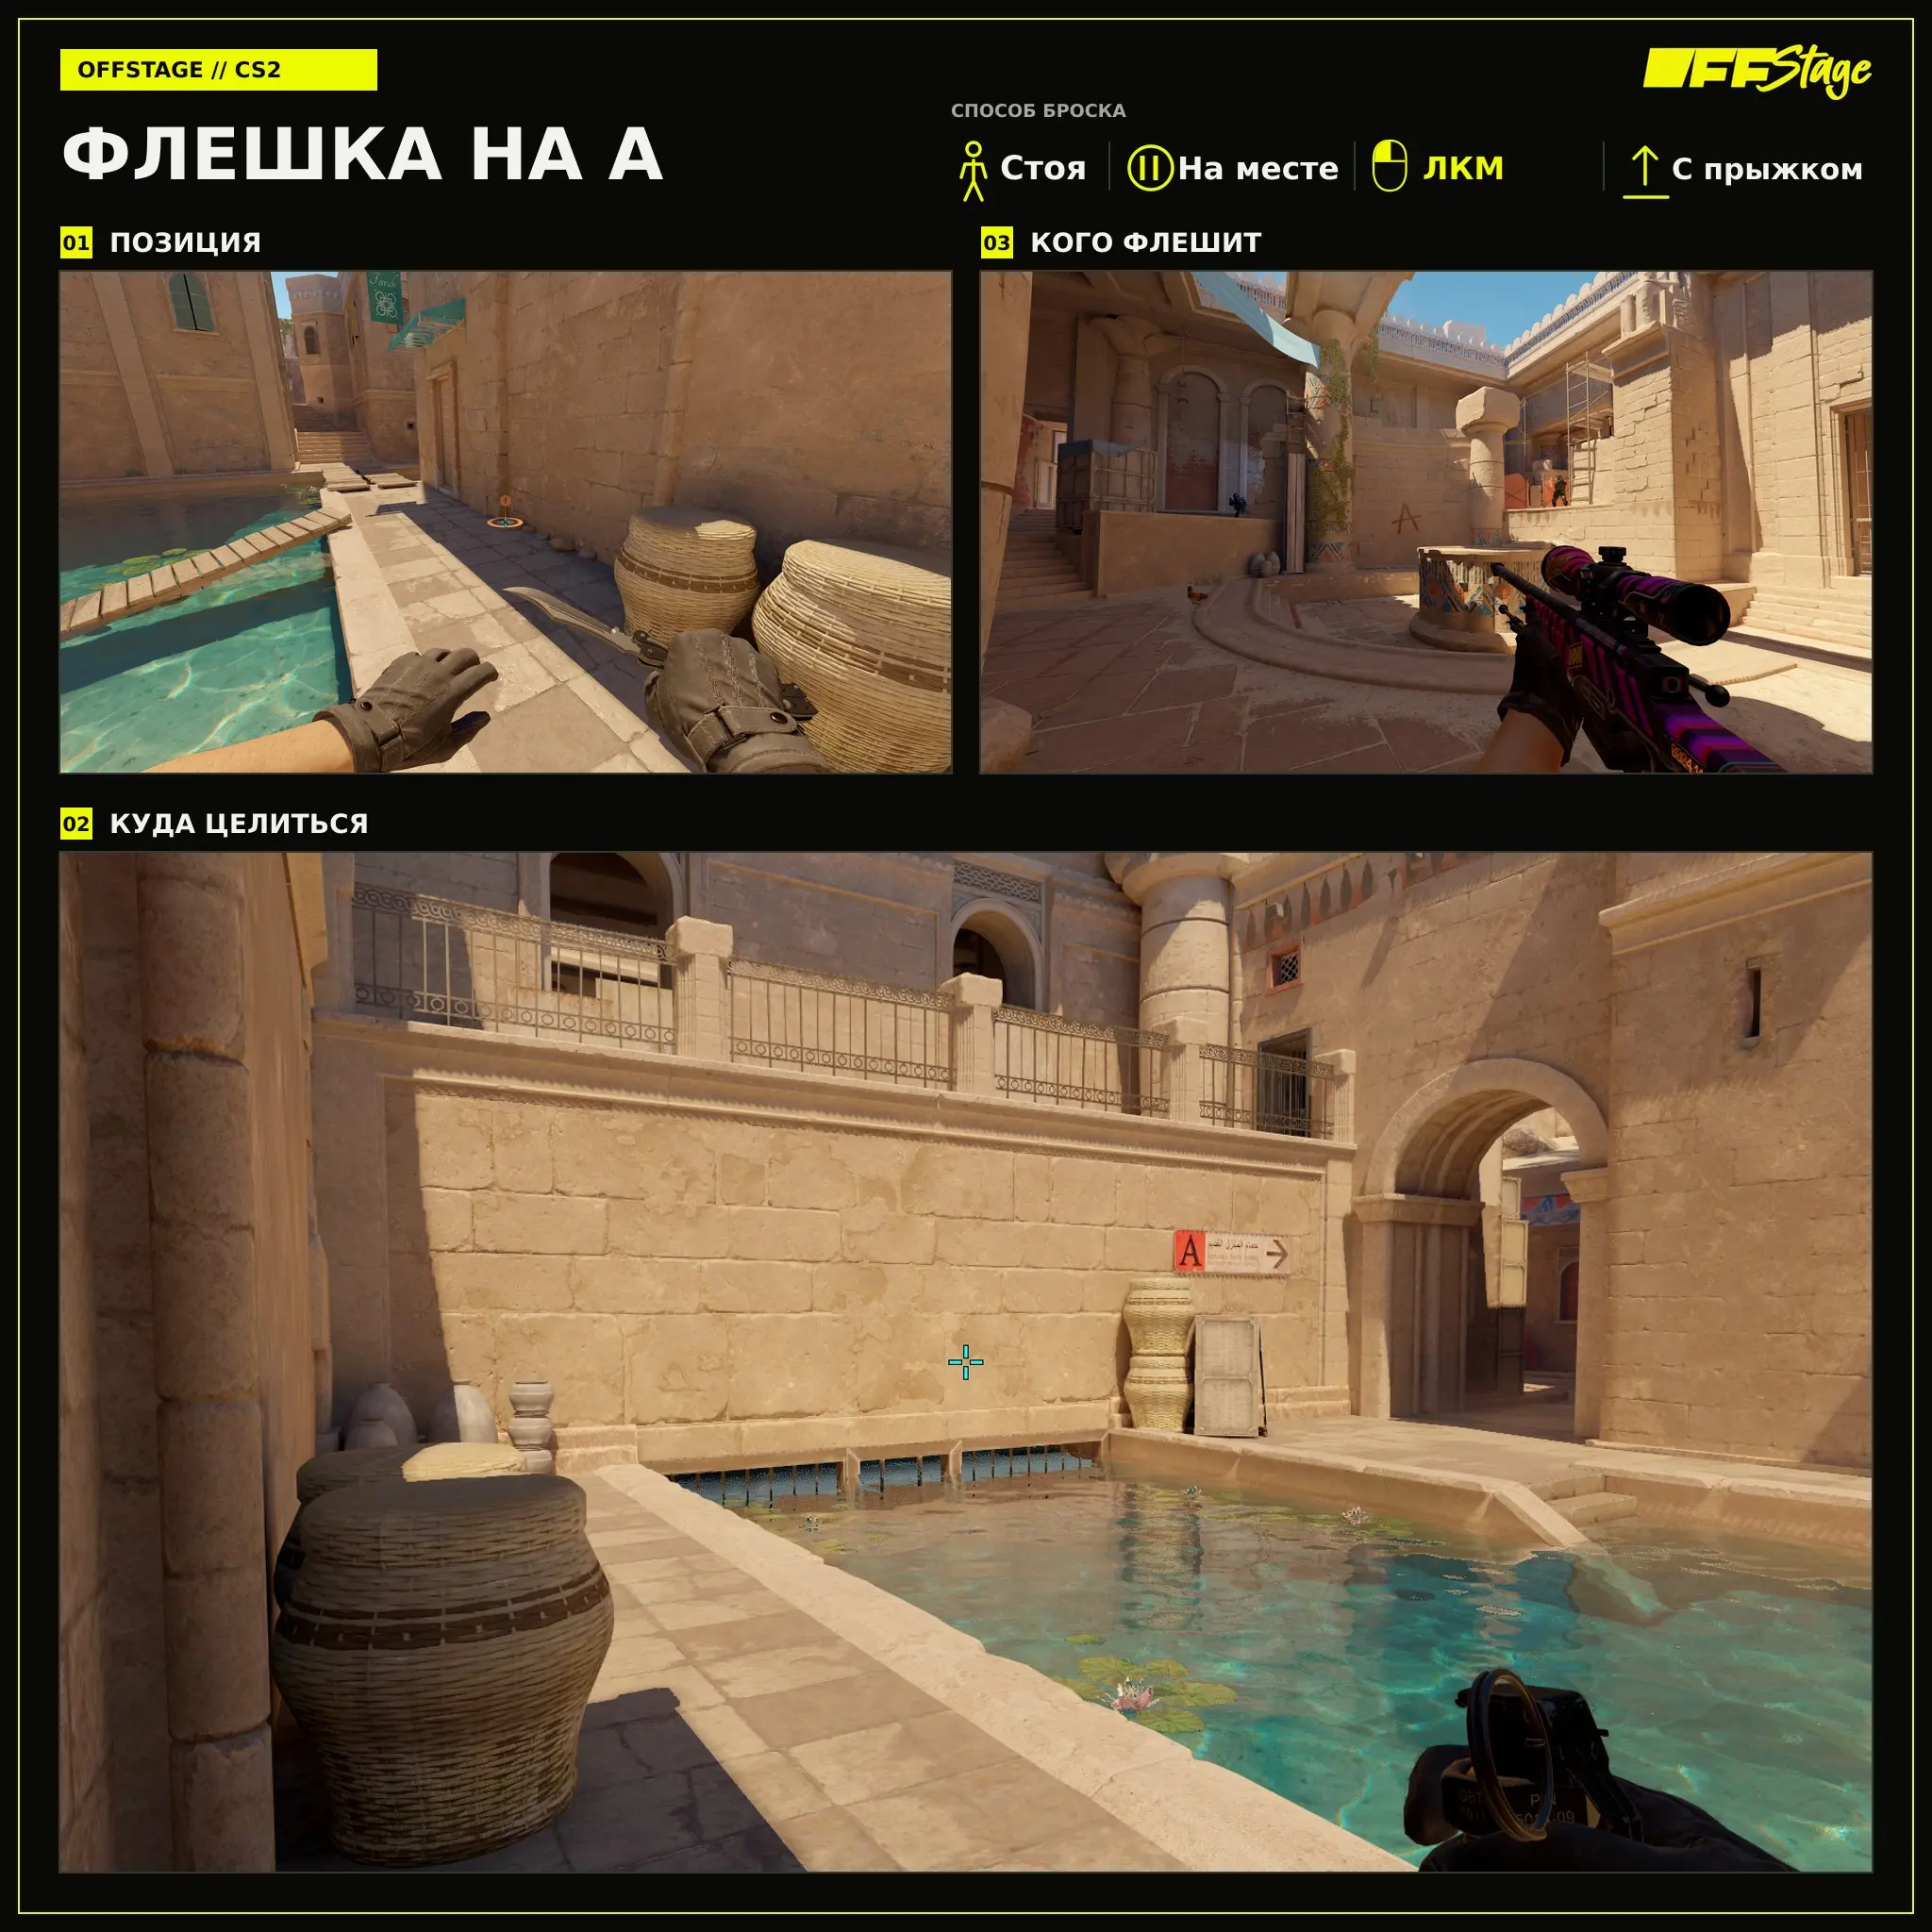
Flash to A
This flash to A opens up in front of the main defensive positions and helps initiate a push into the plant site. Stand as shown in the first frame, aim at the landmark, and perform a left-click + jump throw from a standing position.
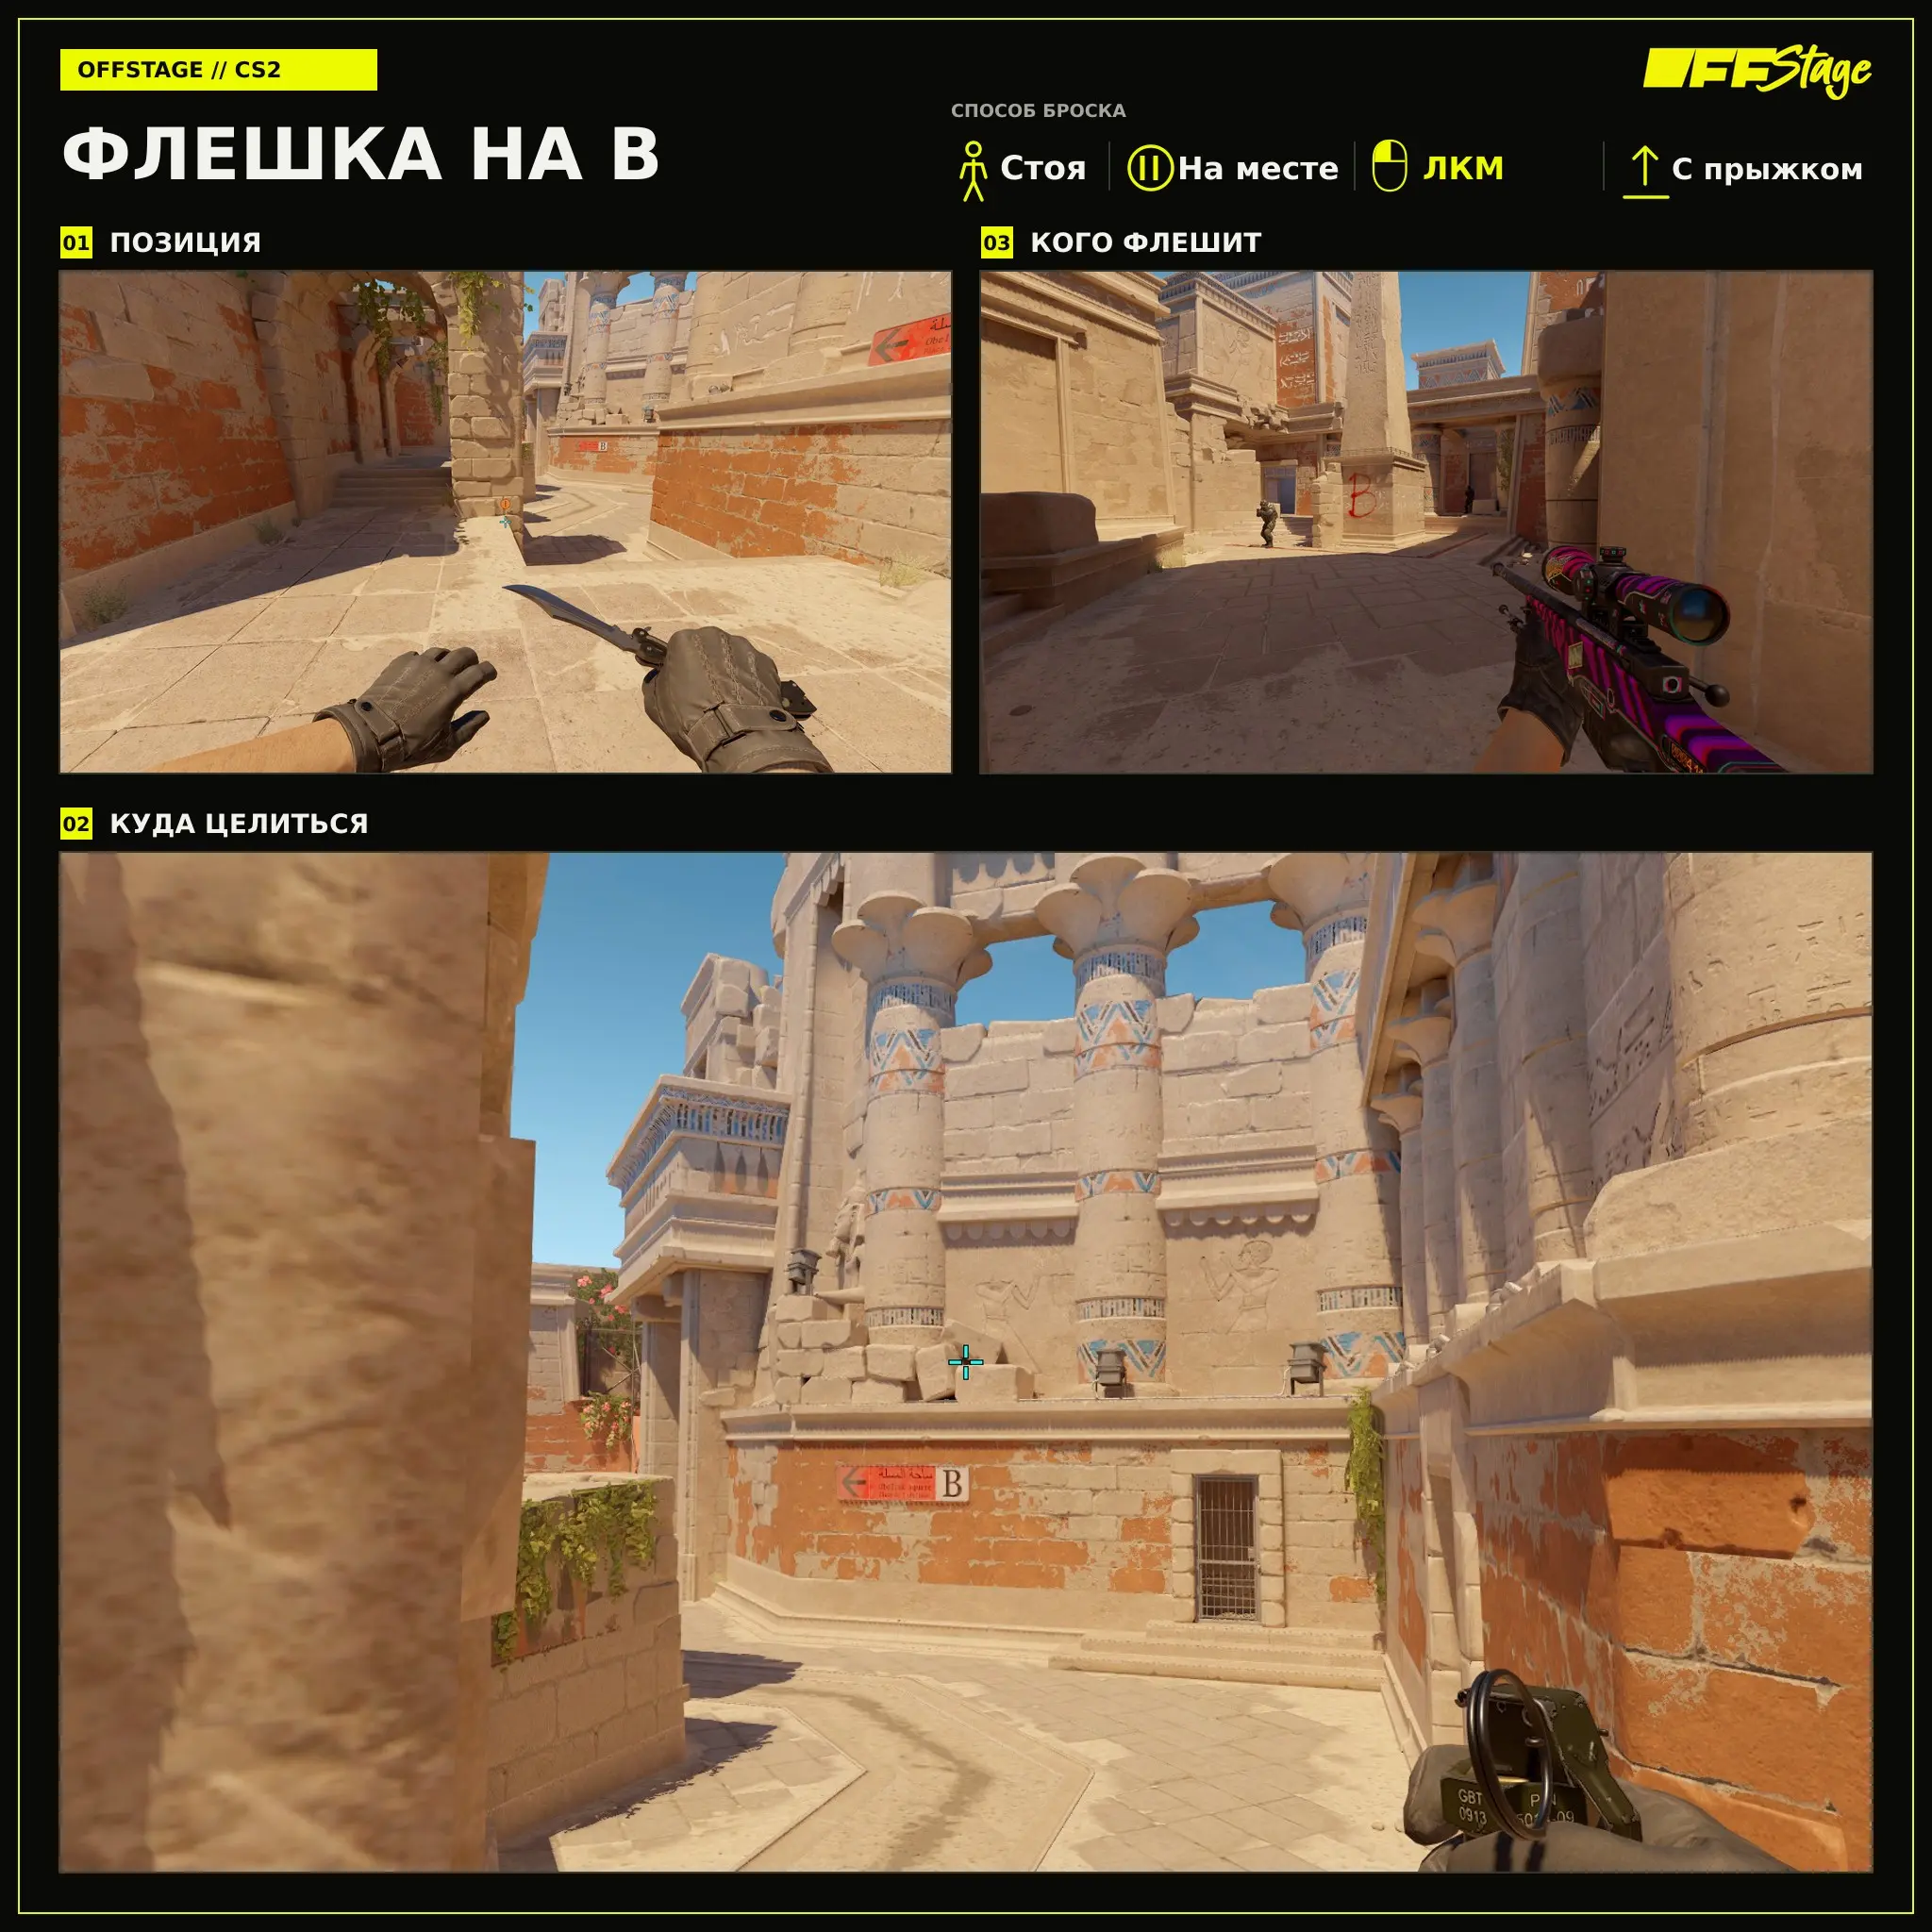
Flash to B
The B flash is suitable for the first push and gives your teammate time to check the near corners. Stand as shown in the first frame, aim at the landmark, and perform LMB + jump throw from a standing position.
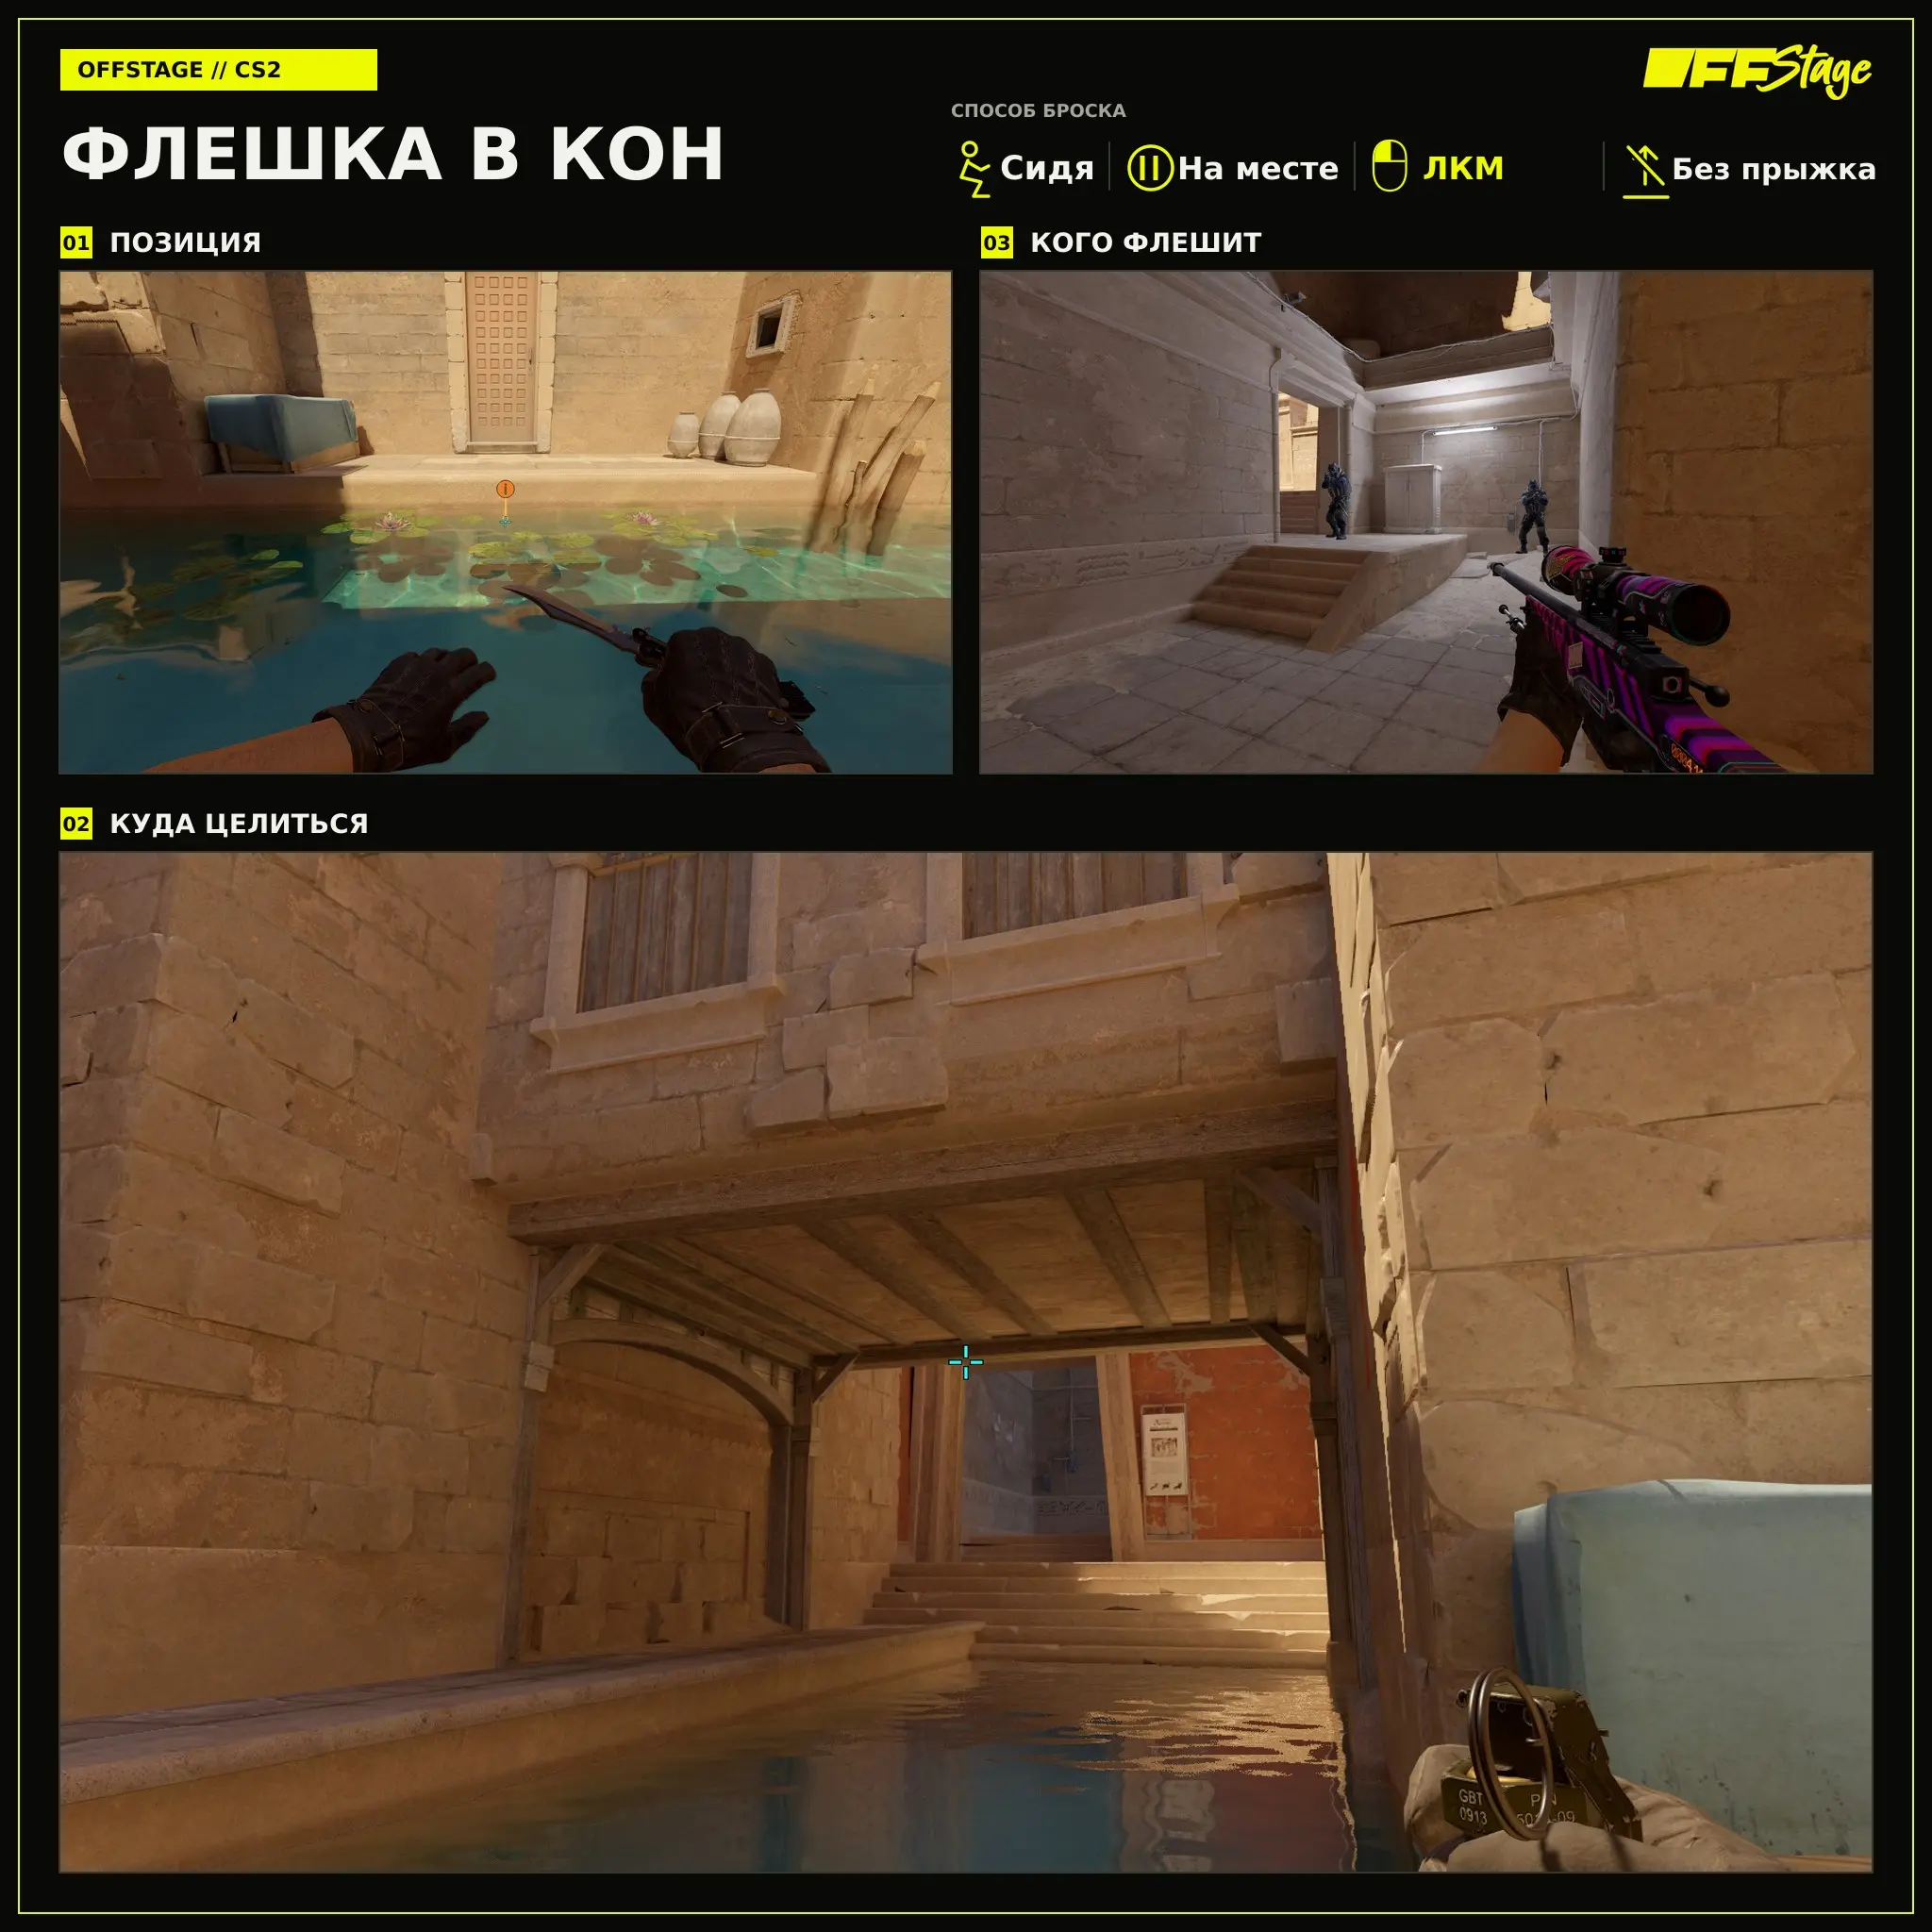
Flashbang to the Corner
The throw into the corner is performed from a crouching position so that the grenade follows the desired trajectory. Crouch, aim at the reference point, and throw the grenade with a left-click without jumping.
Defensive Throws
On defense, these grenades help the anchor counter an opponent emerging from the main lane, the river, or the mid lane without getting hit by the first shot.
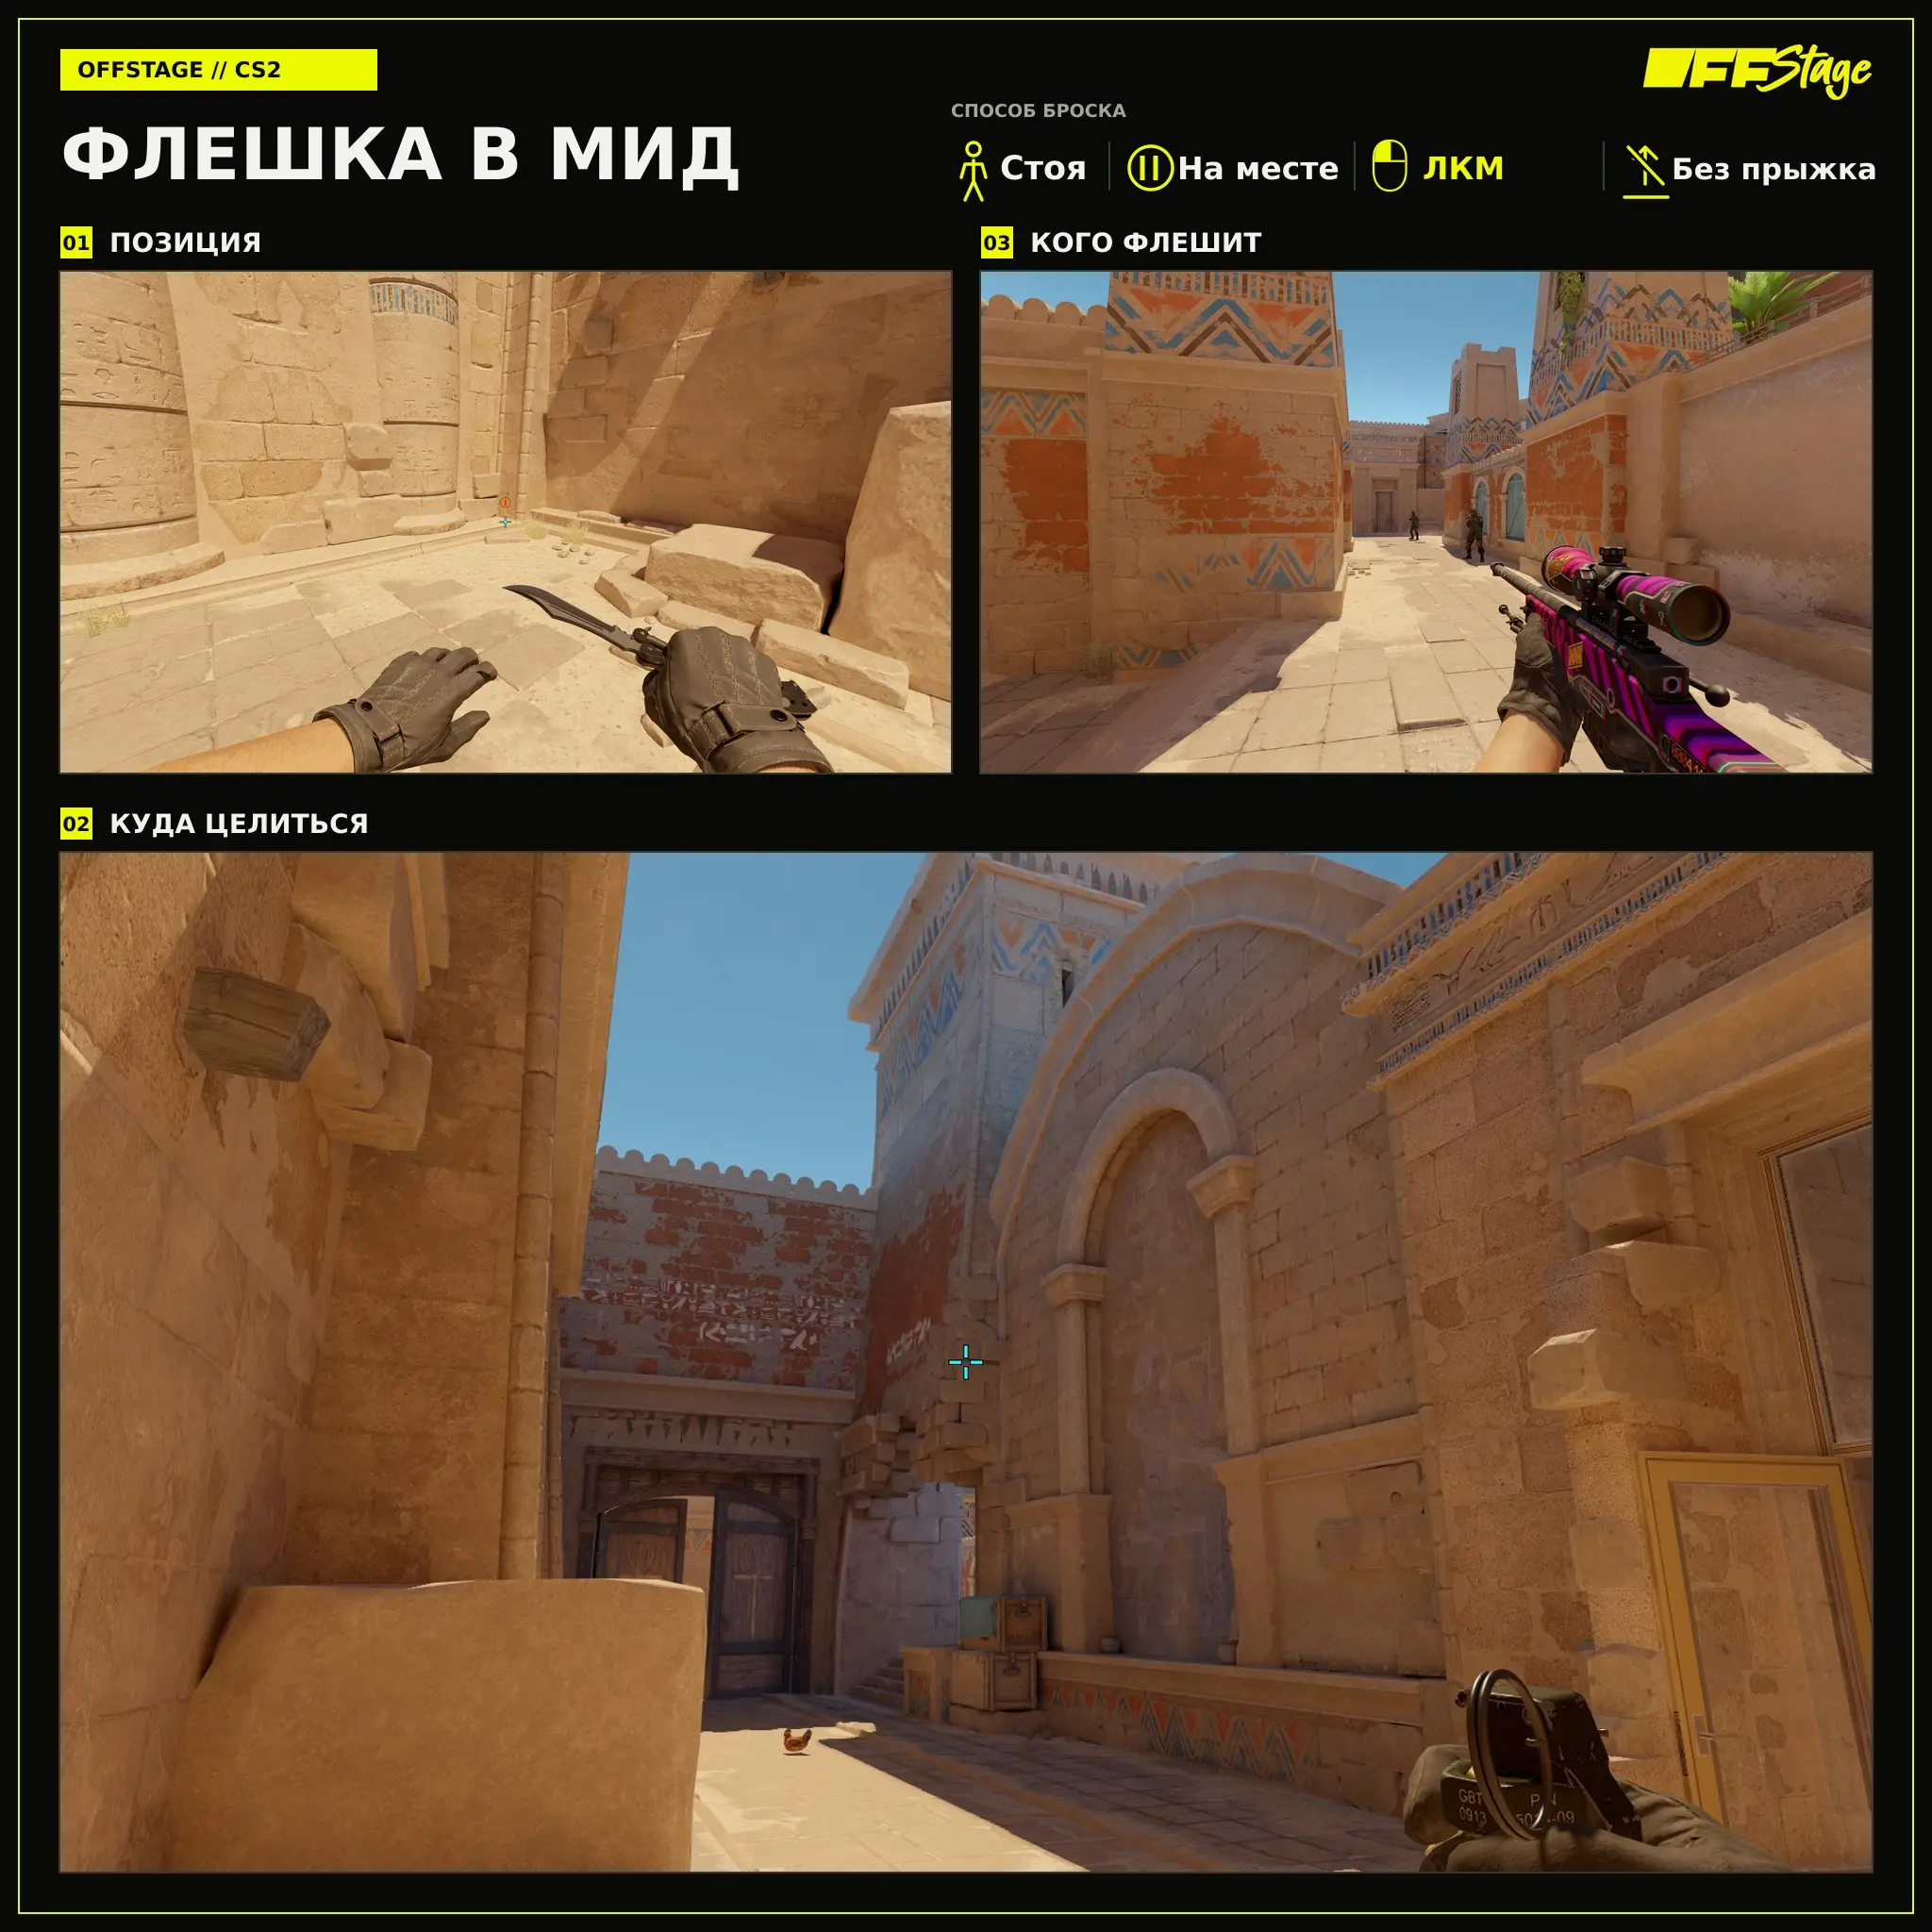
Flashbang into mid
Behind the KT, a Flashbang to mid helps the support take or regain control of the area. Stand as shown in the first frame, aim at the designated landmark, and throw the grenade with a left-click without jumping.
Flashbang in B-Main
A flashbang in B-main is designed for early engagement with attackers emerging from the main. Stand as shown in the first frame, aim at the landmark, and perform a left-click + jump throw from a standing position.
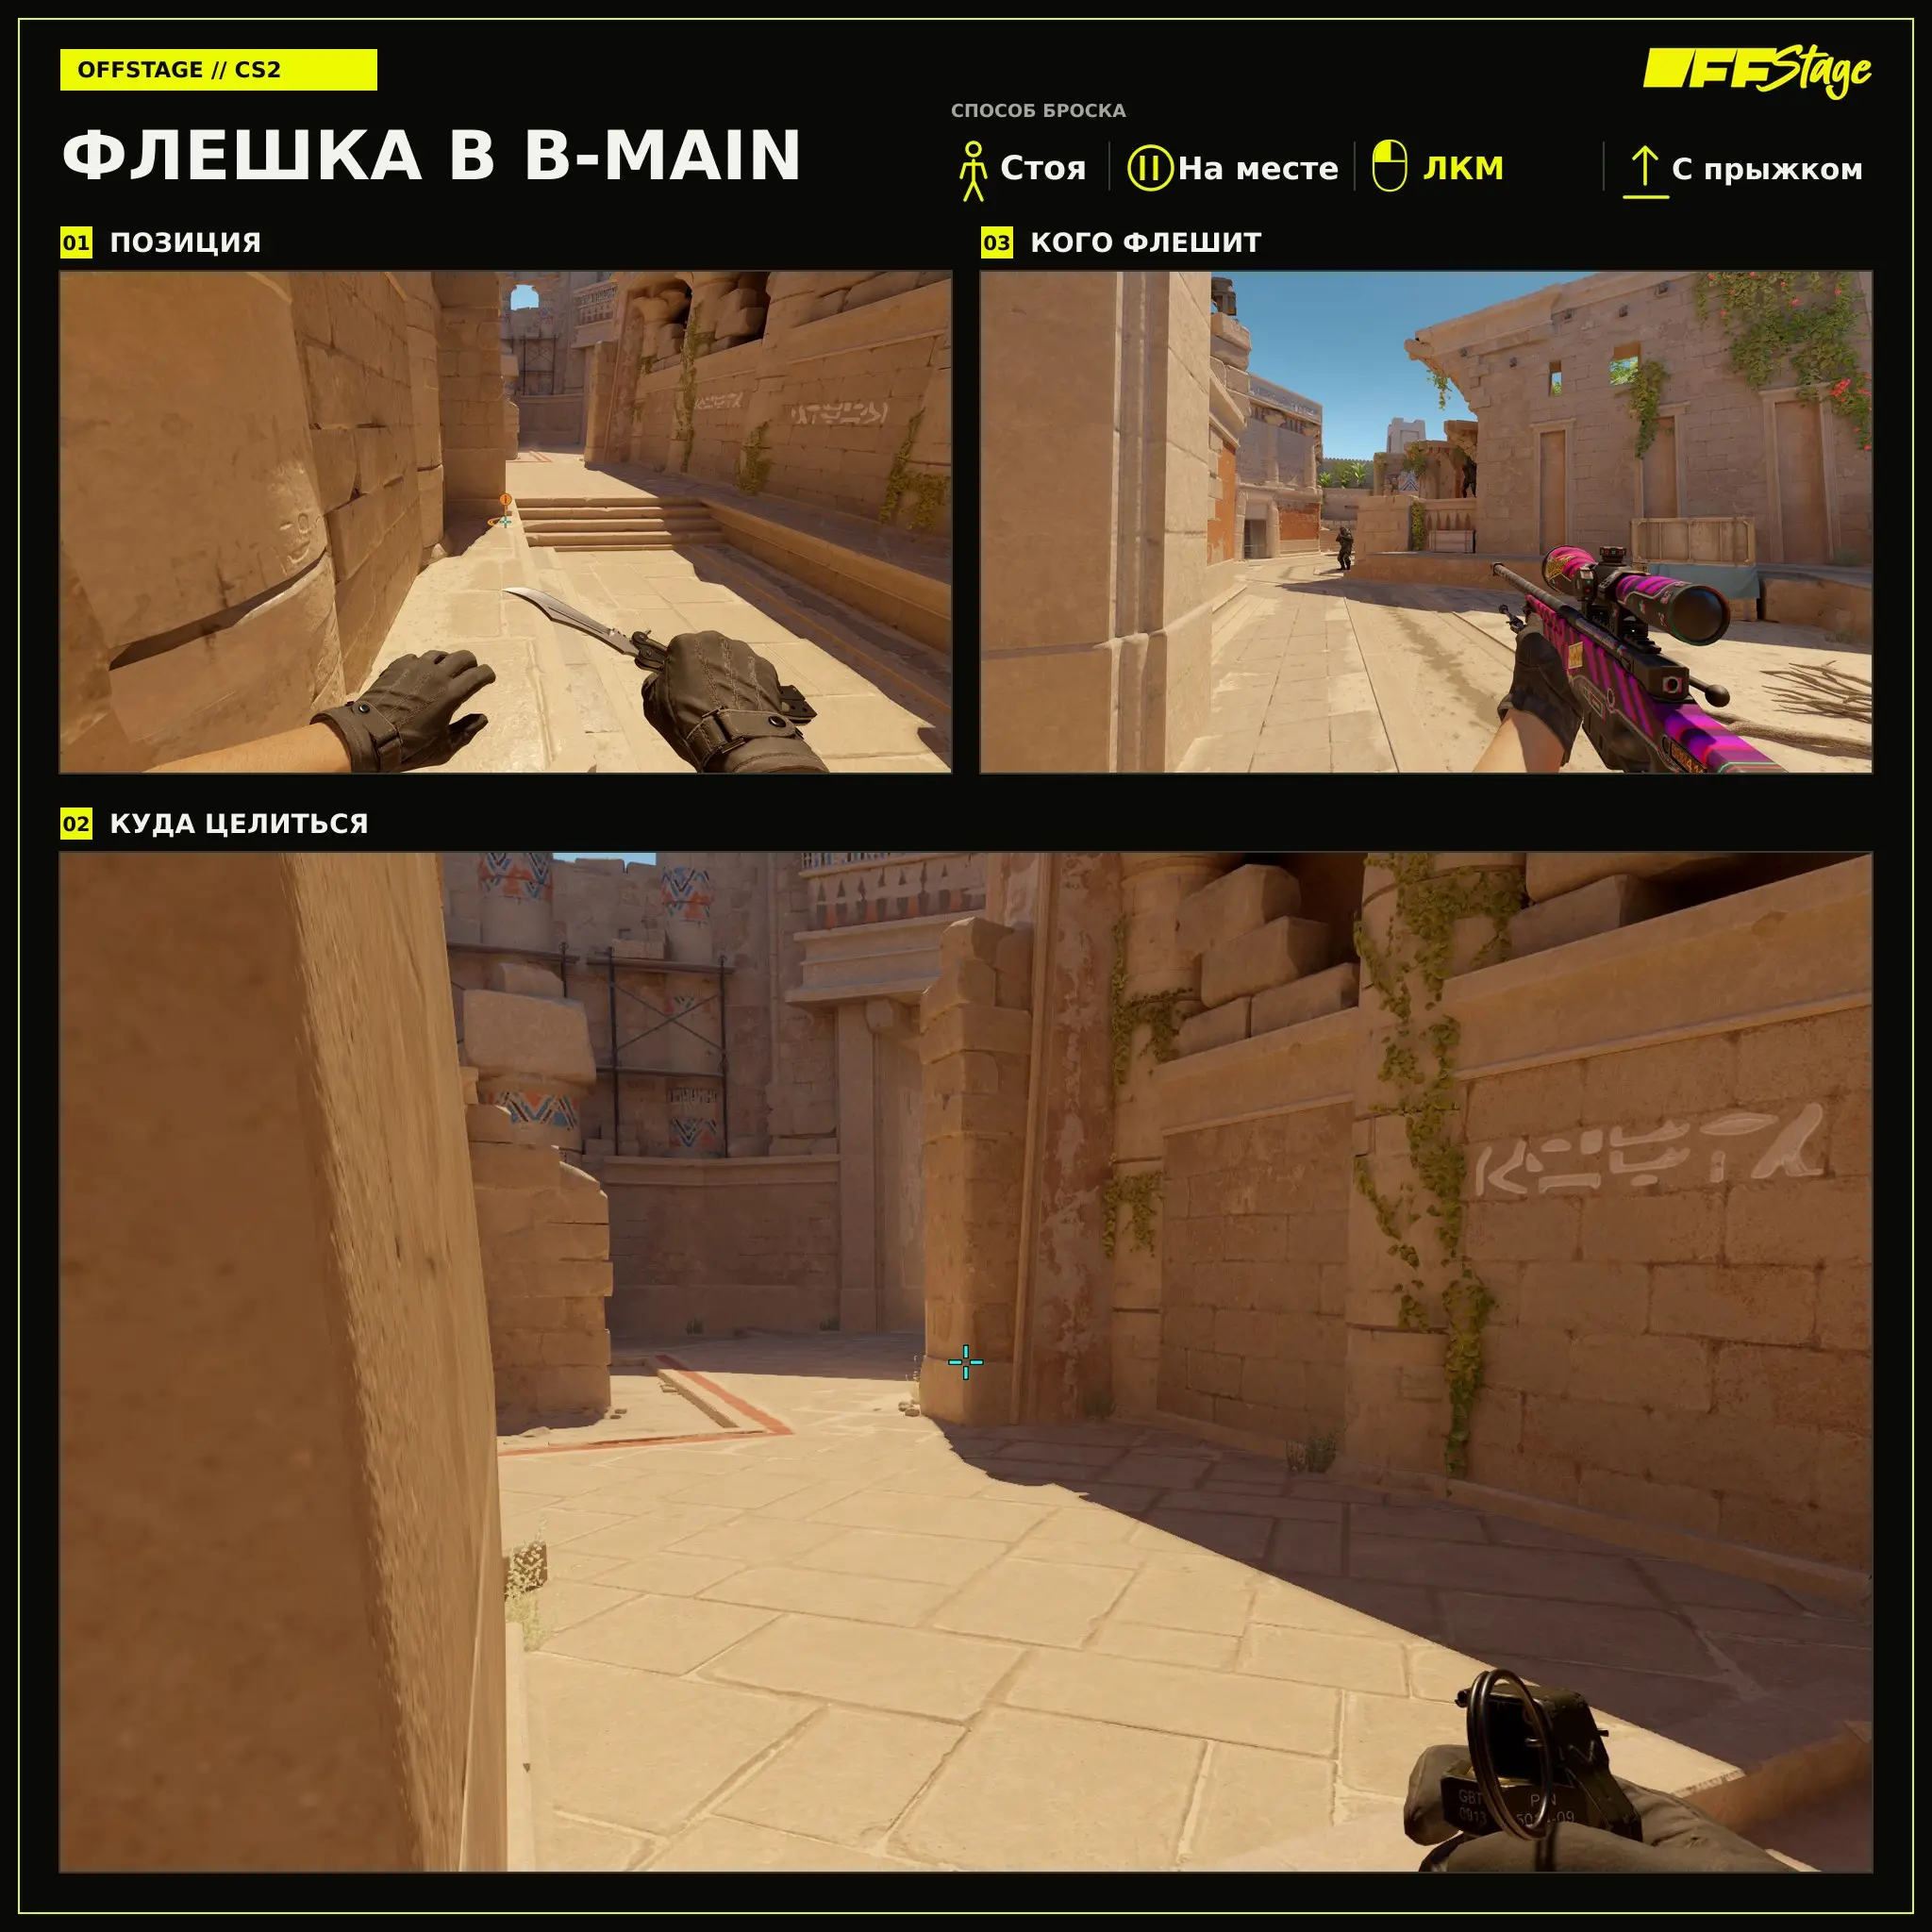
Flashbang into the water
The water throw is useful when requested by a teammate before a second push. Sit down, aim at the landmark, and throw the grenade with LMB without jumping.
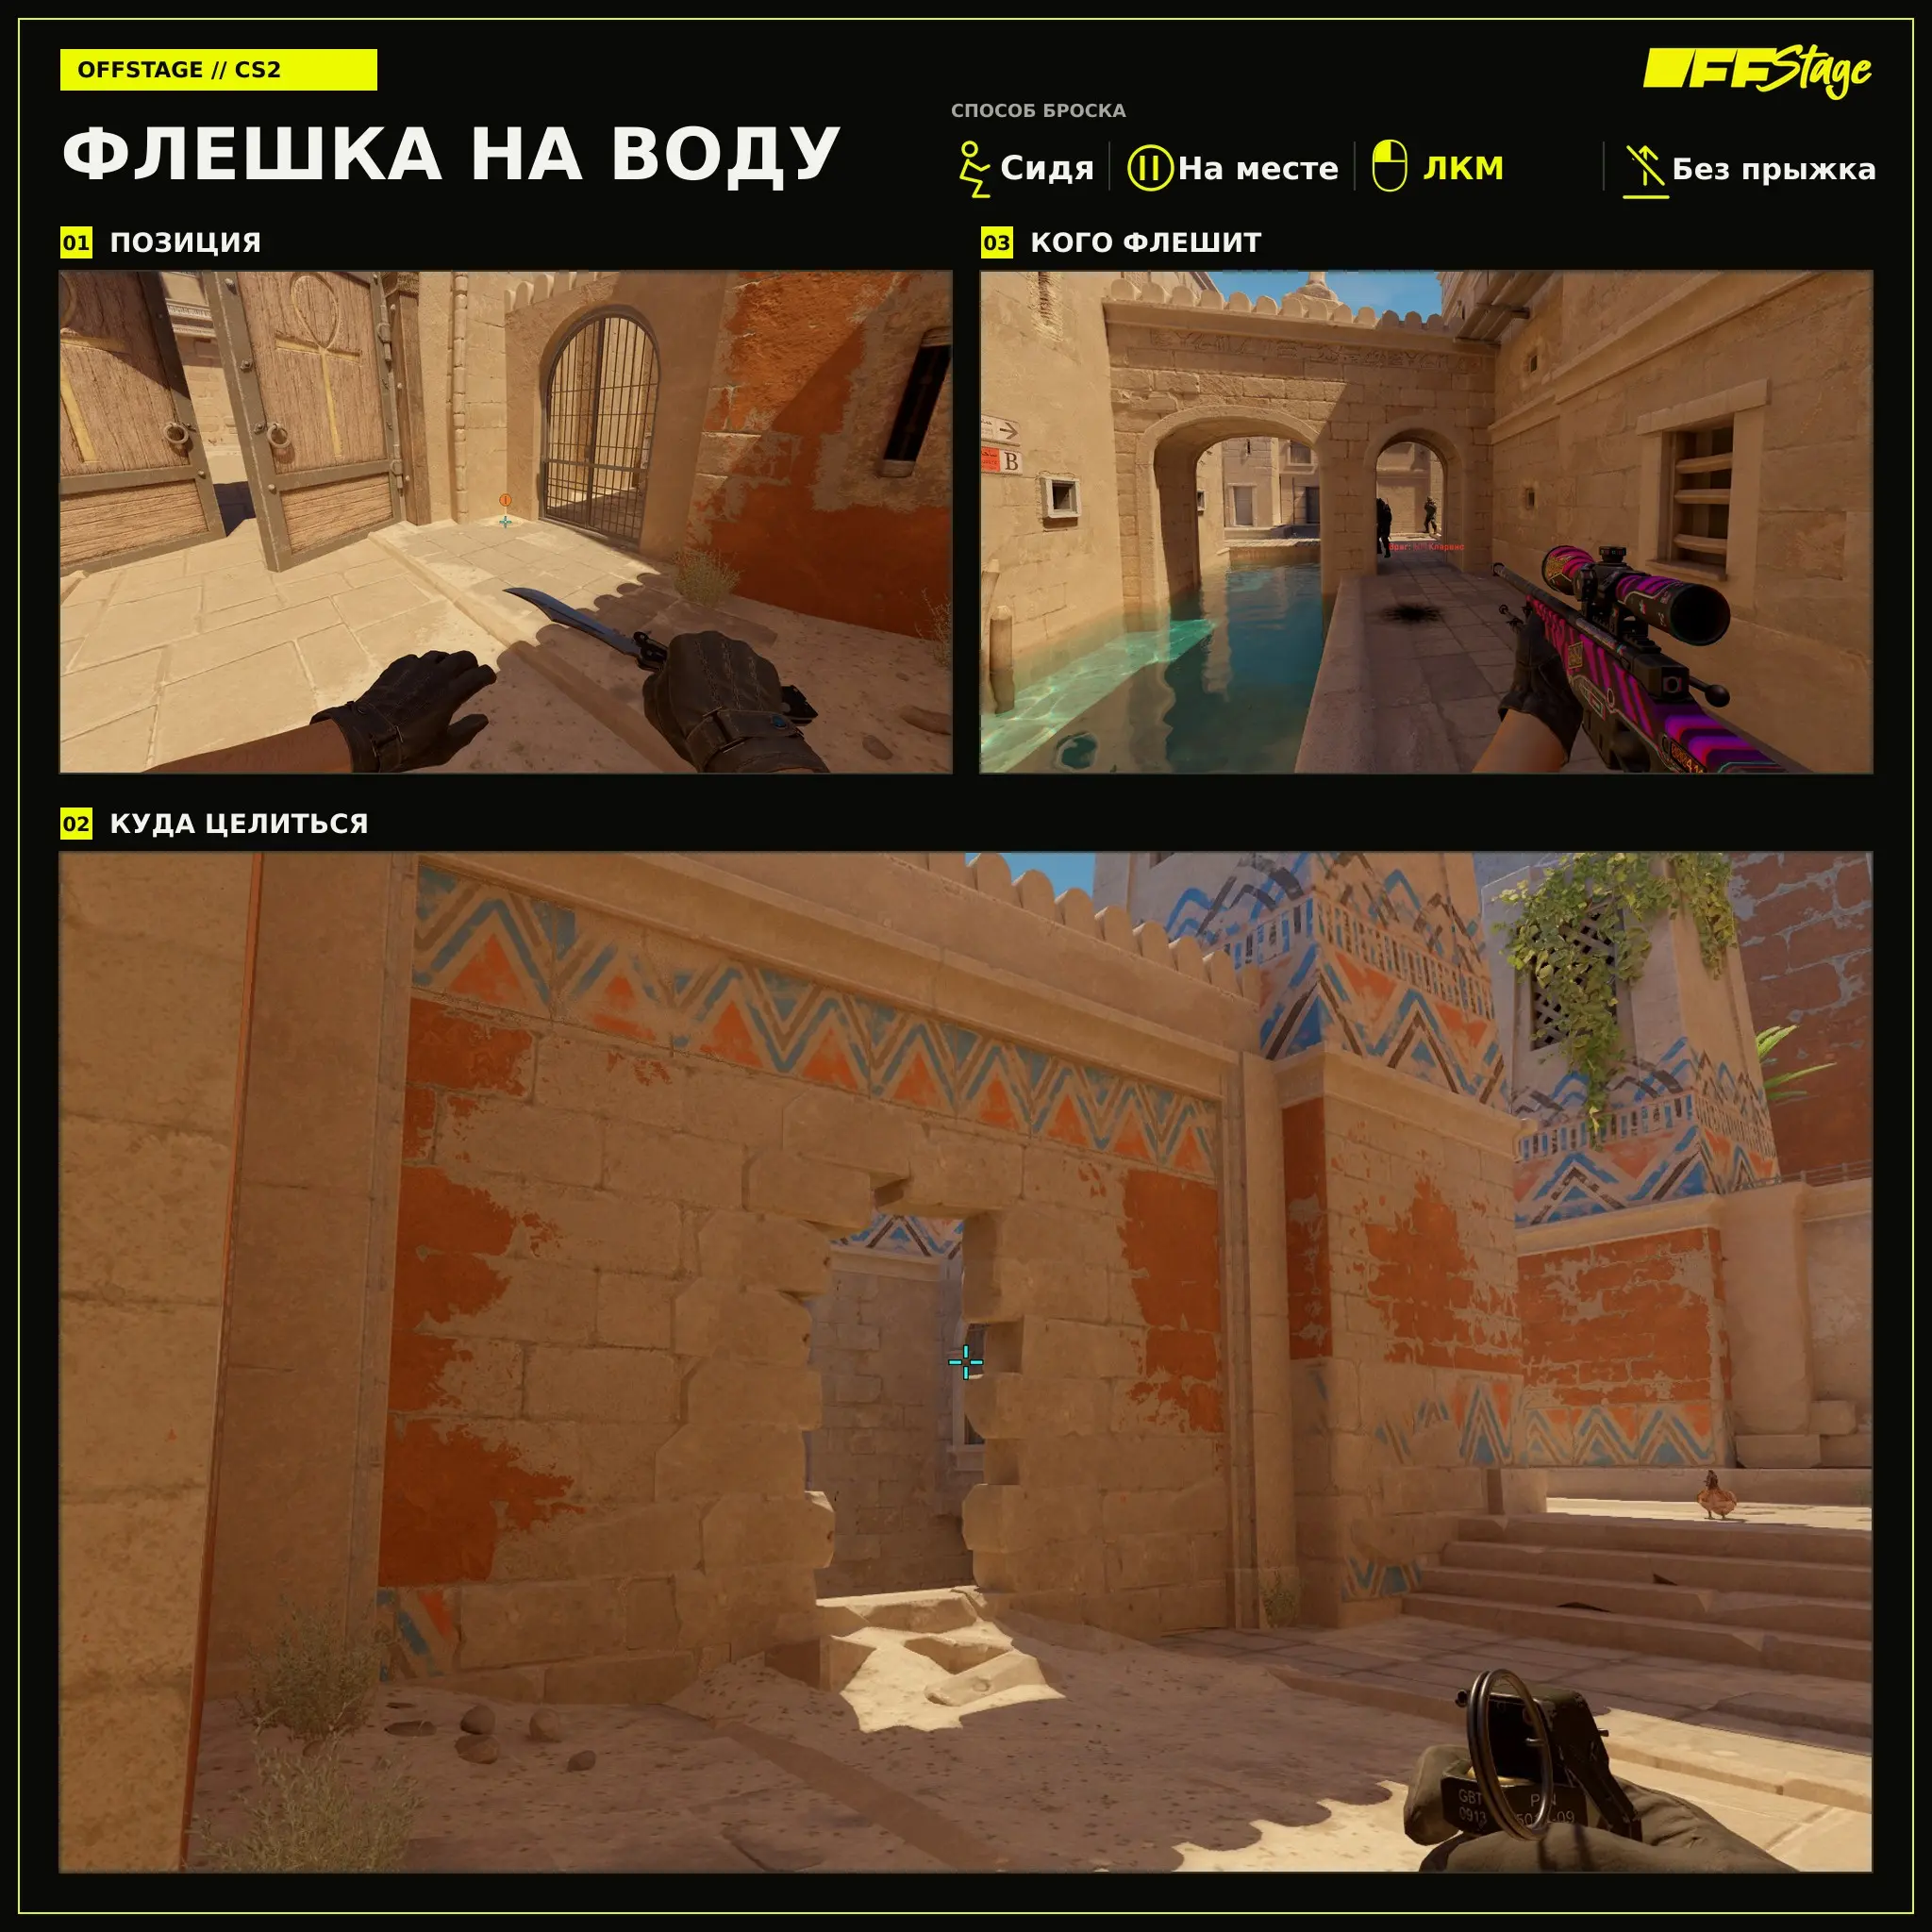
What to Learn First
To start, it’s enough to learn the mid-lane flash and one grenade for each plant. As a CT, choose the option that suits your position: B-main, water, or mid-lane.
Practice the throw in sync with your teammate’s exit. If your teammate starts moving before the grenade explodes, even a perfectly placed throw won’t give you the advantage you need.
Frequently Asked Questions (FAQ)
В обычной игре чаще всего пригодятся варианты на мид, в кон и B-main. Остальные стоит учить под свою позицию и план раунда.
Бросайте её перед выходом партнёра в мид. Граната должна взорваться до того, как он покажется сопернику.
Она помогает проверить кон и пройти узкий выход, не отдавая сопернику удобную первую дуэль.
Да. Повторите положение, прицел и момент броска, показанные на схеме.