Flashbang placements on the Inferno map in CS2

On Inferno, flashbangs are needed in almost every push: on the Banana, in the Long, in the Ups, and during a retake. This guide compiles attack and defense options for the most common situations. Each diagram shows the position, a zoomed-in landmark, and the player under the flashbang. This helps you immediately understand which route the flashbang is best suited for and when to throw it. Flashbang placement on Inferno works best when combined with voice commands. Warn your teammate about the throw and call out the explosion time so they don’t turn away too early.
Flashbangs for the Attack
On the attack, flashbangs help clear the Banana and begin the push to A or B. Most of these throws are made from a standing position, so they’re easy to incorporate into a regular round.
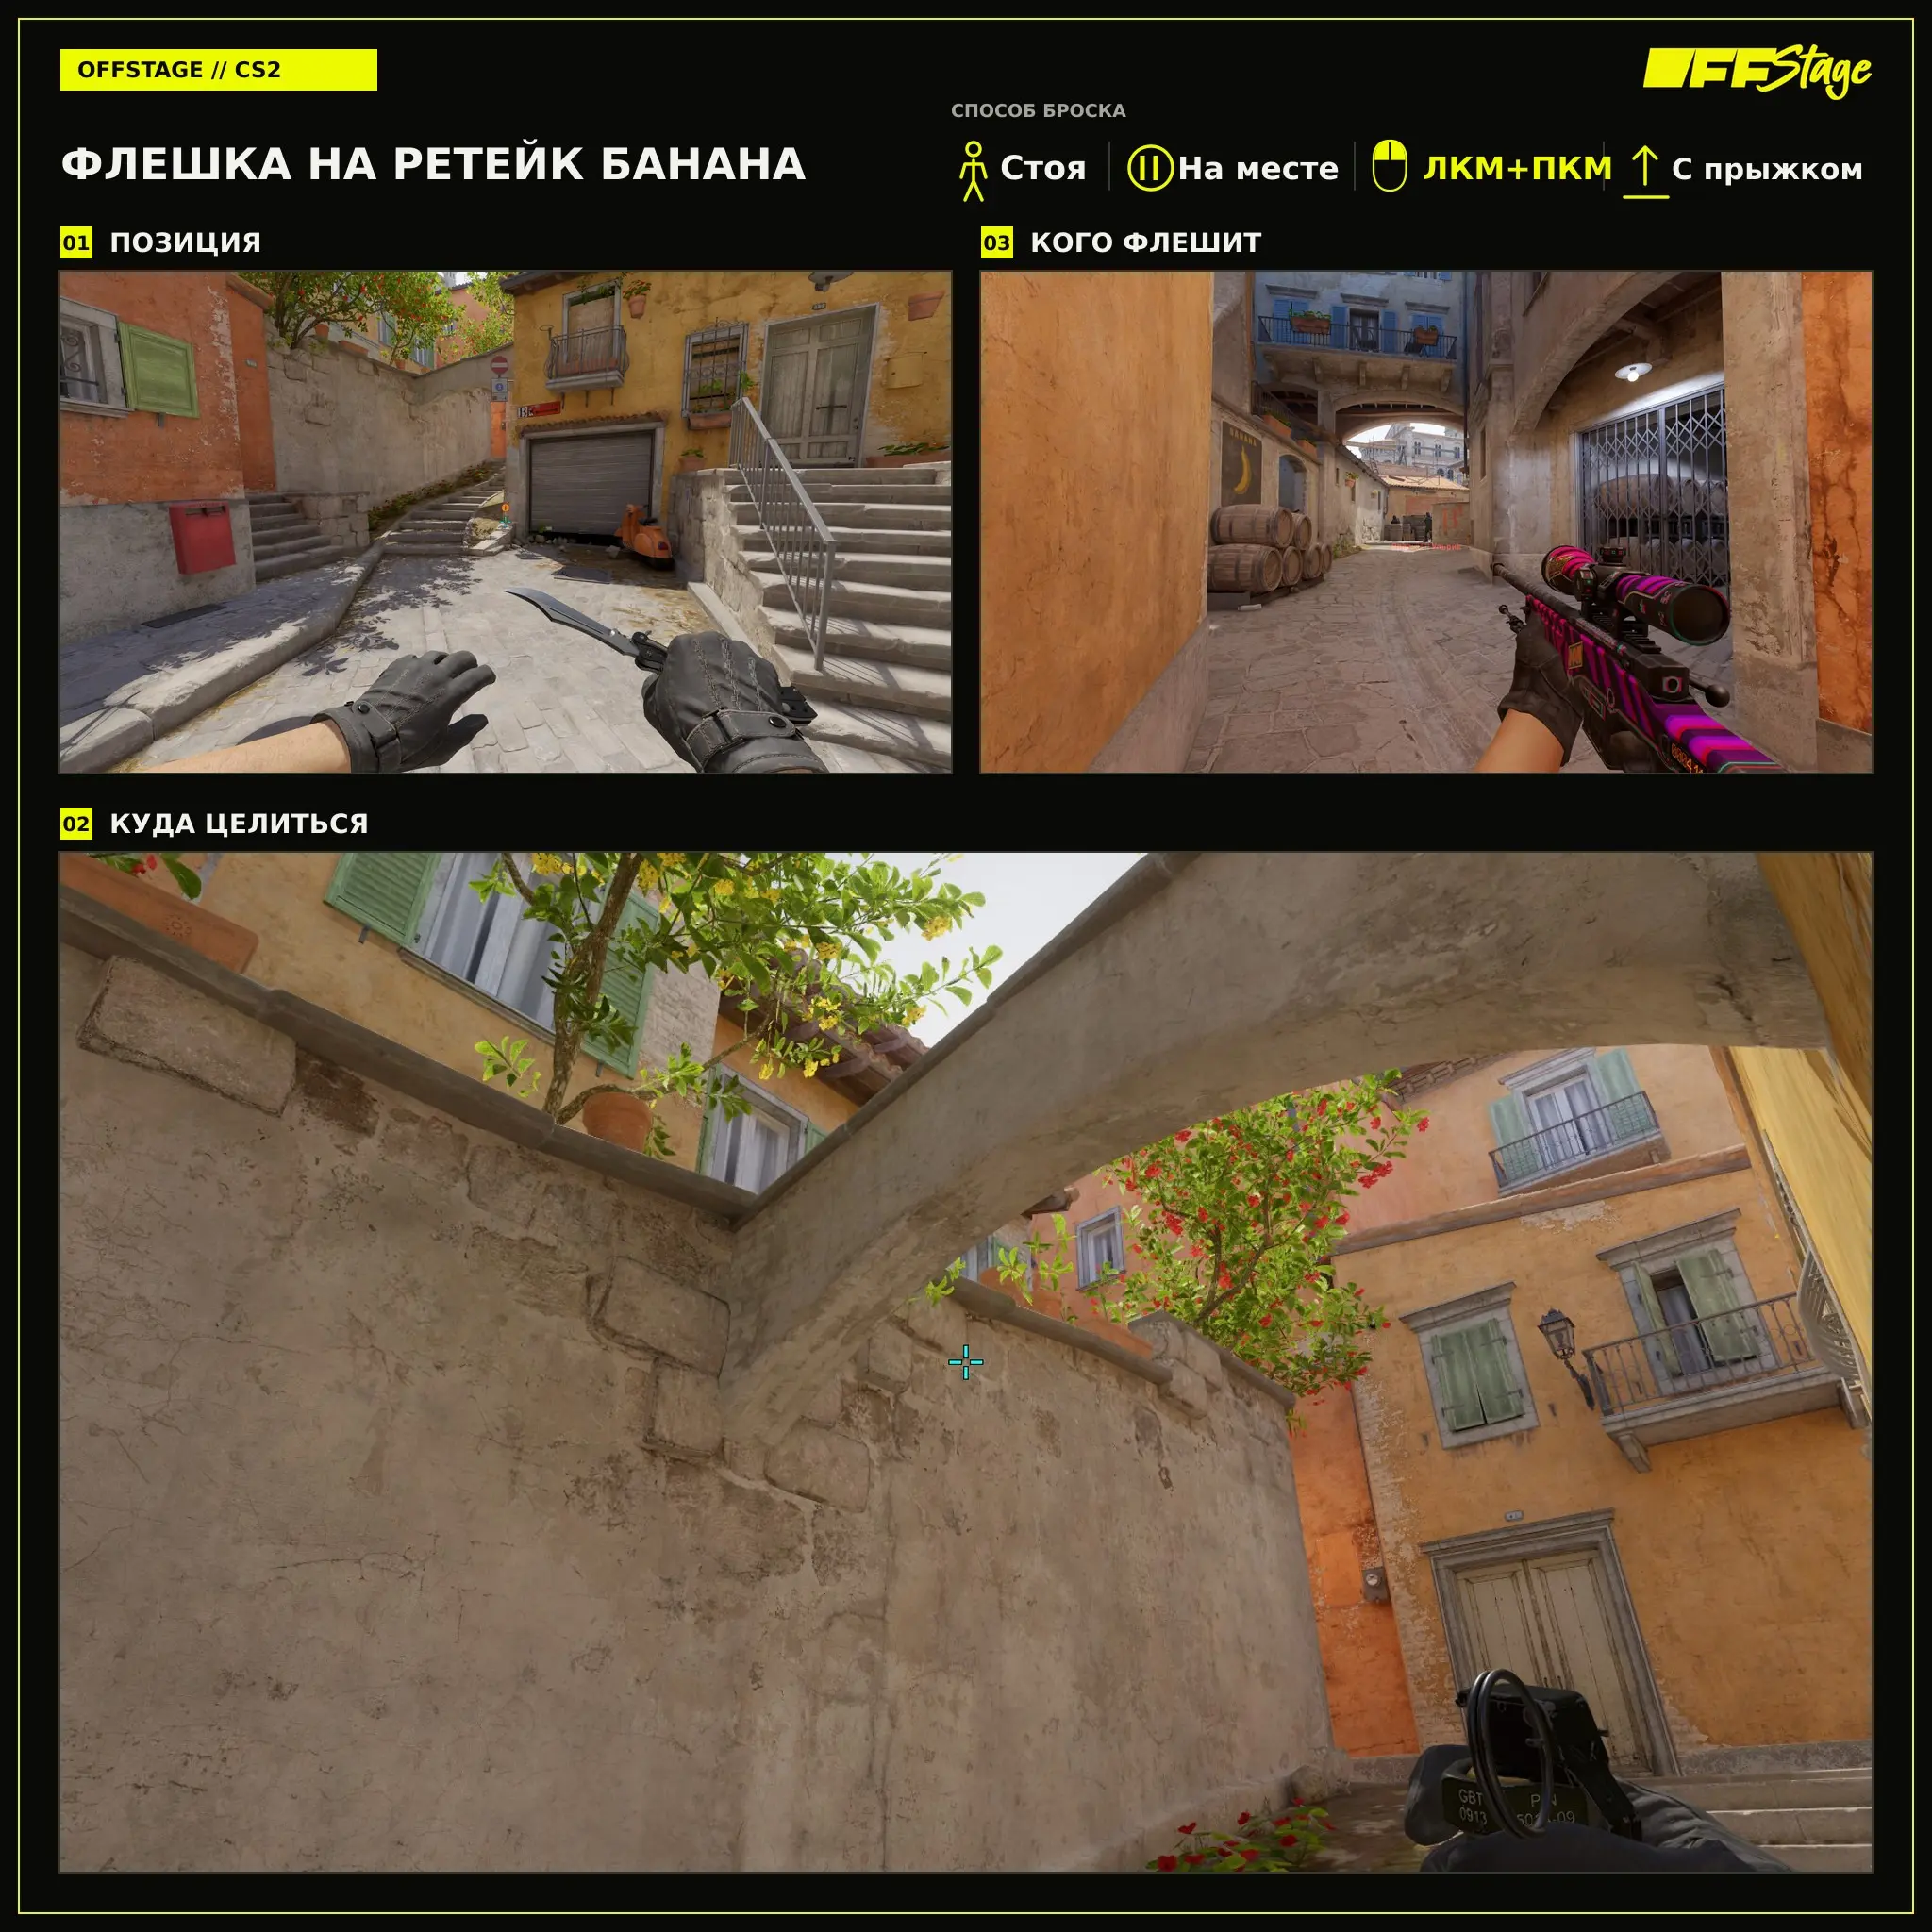
Flashbang for retaking the Banana
On the attack, the banana retake throw comes in handy after losing control of the area. From a standing position, hold down the left and right mouse buttons, then perform a jump throw.
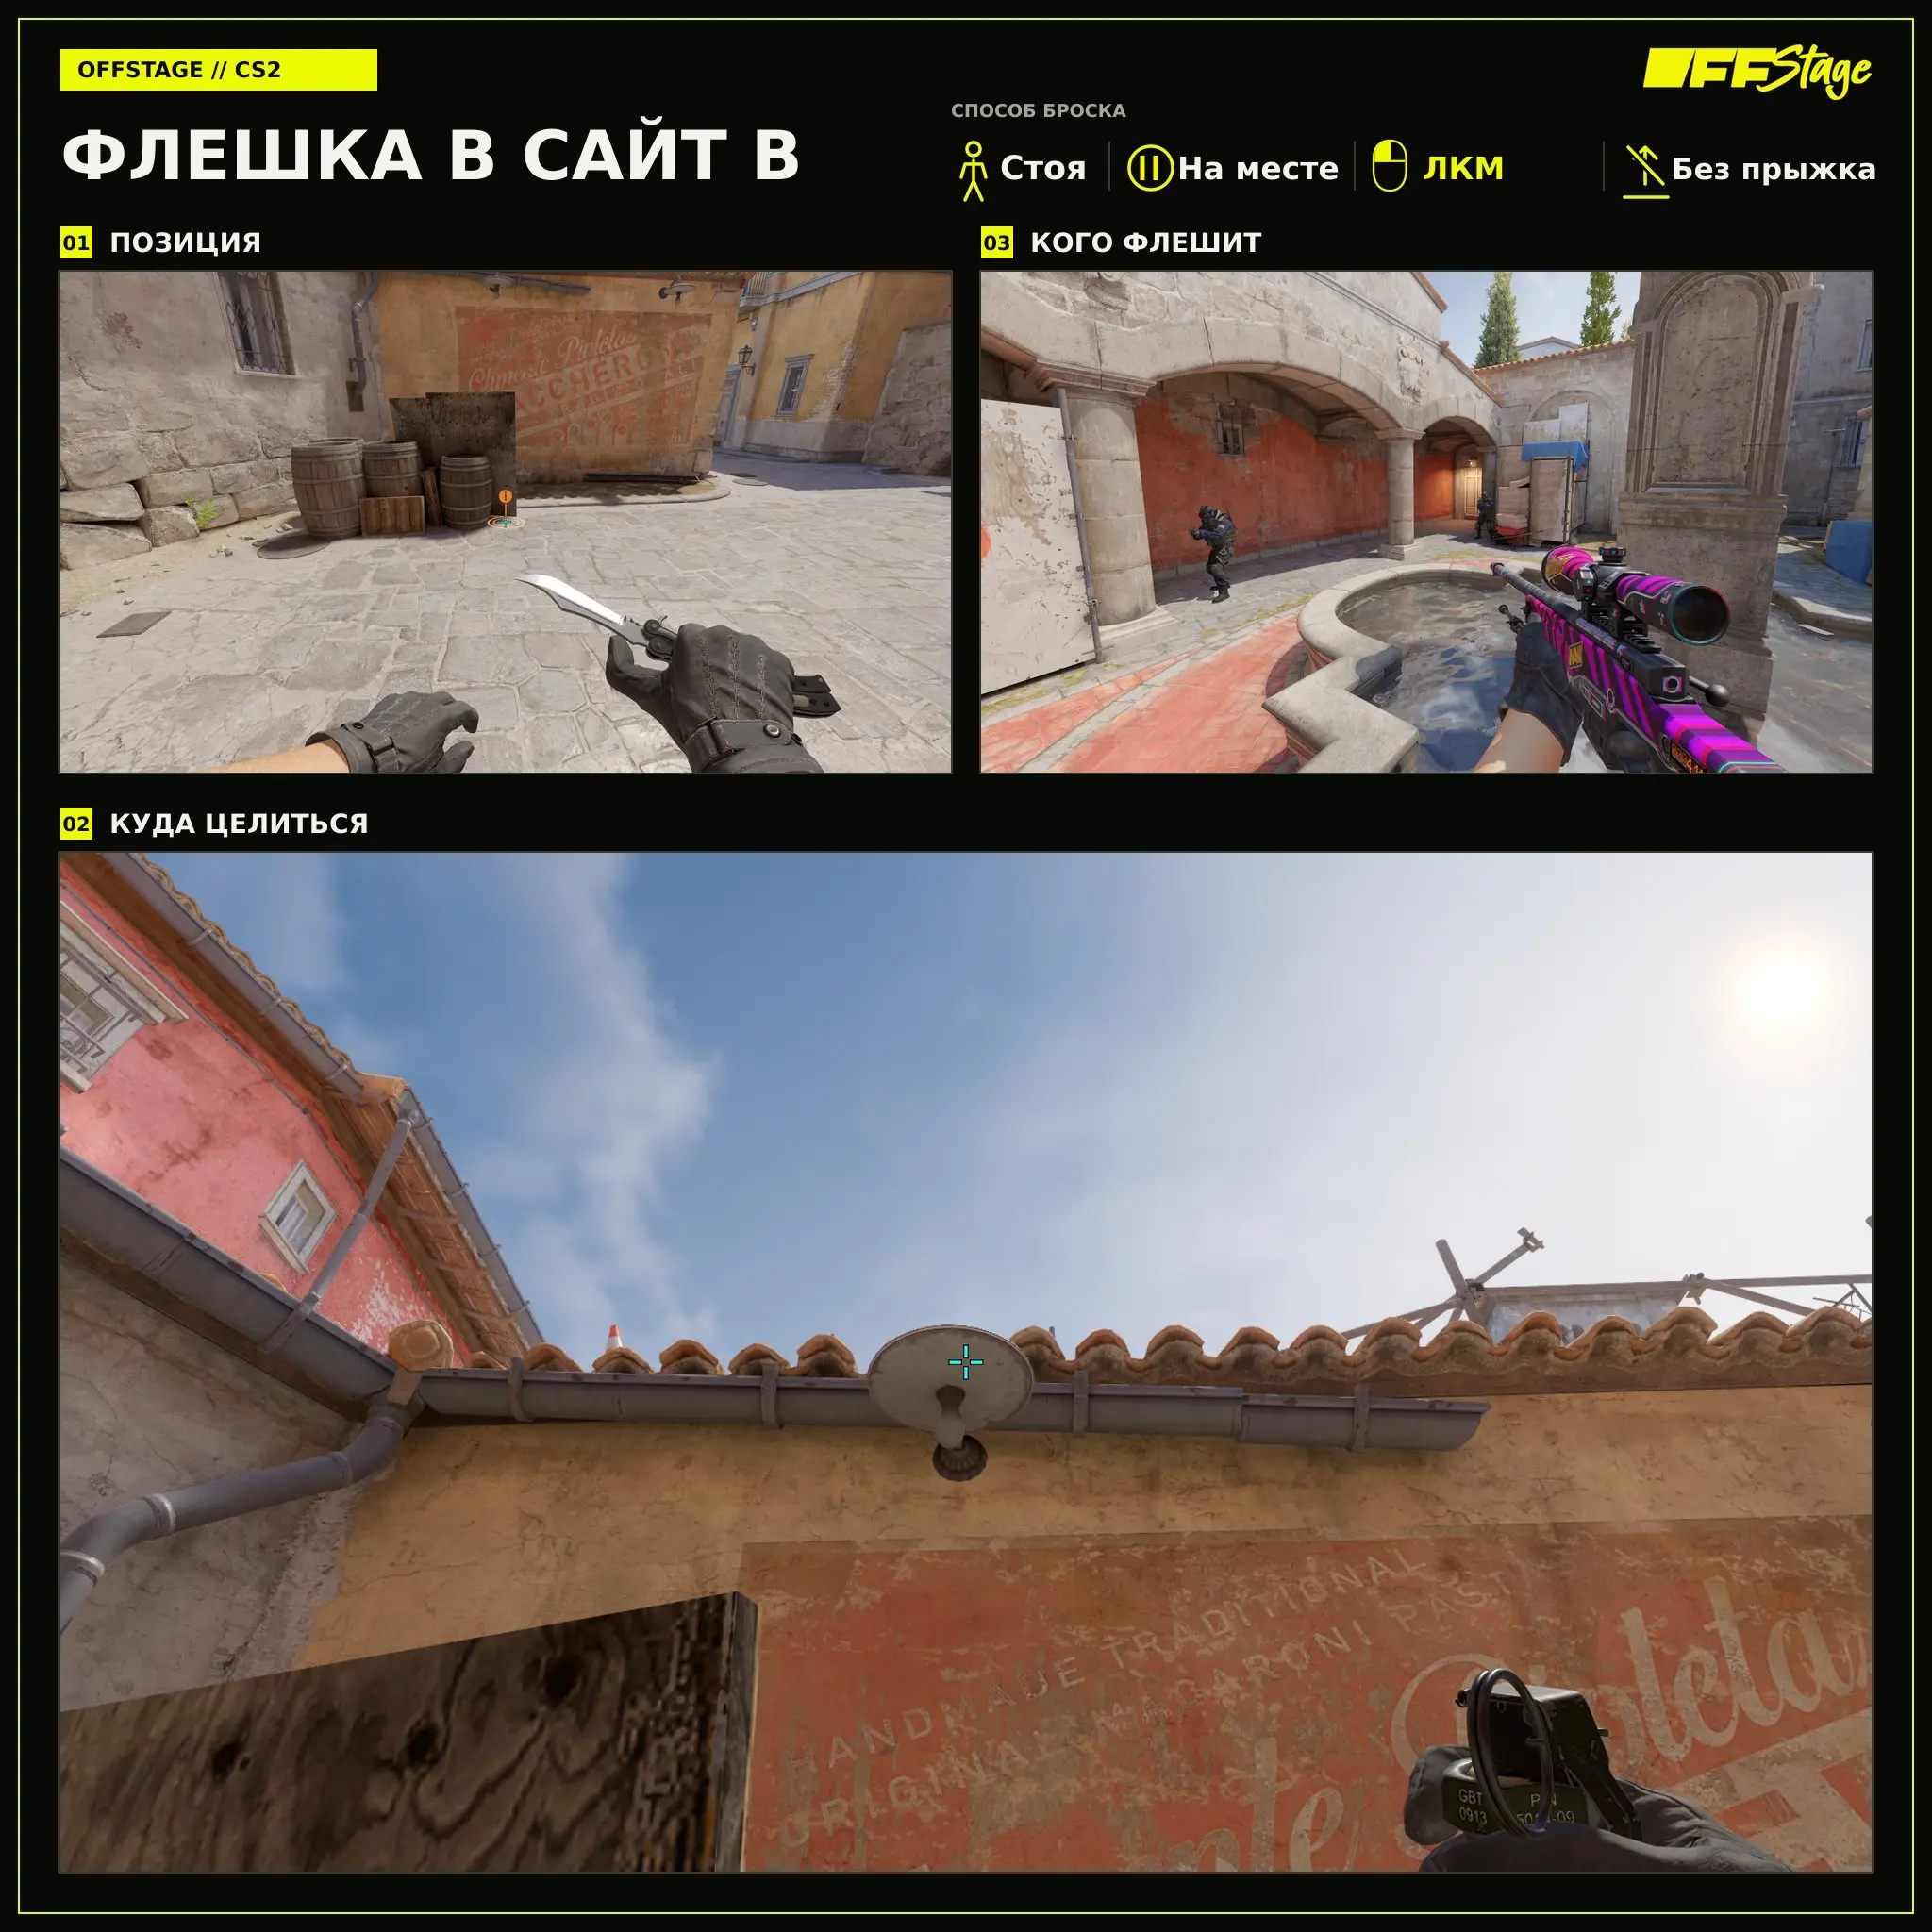
Flash to Site B
A flashbang to Site B helps the first player exit the banana and check positions on the bridge. Stand as shown in the first frame, aim at the indicated landmark, and throw the flashbang with the left mouse button without jumping.
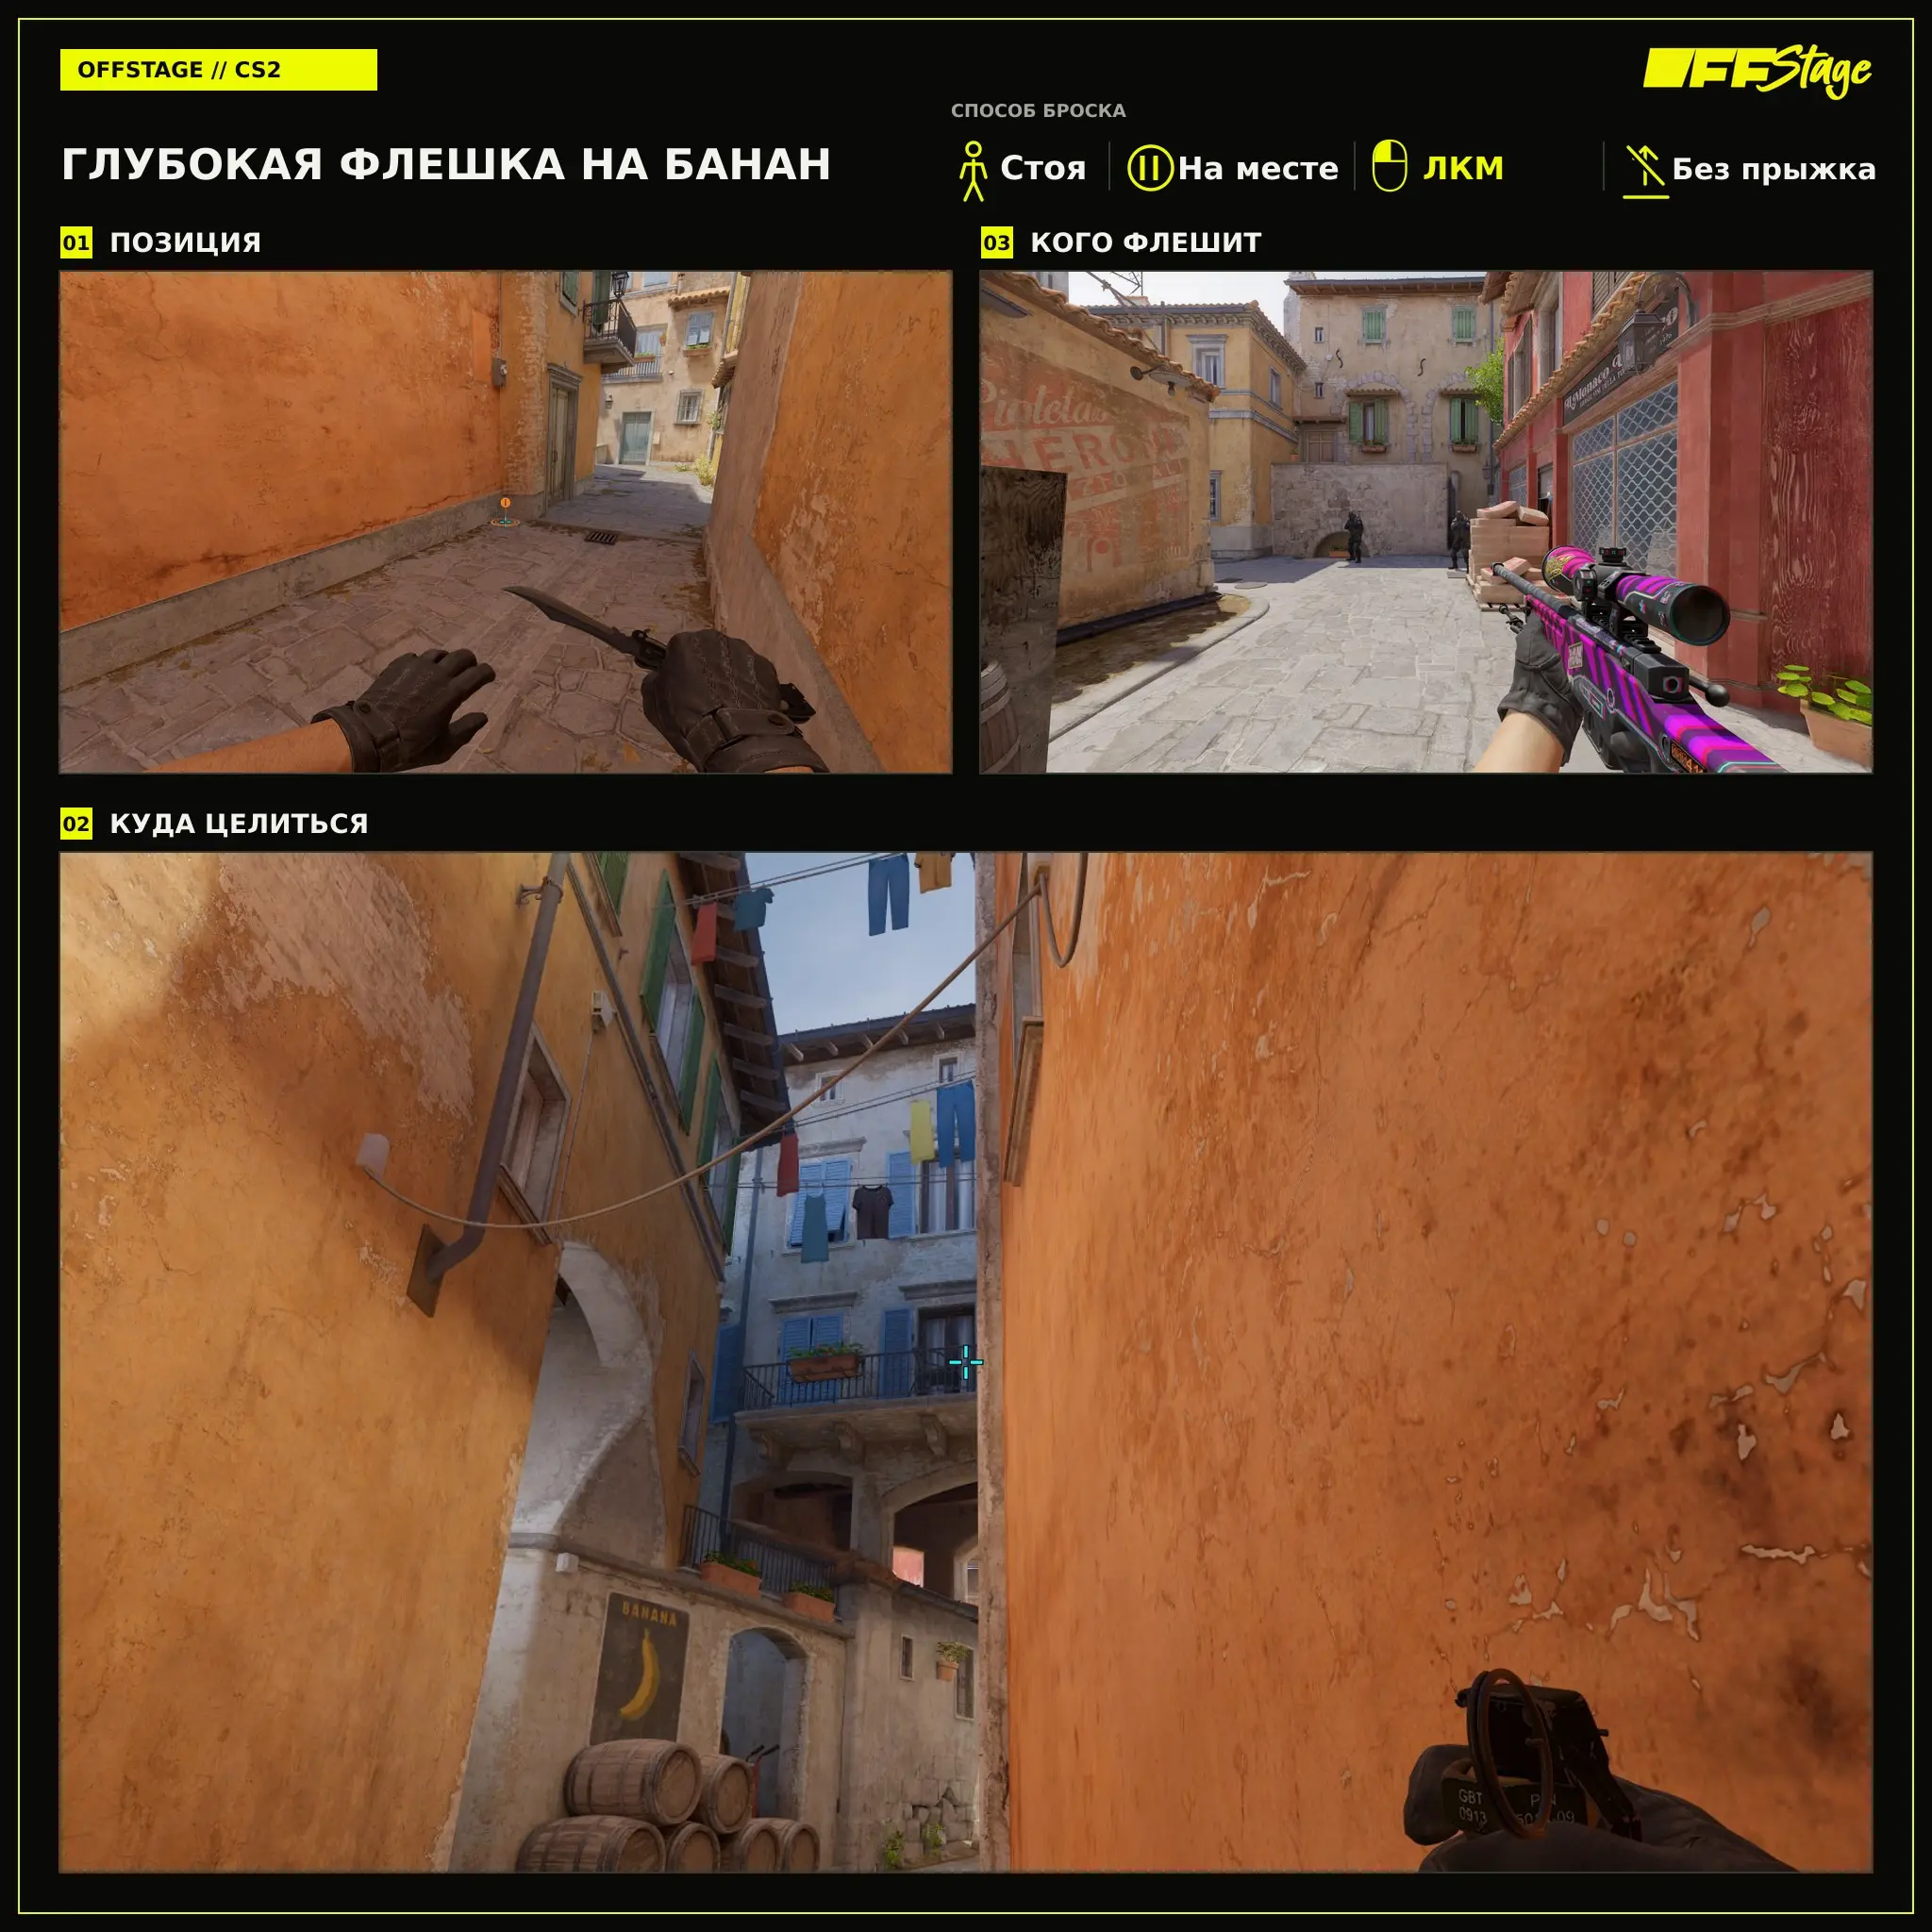
Deep flashbang into the banana
A deep flashbang on the Banana blinds opponents further than usual close-range angles. Stand as shown in the first frame, aim at the indicated landmark, and throw the grenade with a left-click without jumping.
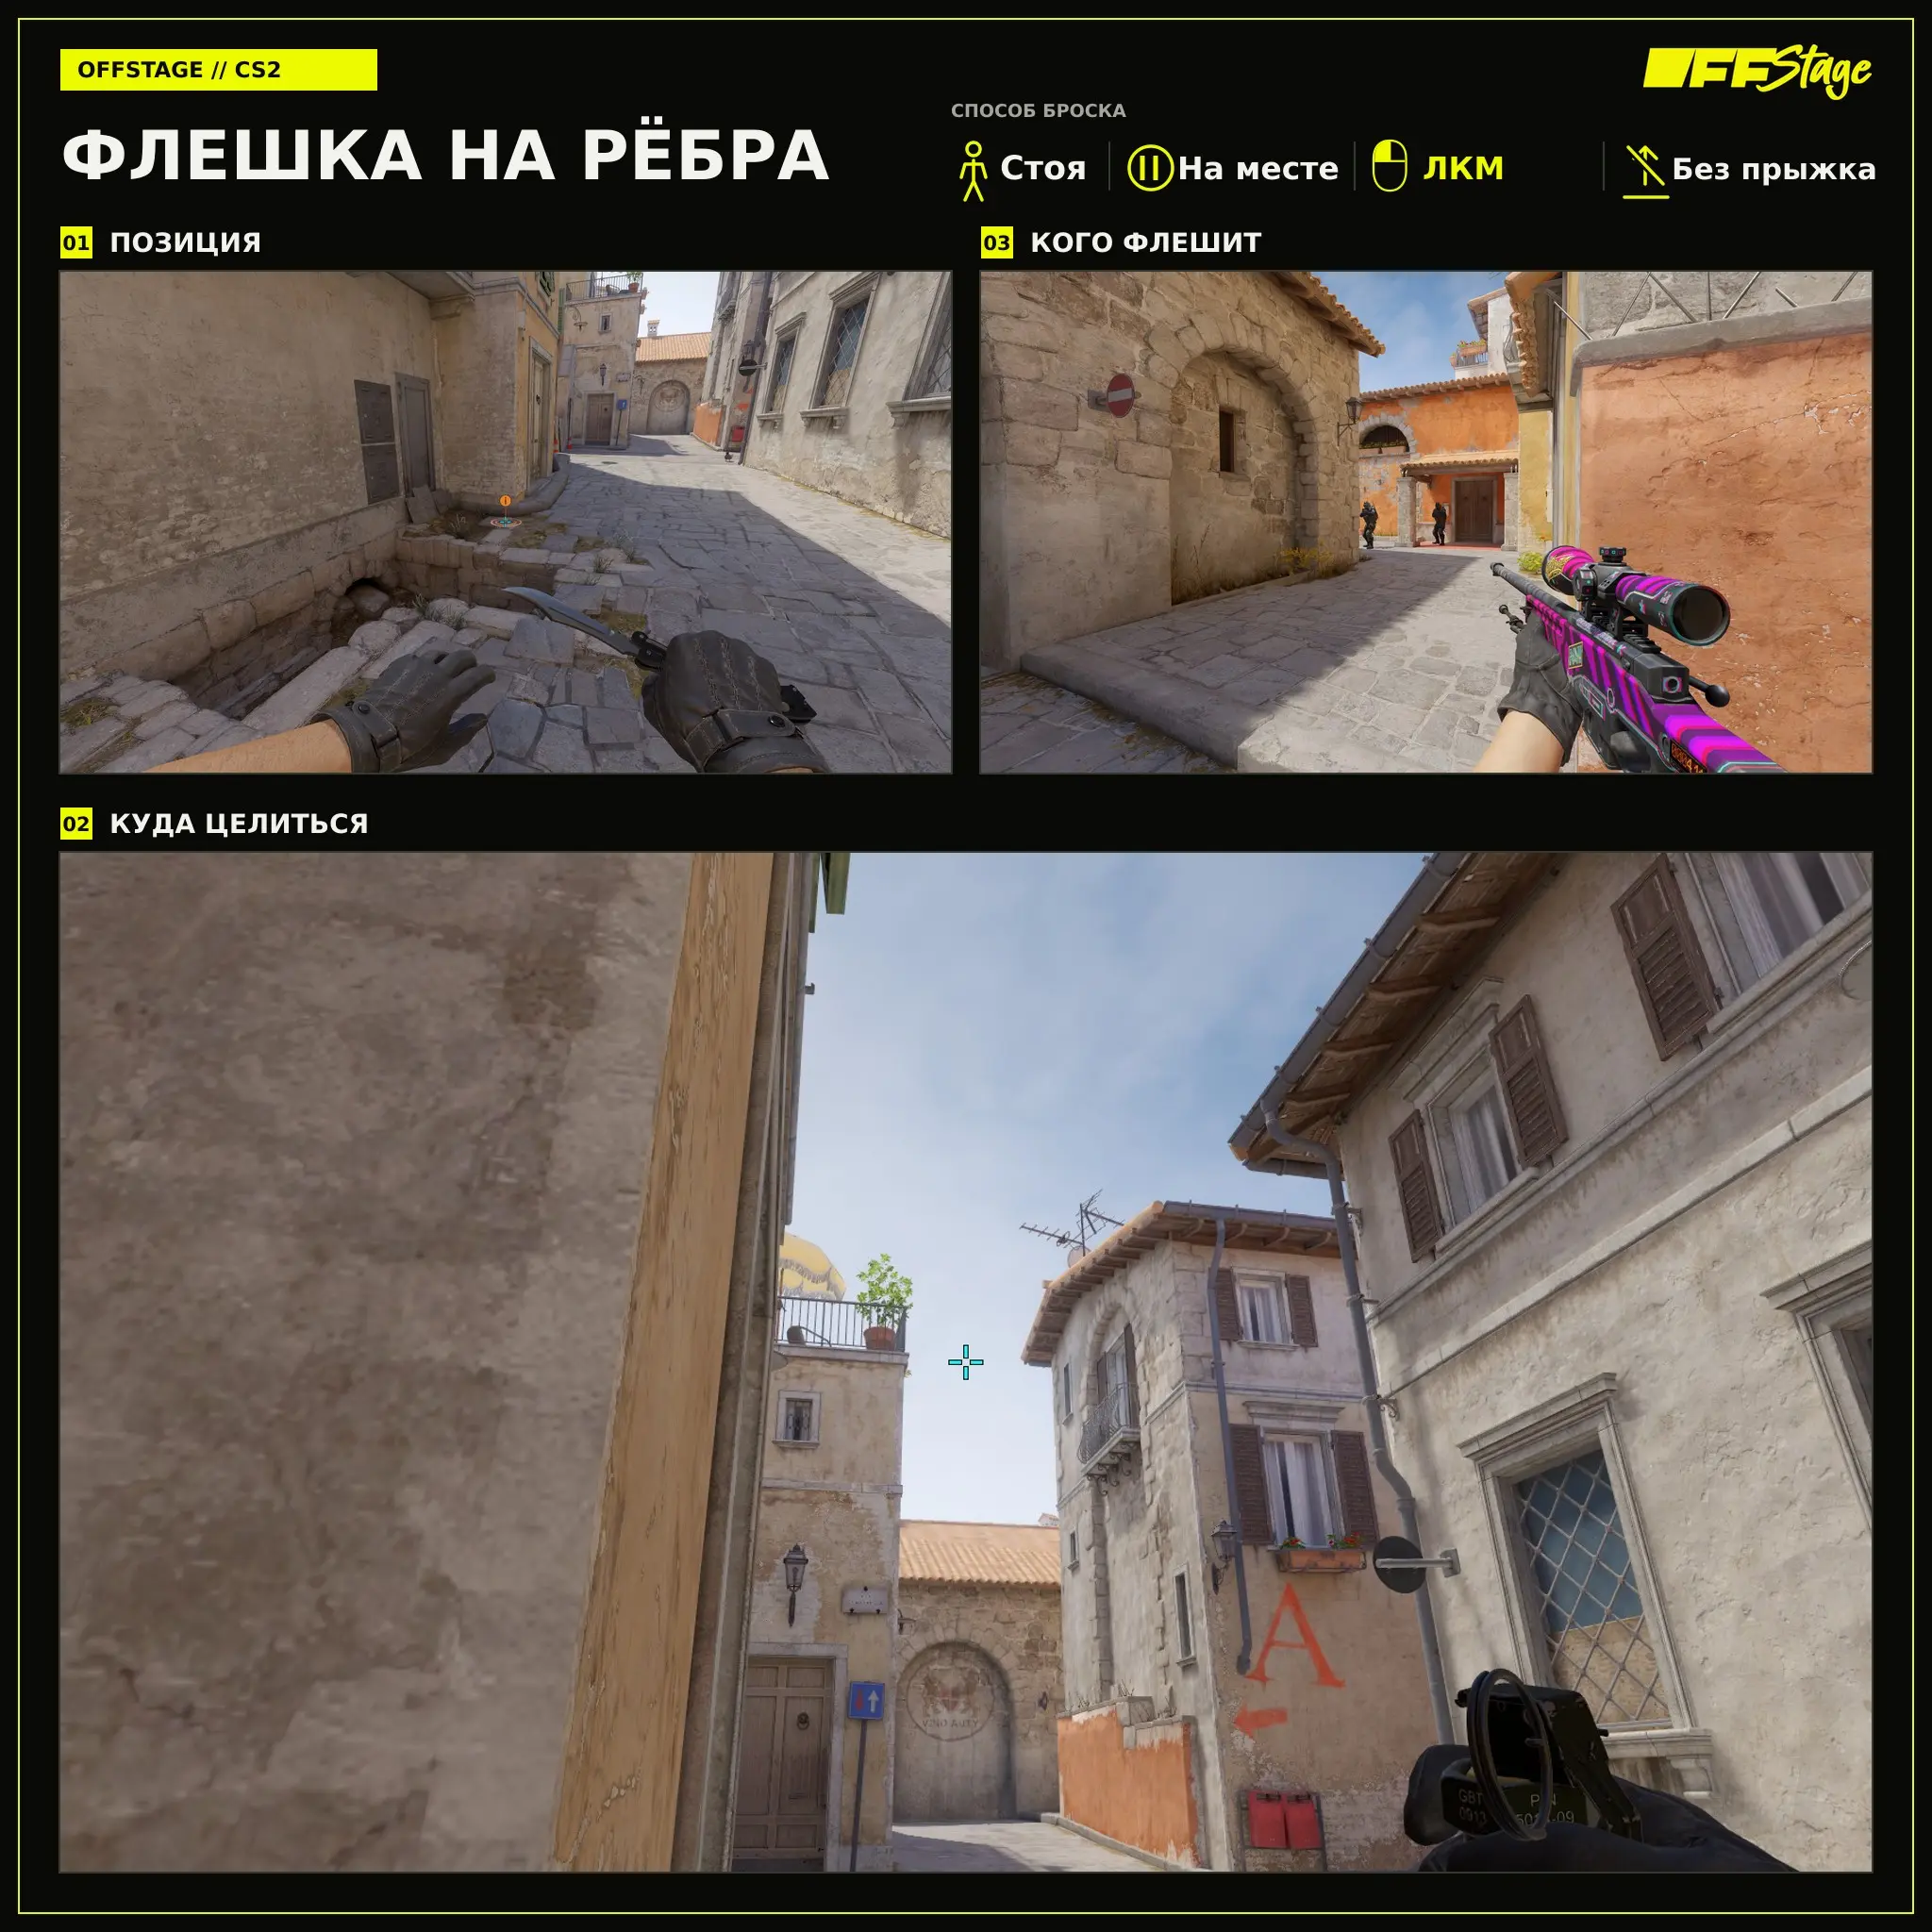
Flashbang to the flanks
An offensive flashbang to the ribs helps you navigate a dangerous section before reaching A. Stand as shown in the first frame, aim at the indicated landmark, and throw the flashbang with a left-click without jumping.
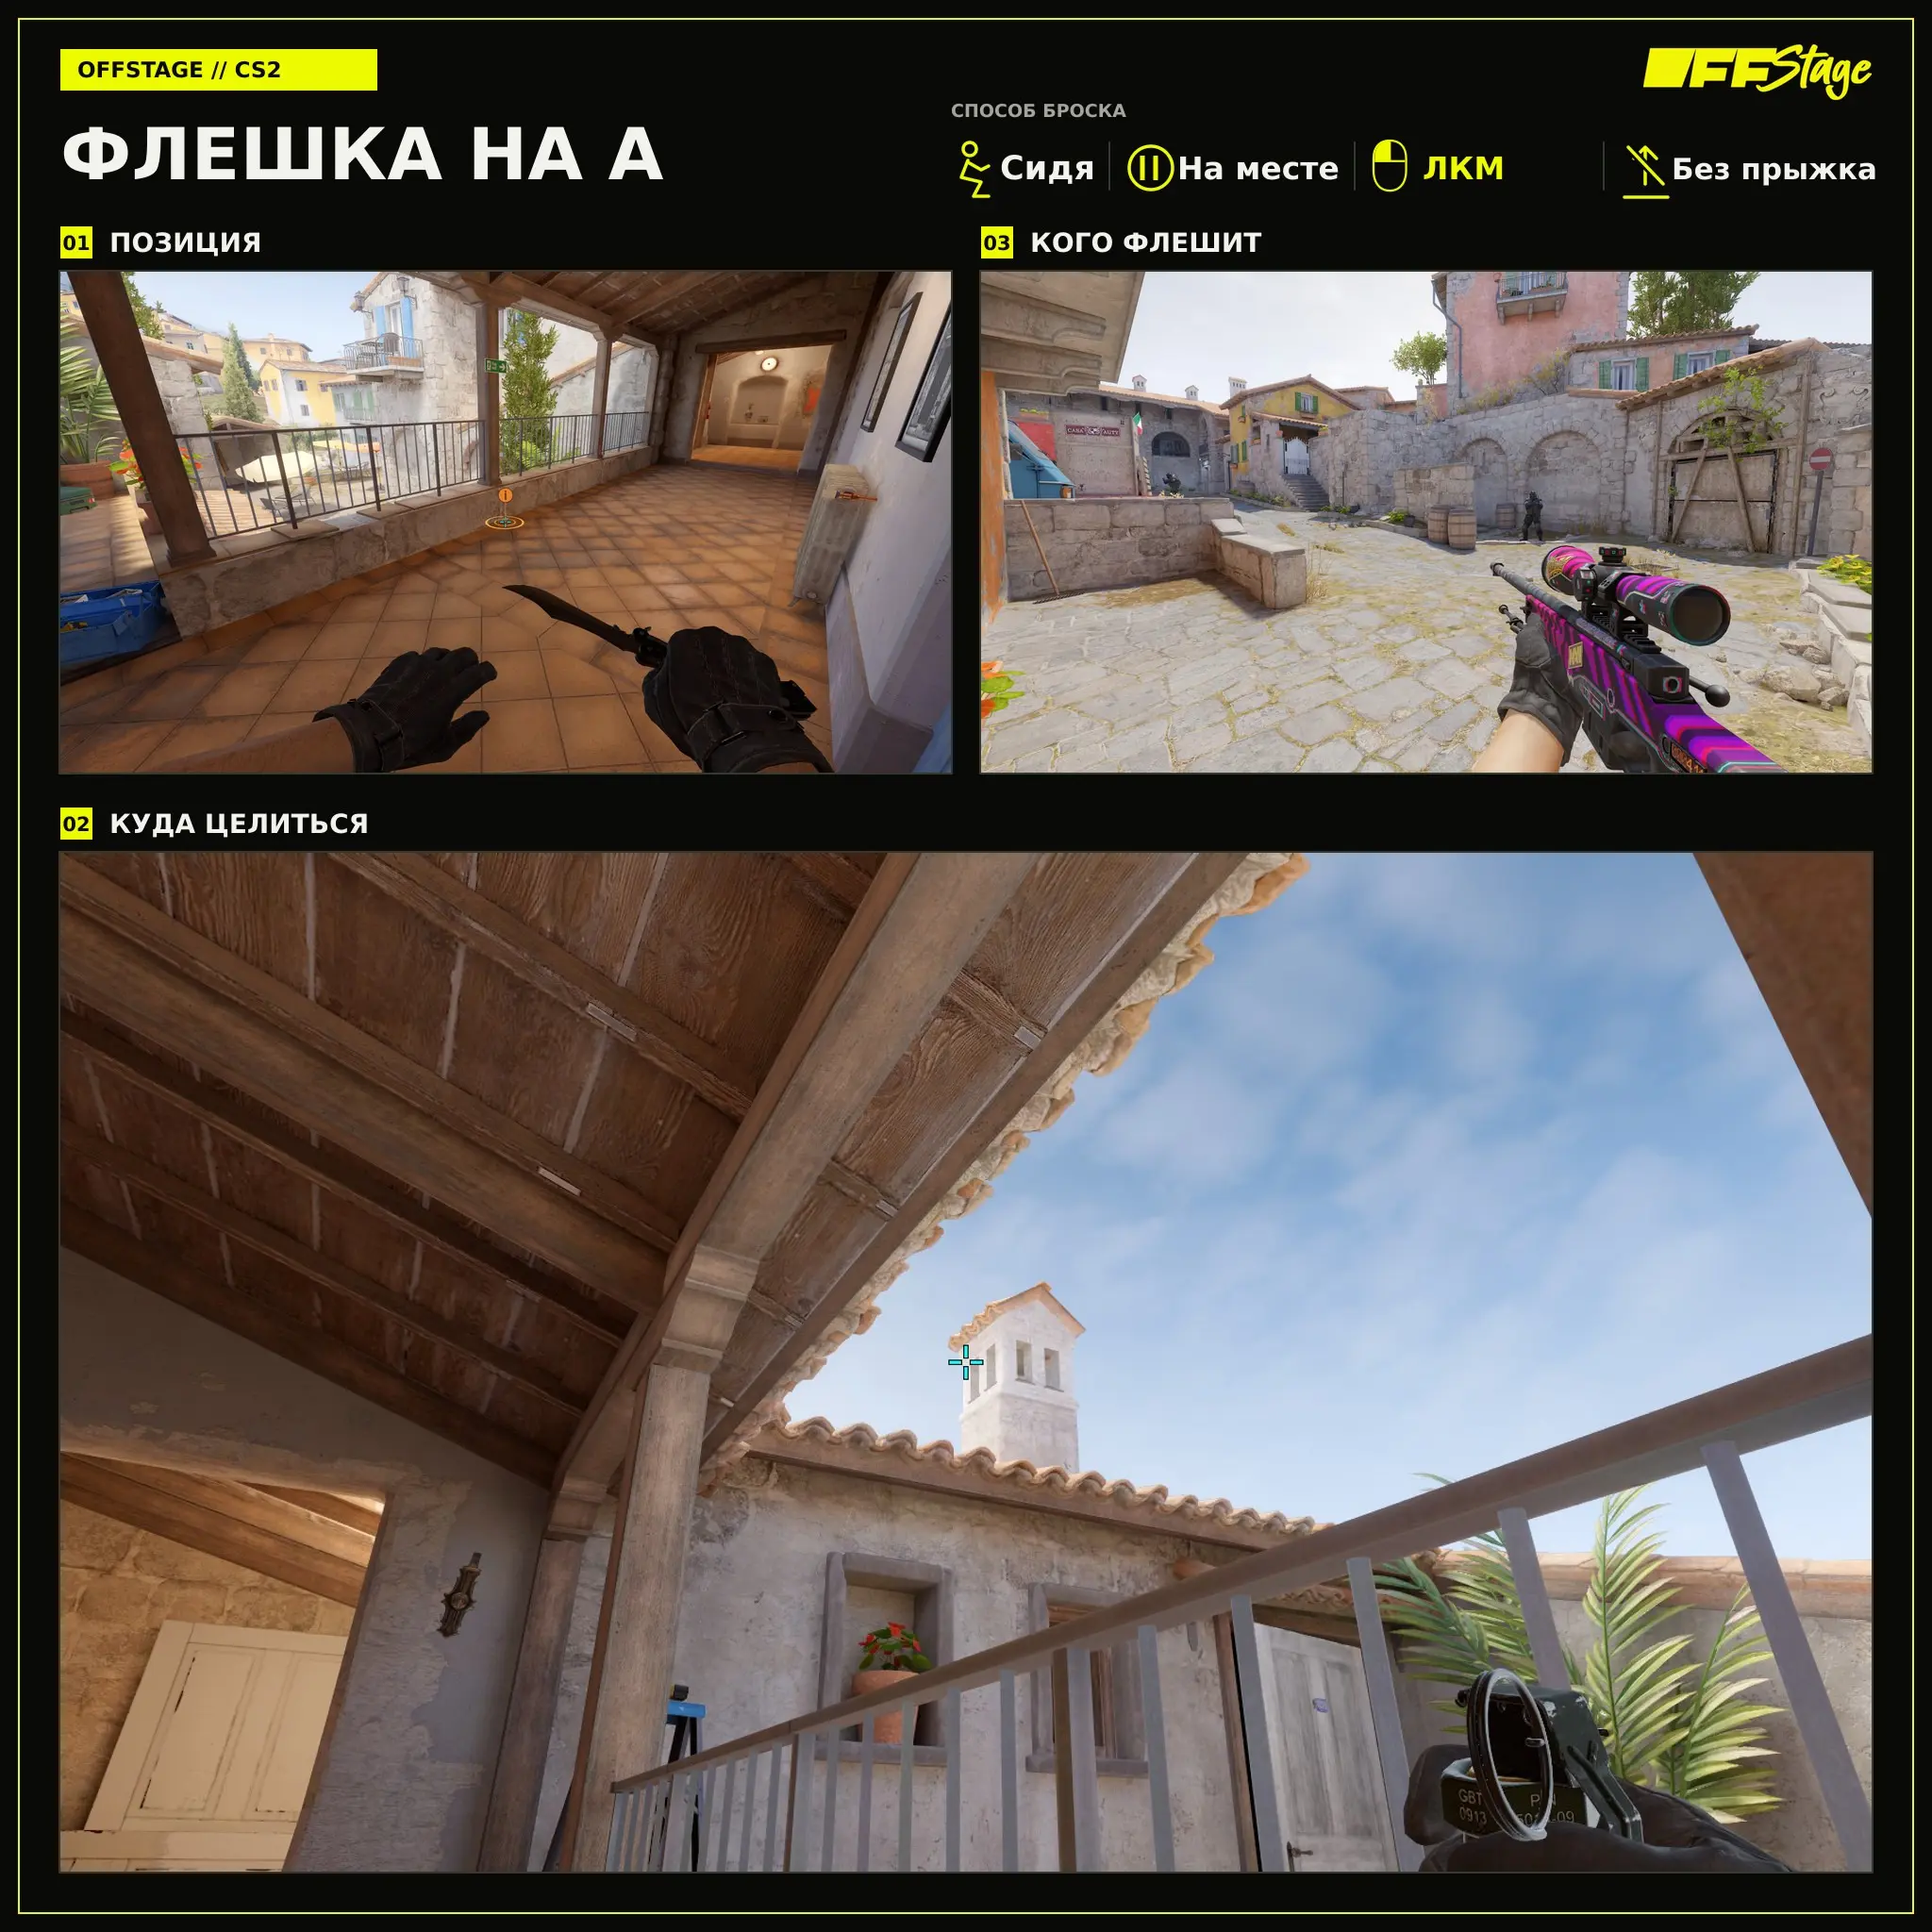
Flash to A
The A flashbang is thrown from a crouching position and helps open up the entrance to the plant site. Crouch, aim at the landmark, and throw the grenade with a left-click without jumping.
Defense Throws
On the CT side, flashbangs help hold the Banana, Ups, and Long, as well as retake positions after a retreat. Don’t throw them without contact if there’s no teammate nearby ready to call out.
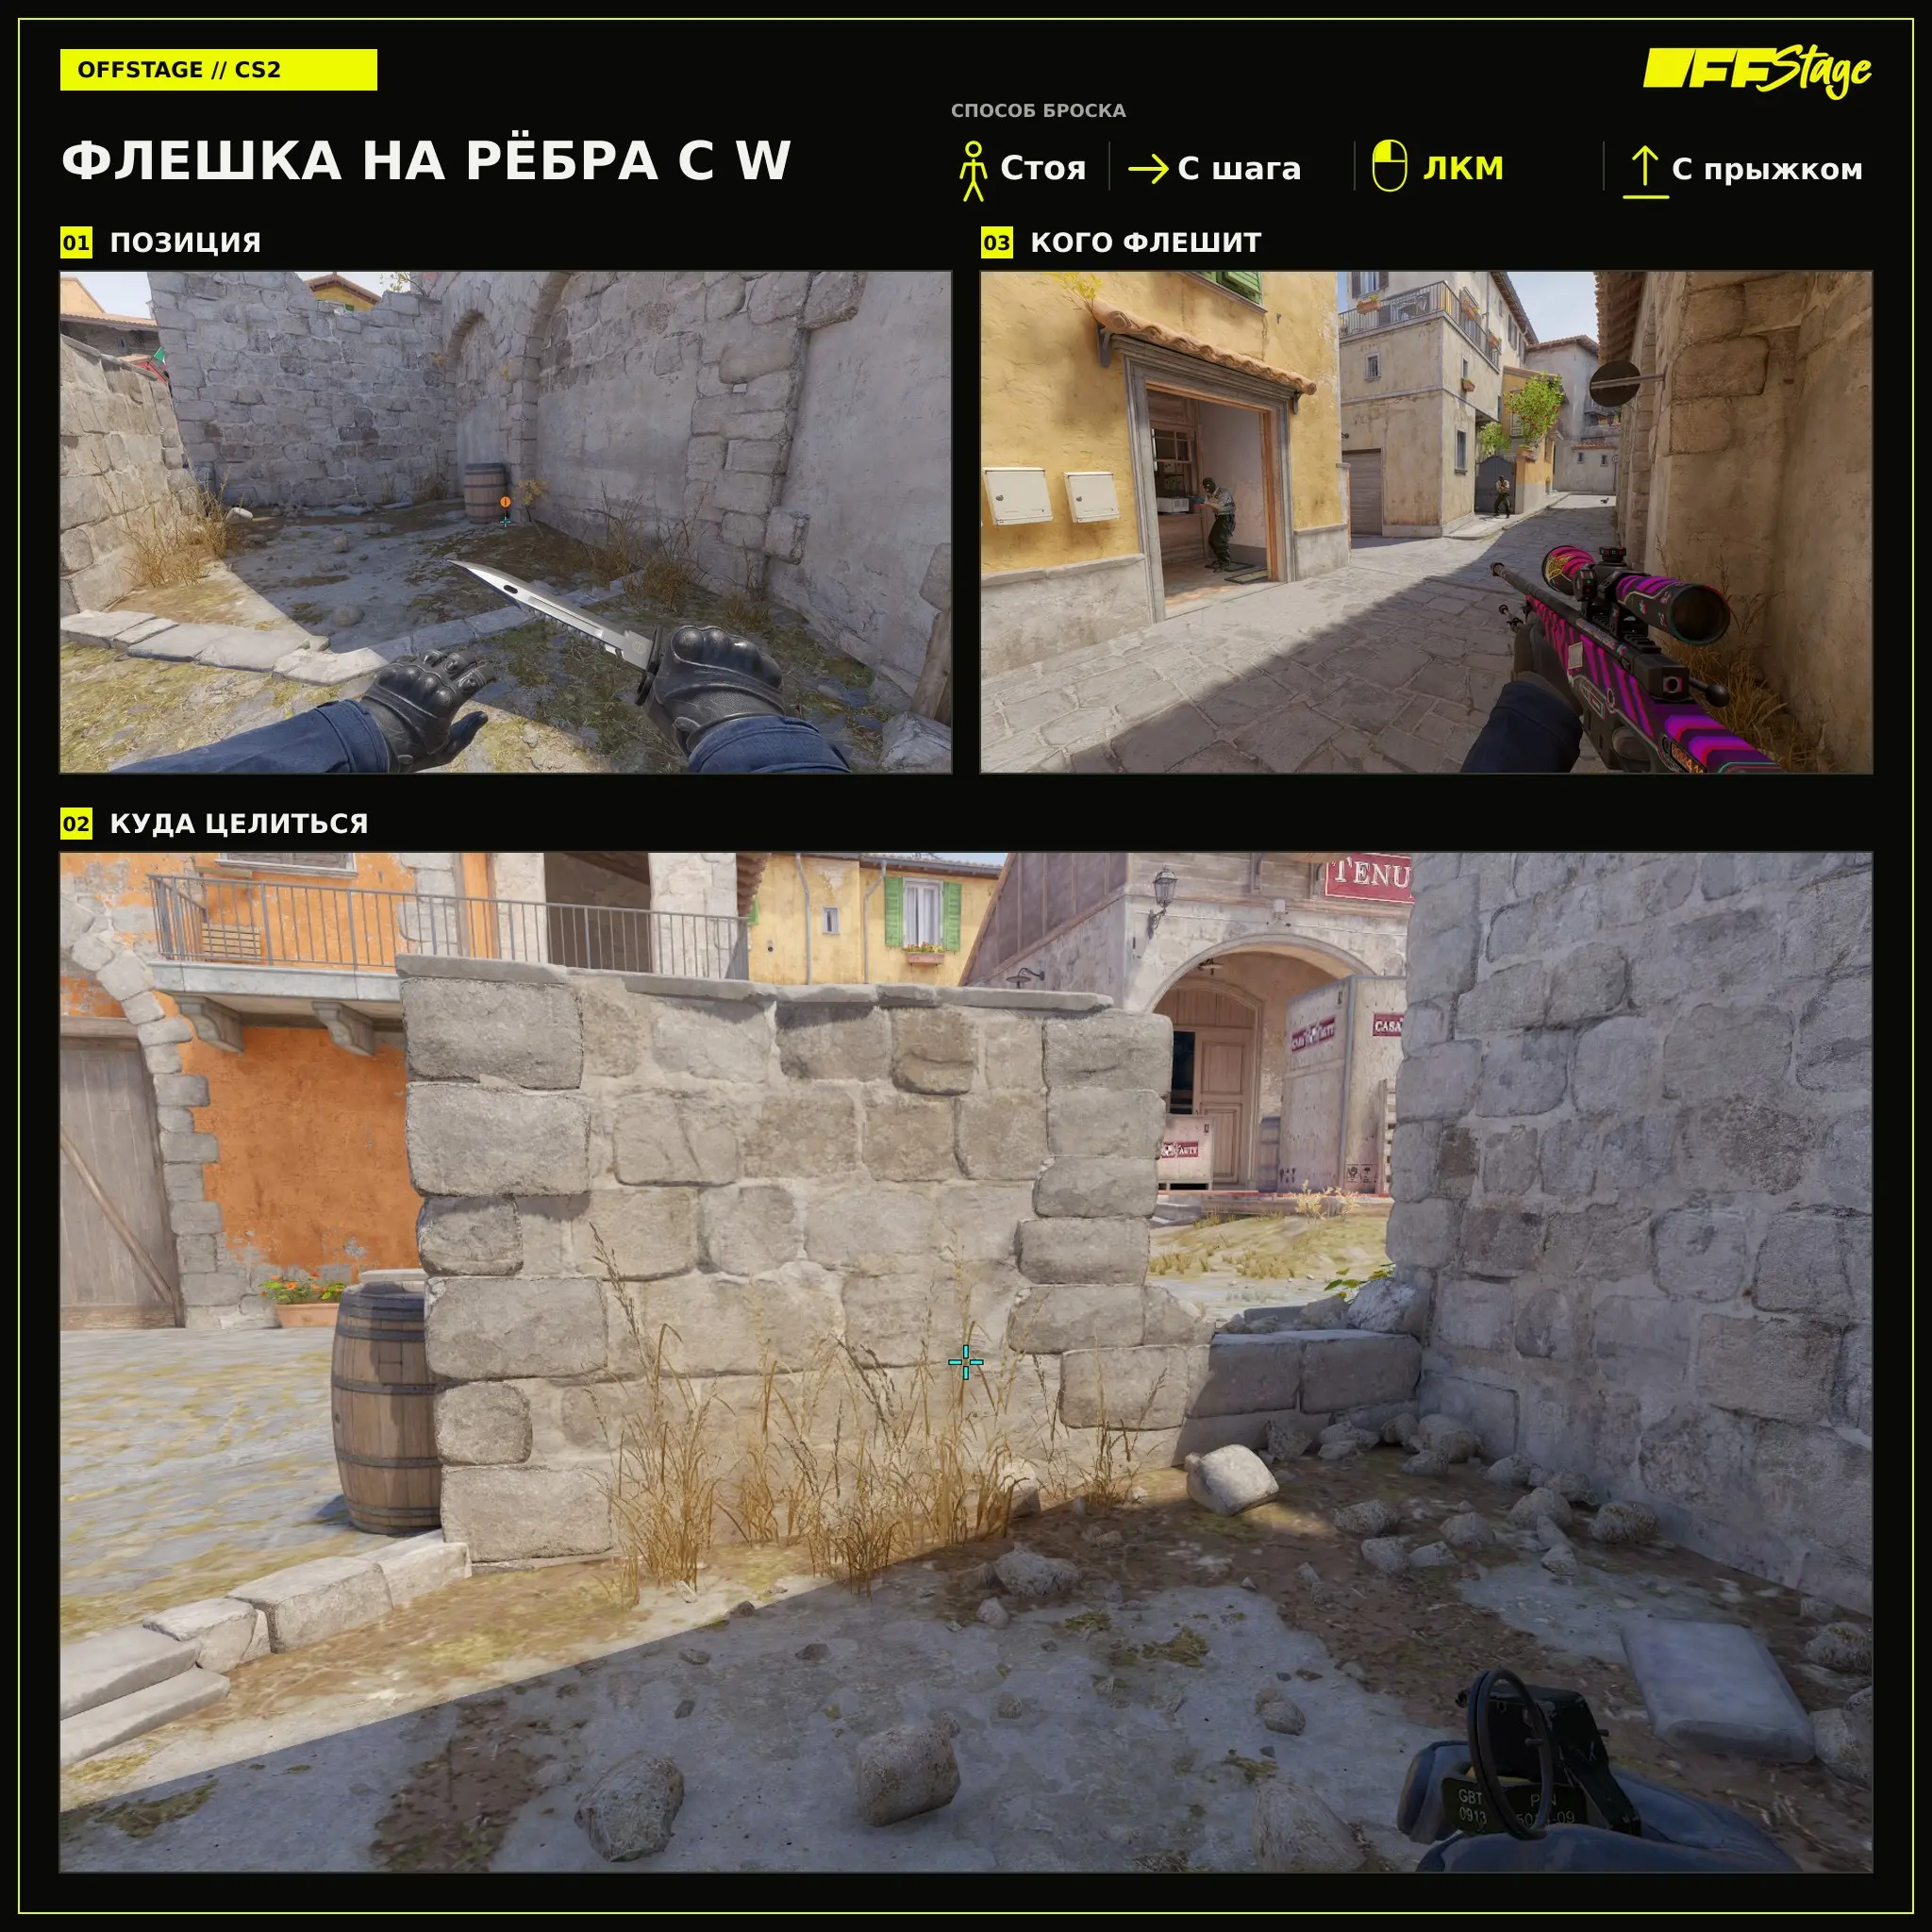
Flashbang to the flanks with W
The W-ribs throw helps a teammate initiate an engagement and requires a short forward movement. Aim at the landmark, start moving forward with the W key, and perform LMB + jump throw.
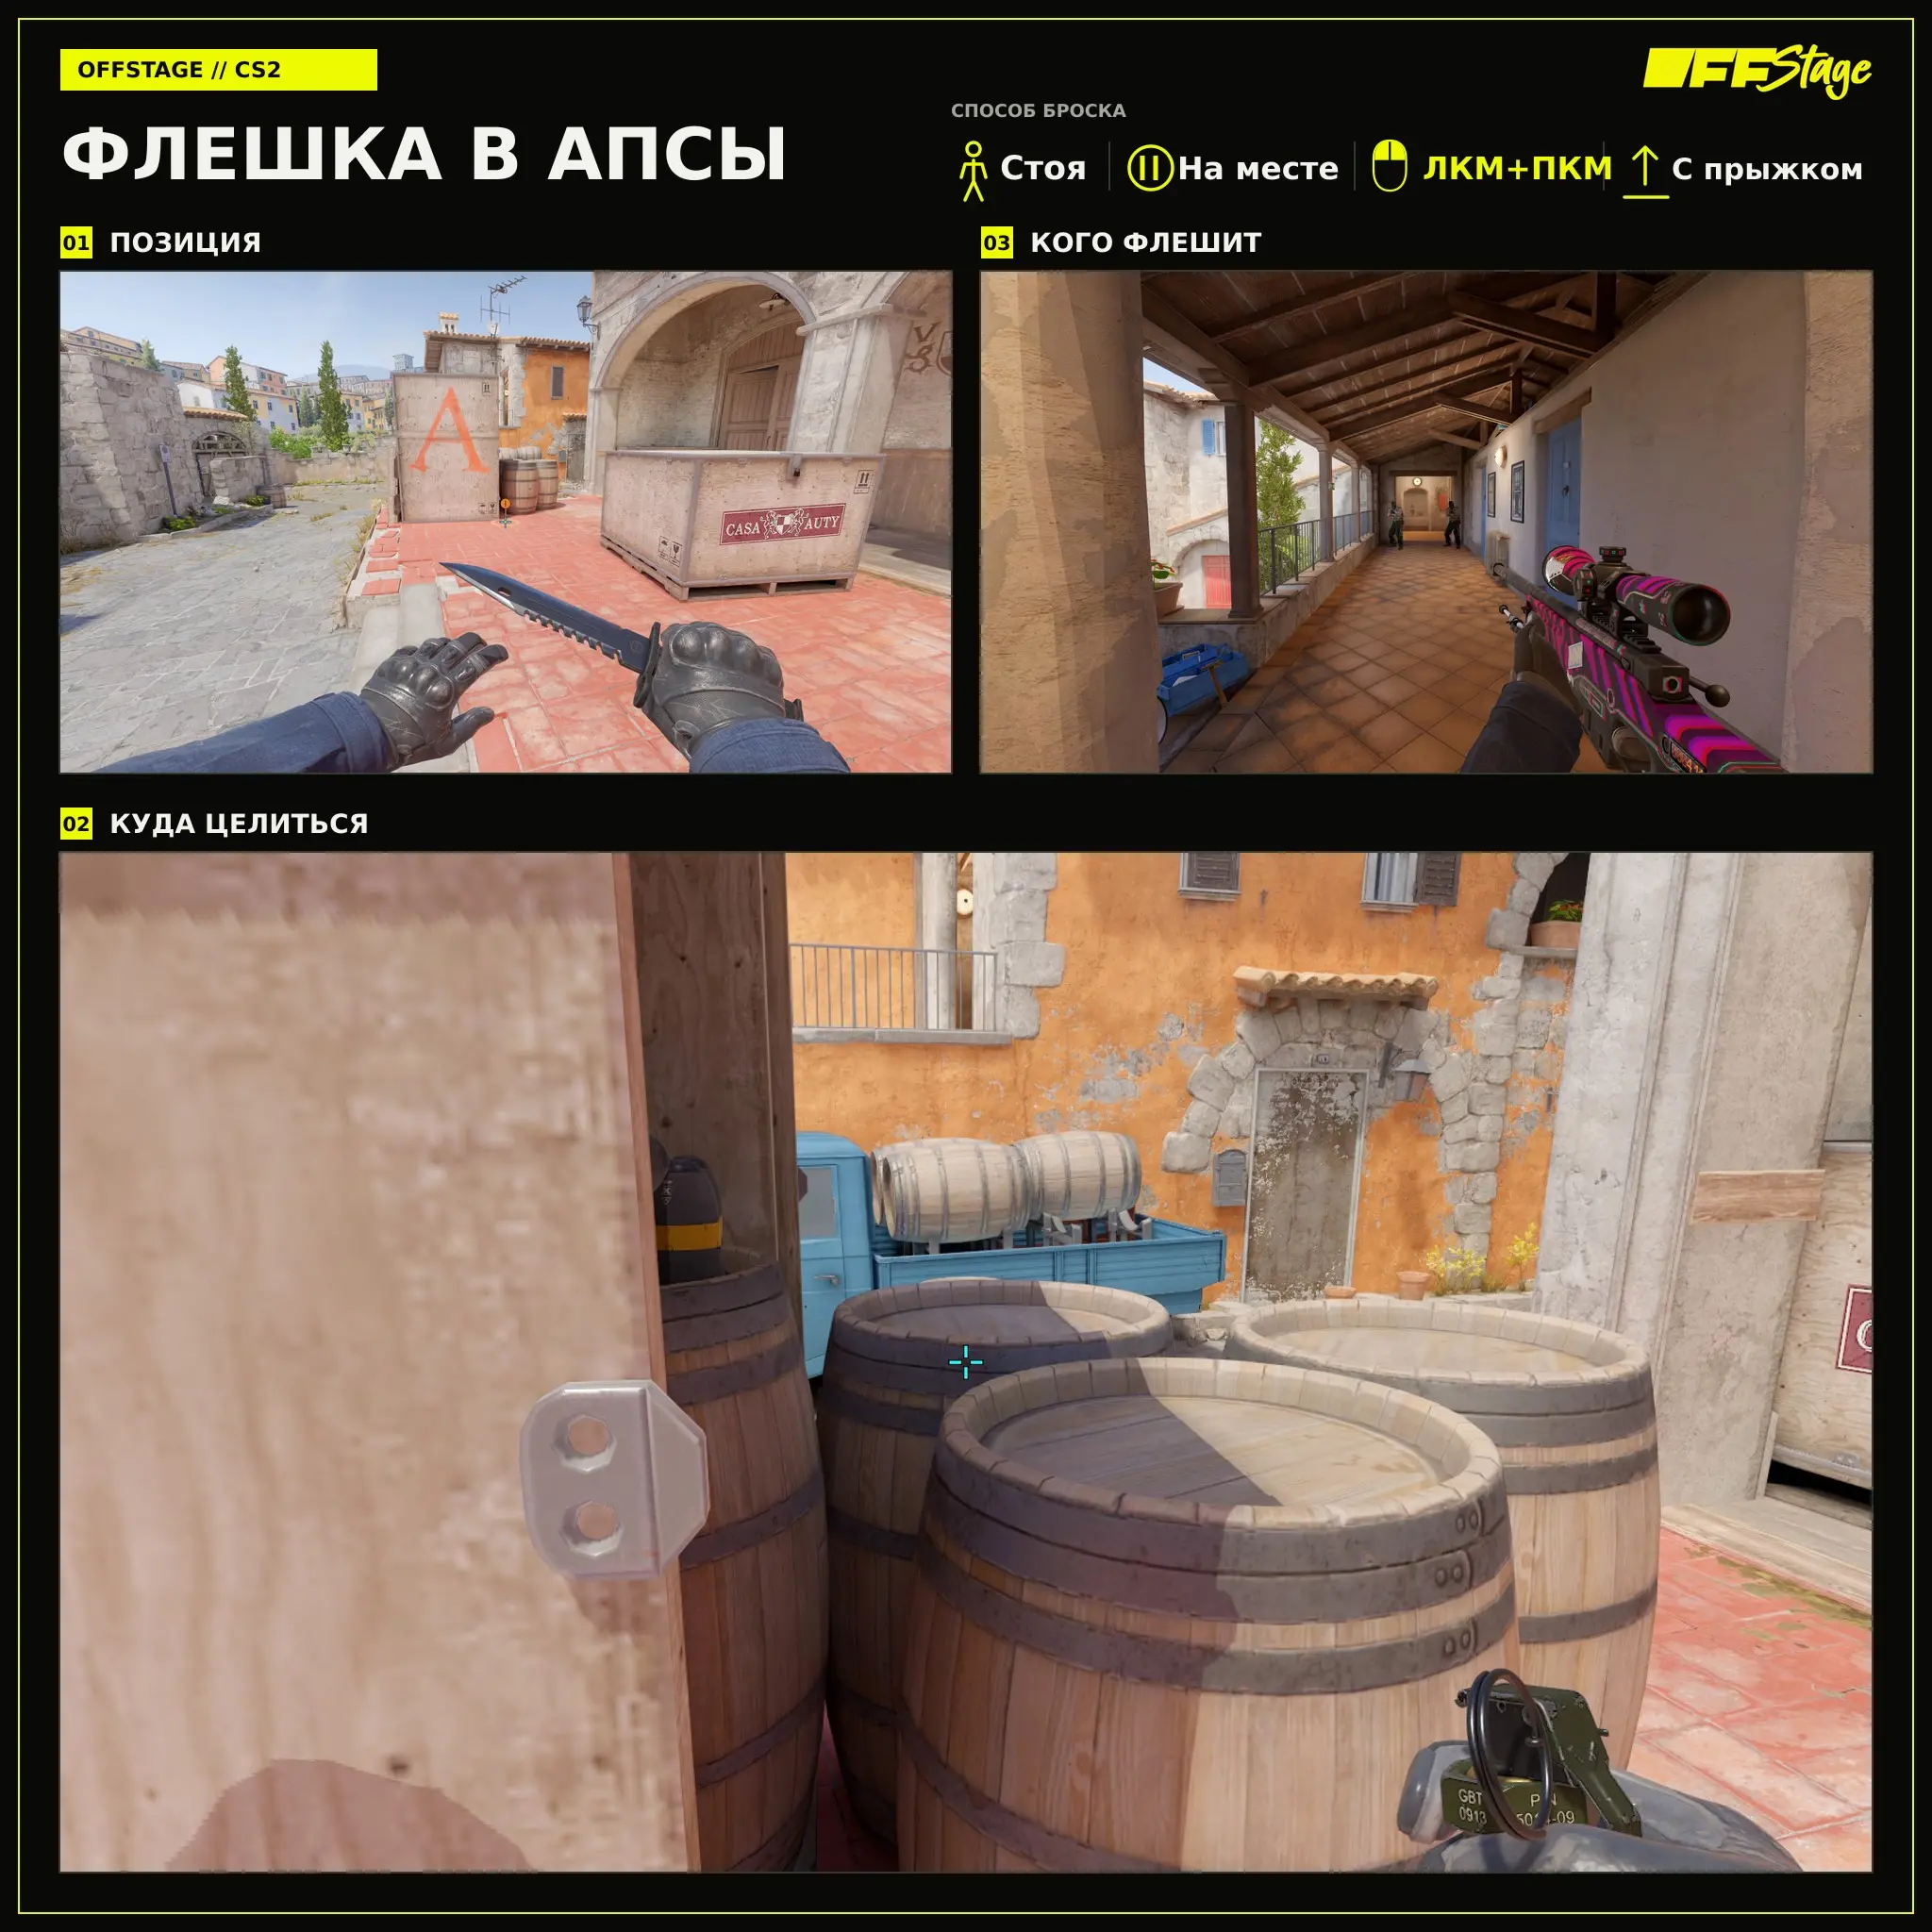
Flash to the Aps
The flash throw to the back opens up in front of the attacker and helps the defender safely check the path. From a standing position, hold down the left mouse button and the right mouse button, then perform a jump throw.
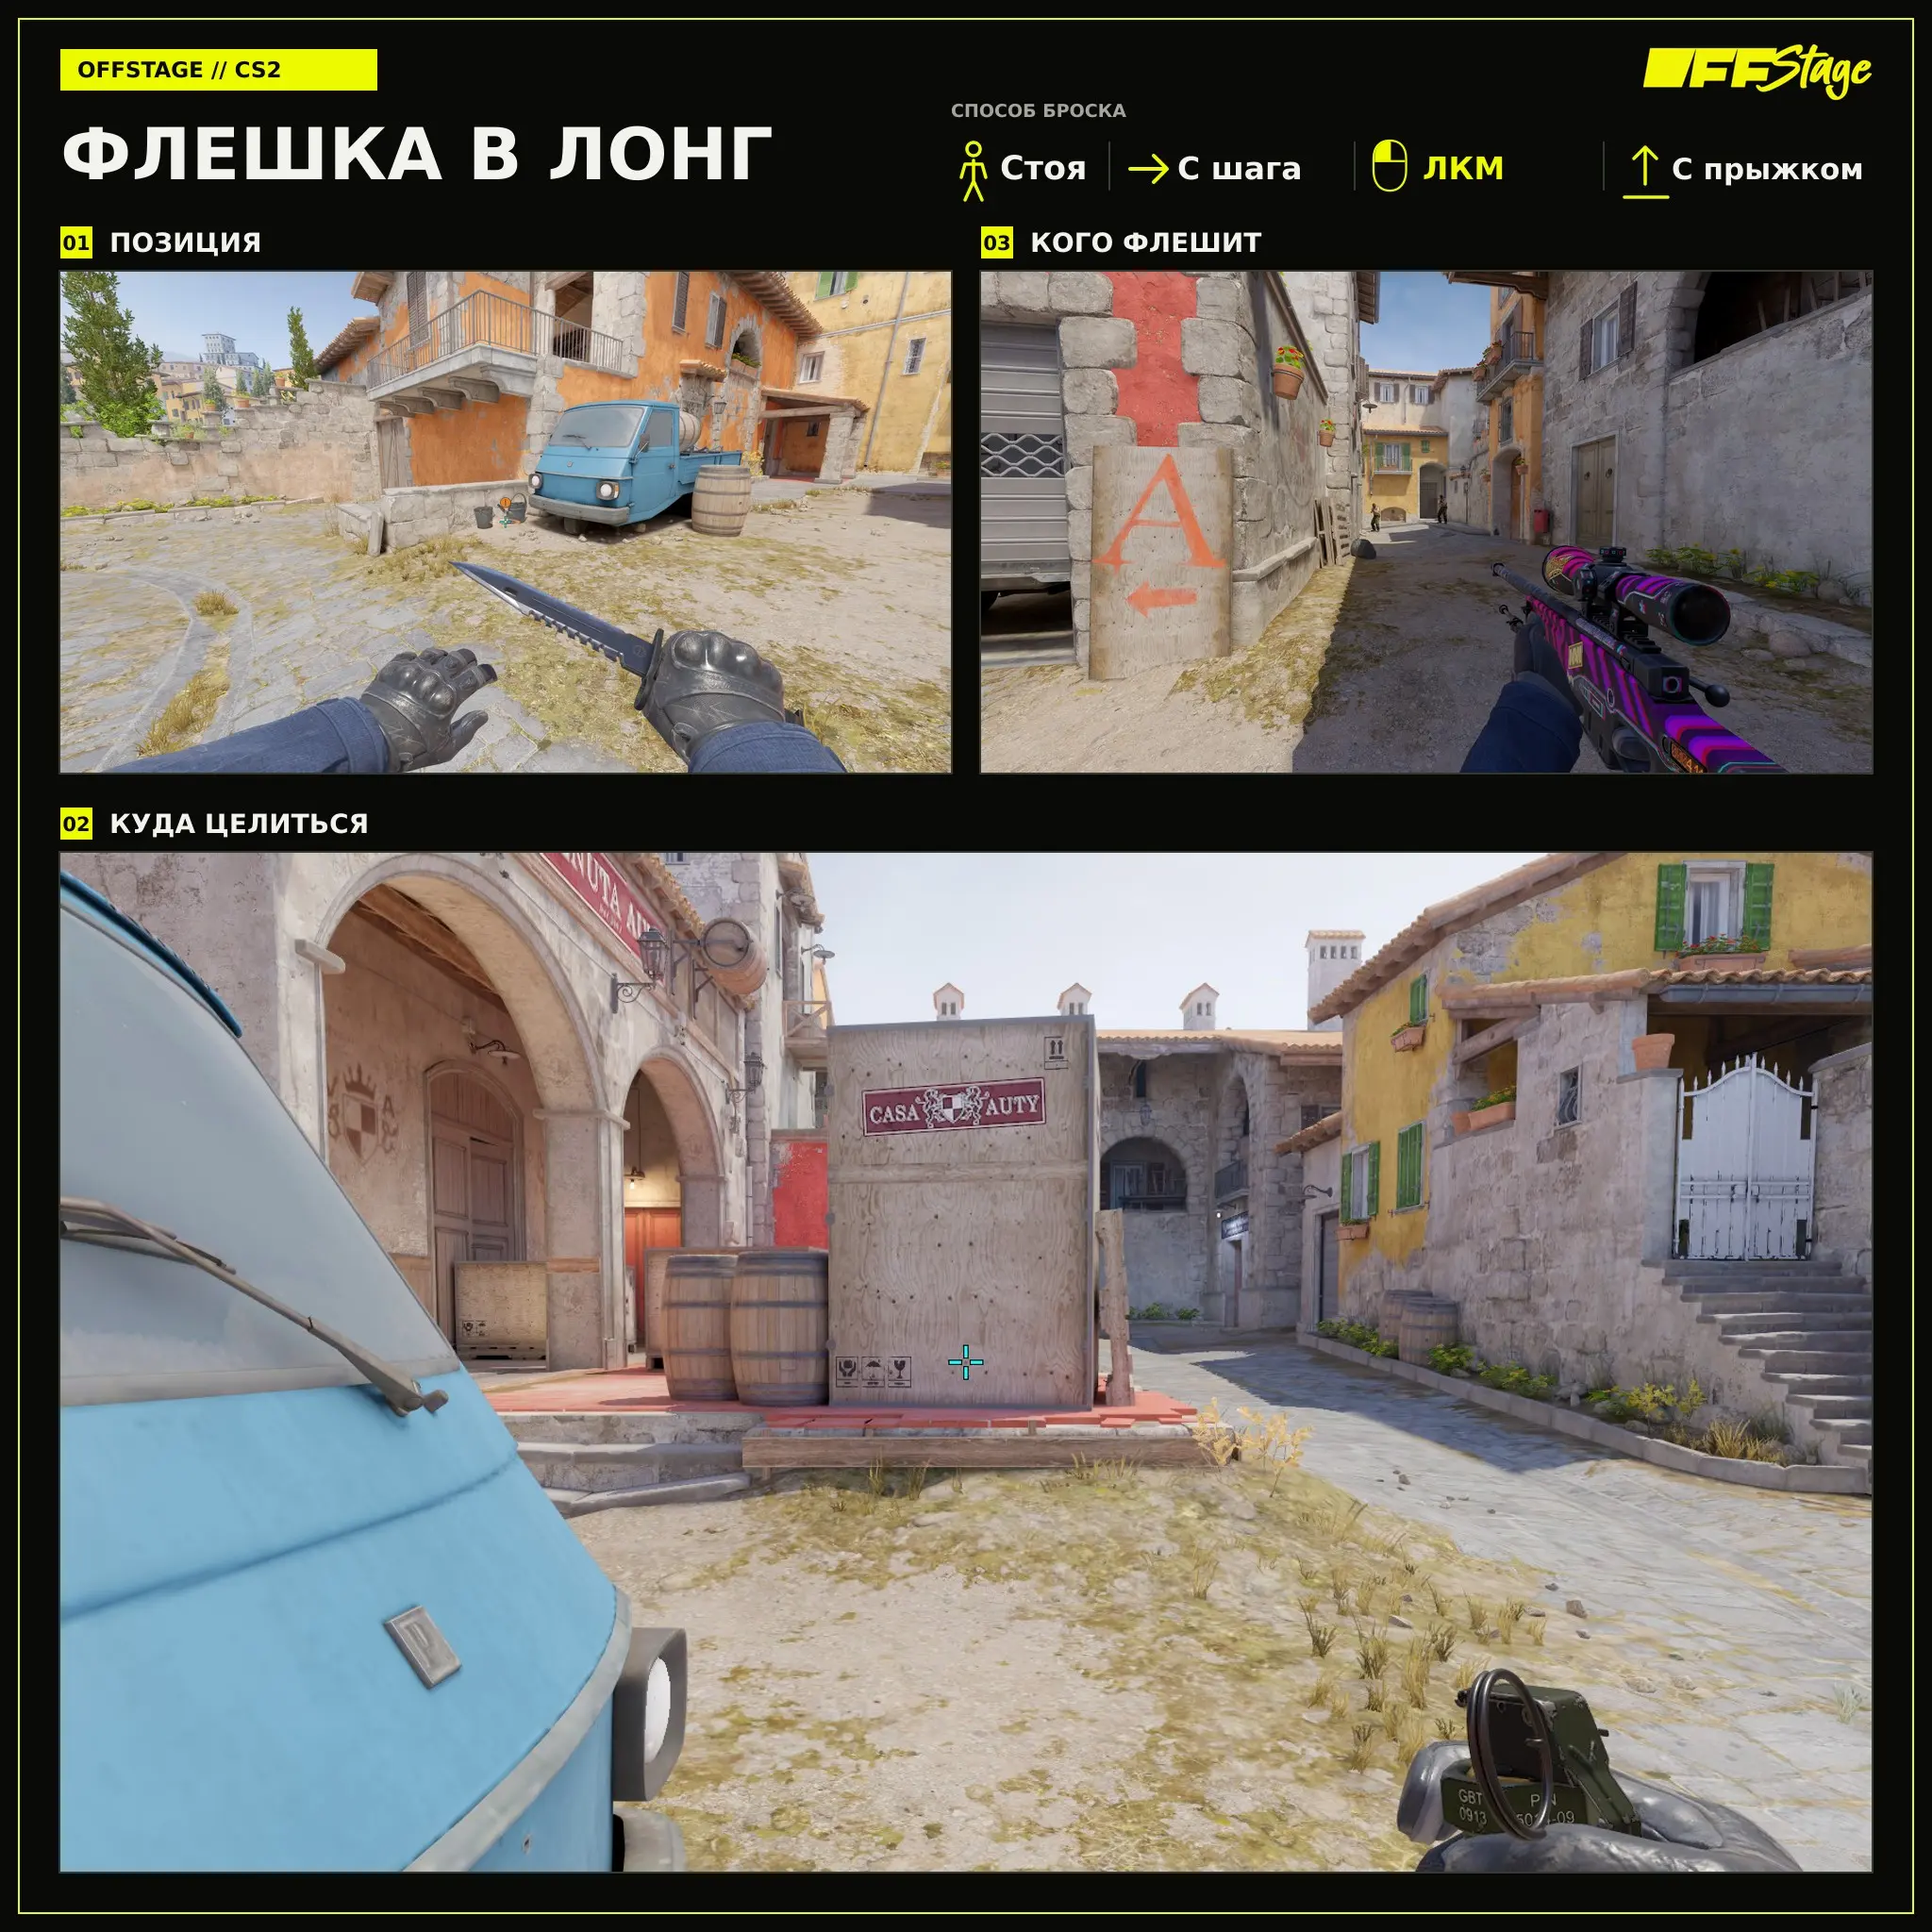
Flash to the long
A defensive flash to the long is suitable for a follow-up pick after receiving information. Aim at the landmark, start moving forward with the W key, and perform LMB + jump throw.
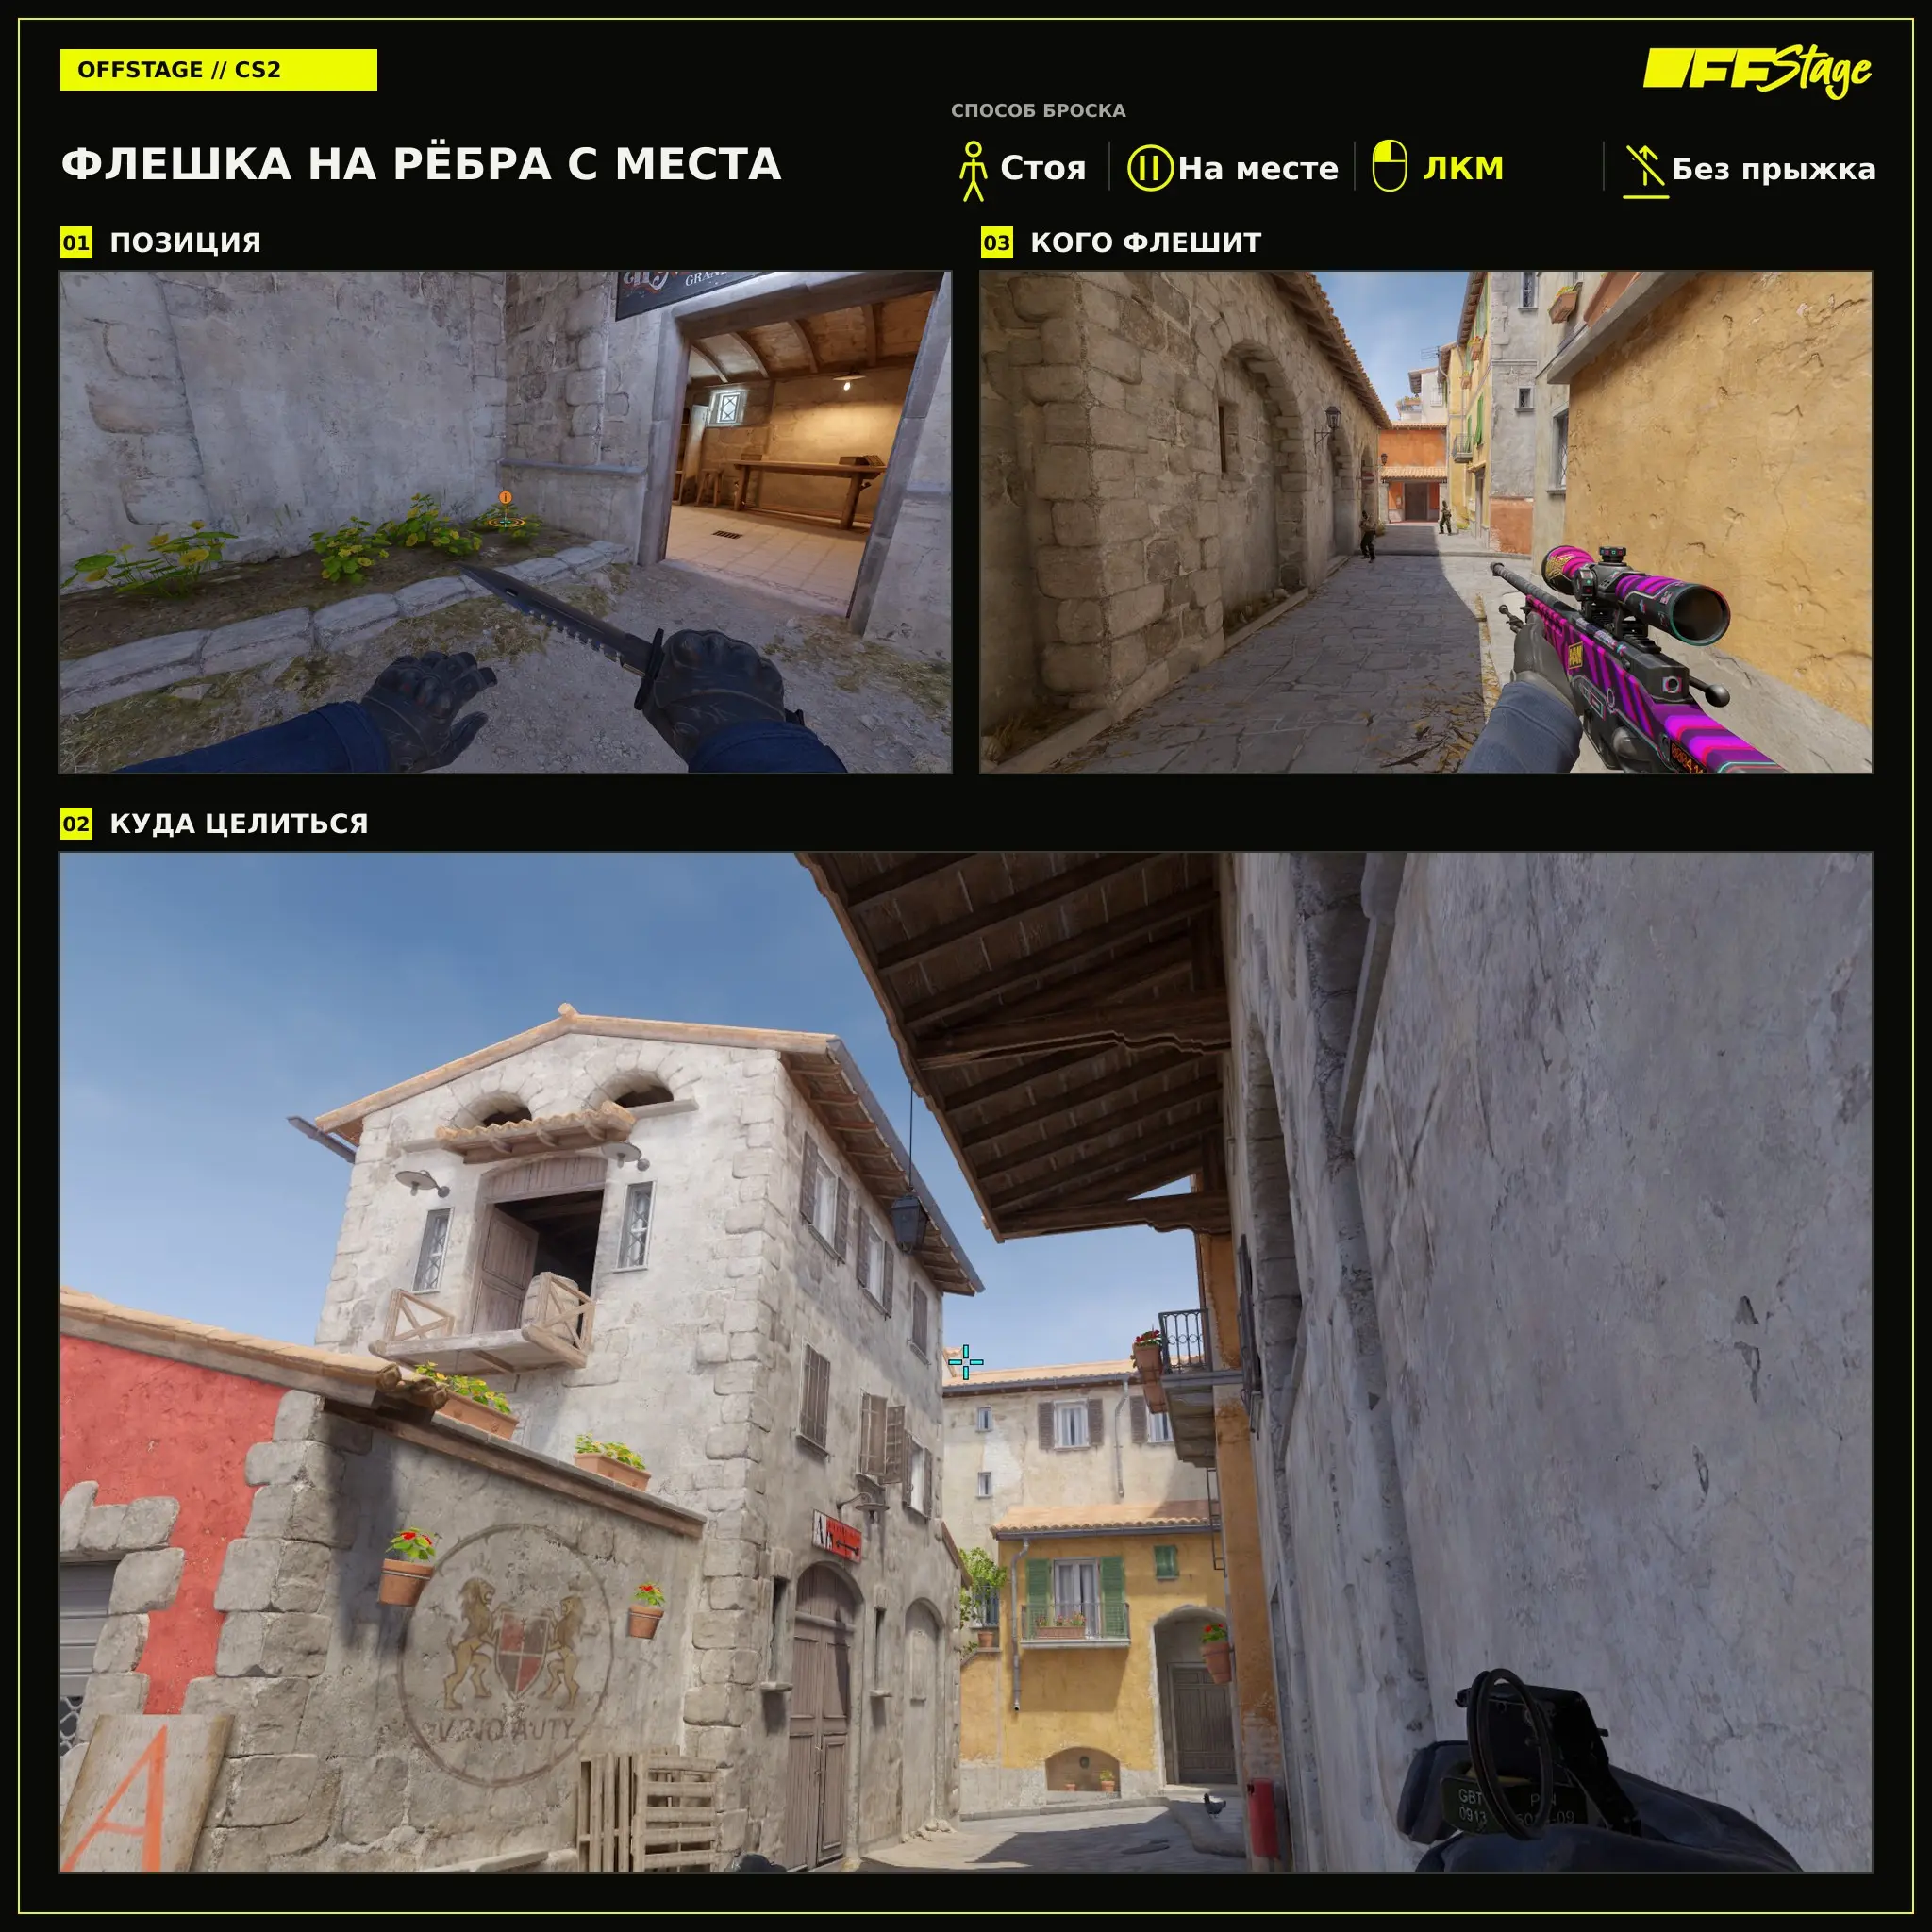
Flash to the flanks from a standing position
The second flashbang to the flanks is thrown from a standing position and is useful when there’s no time to move. Stand as shown in the first frame, aim at the specified landmark, and throw the grenade with a left-click without jumping.
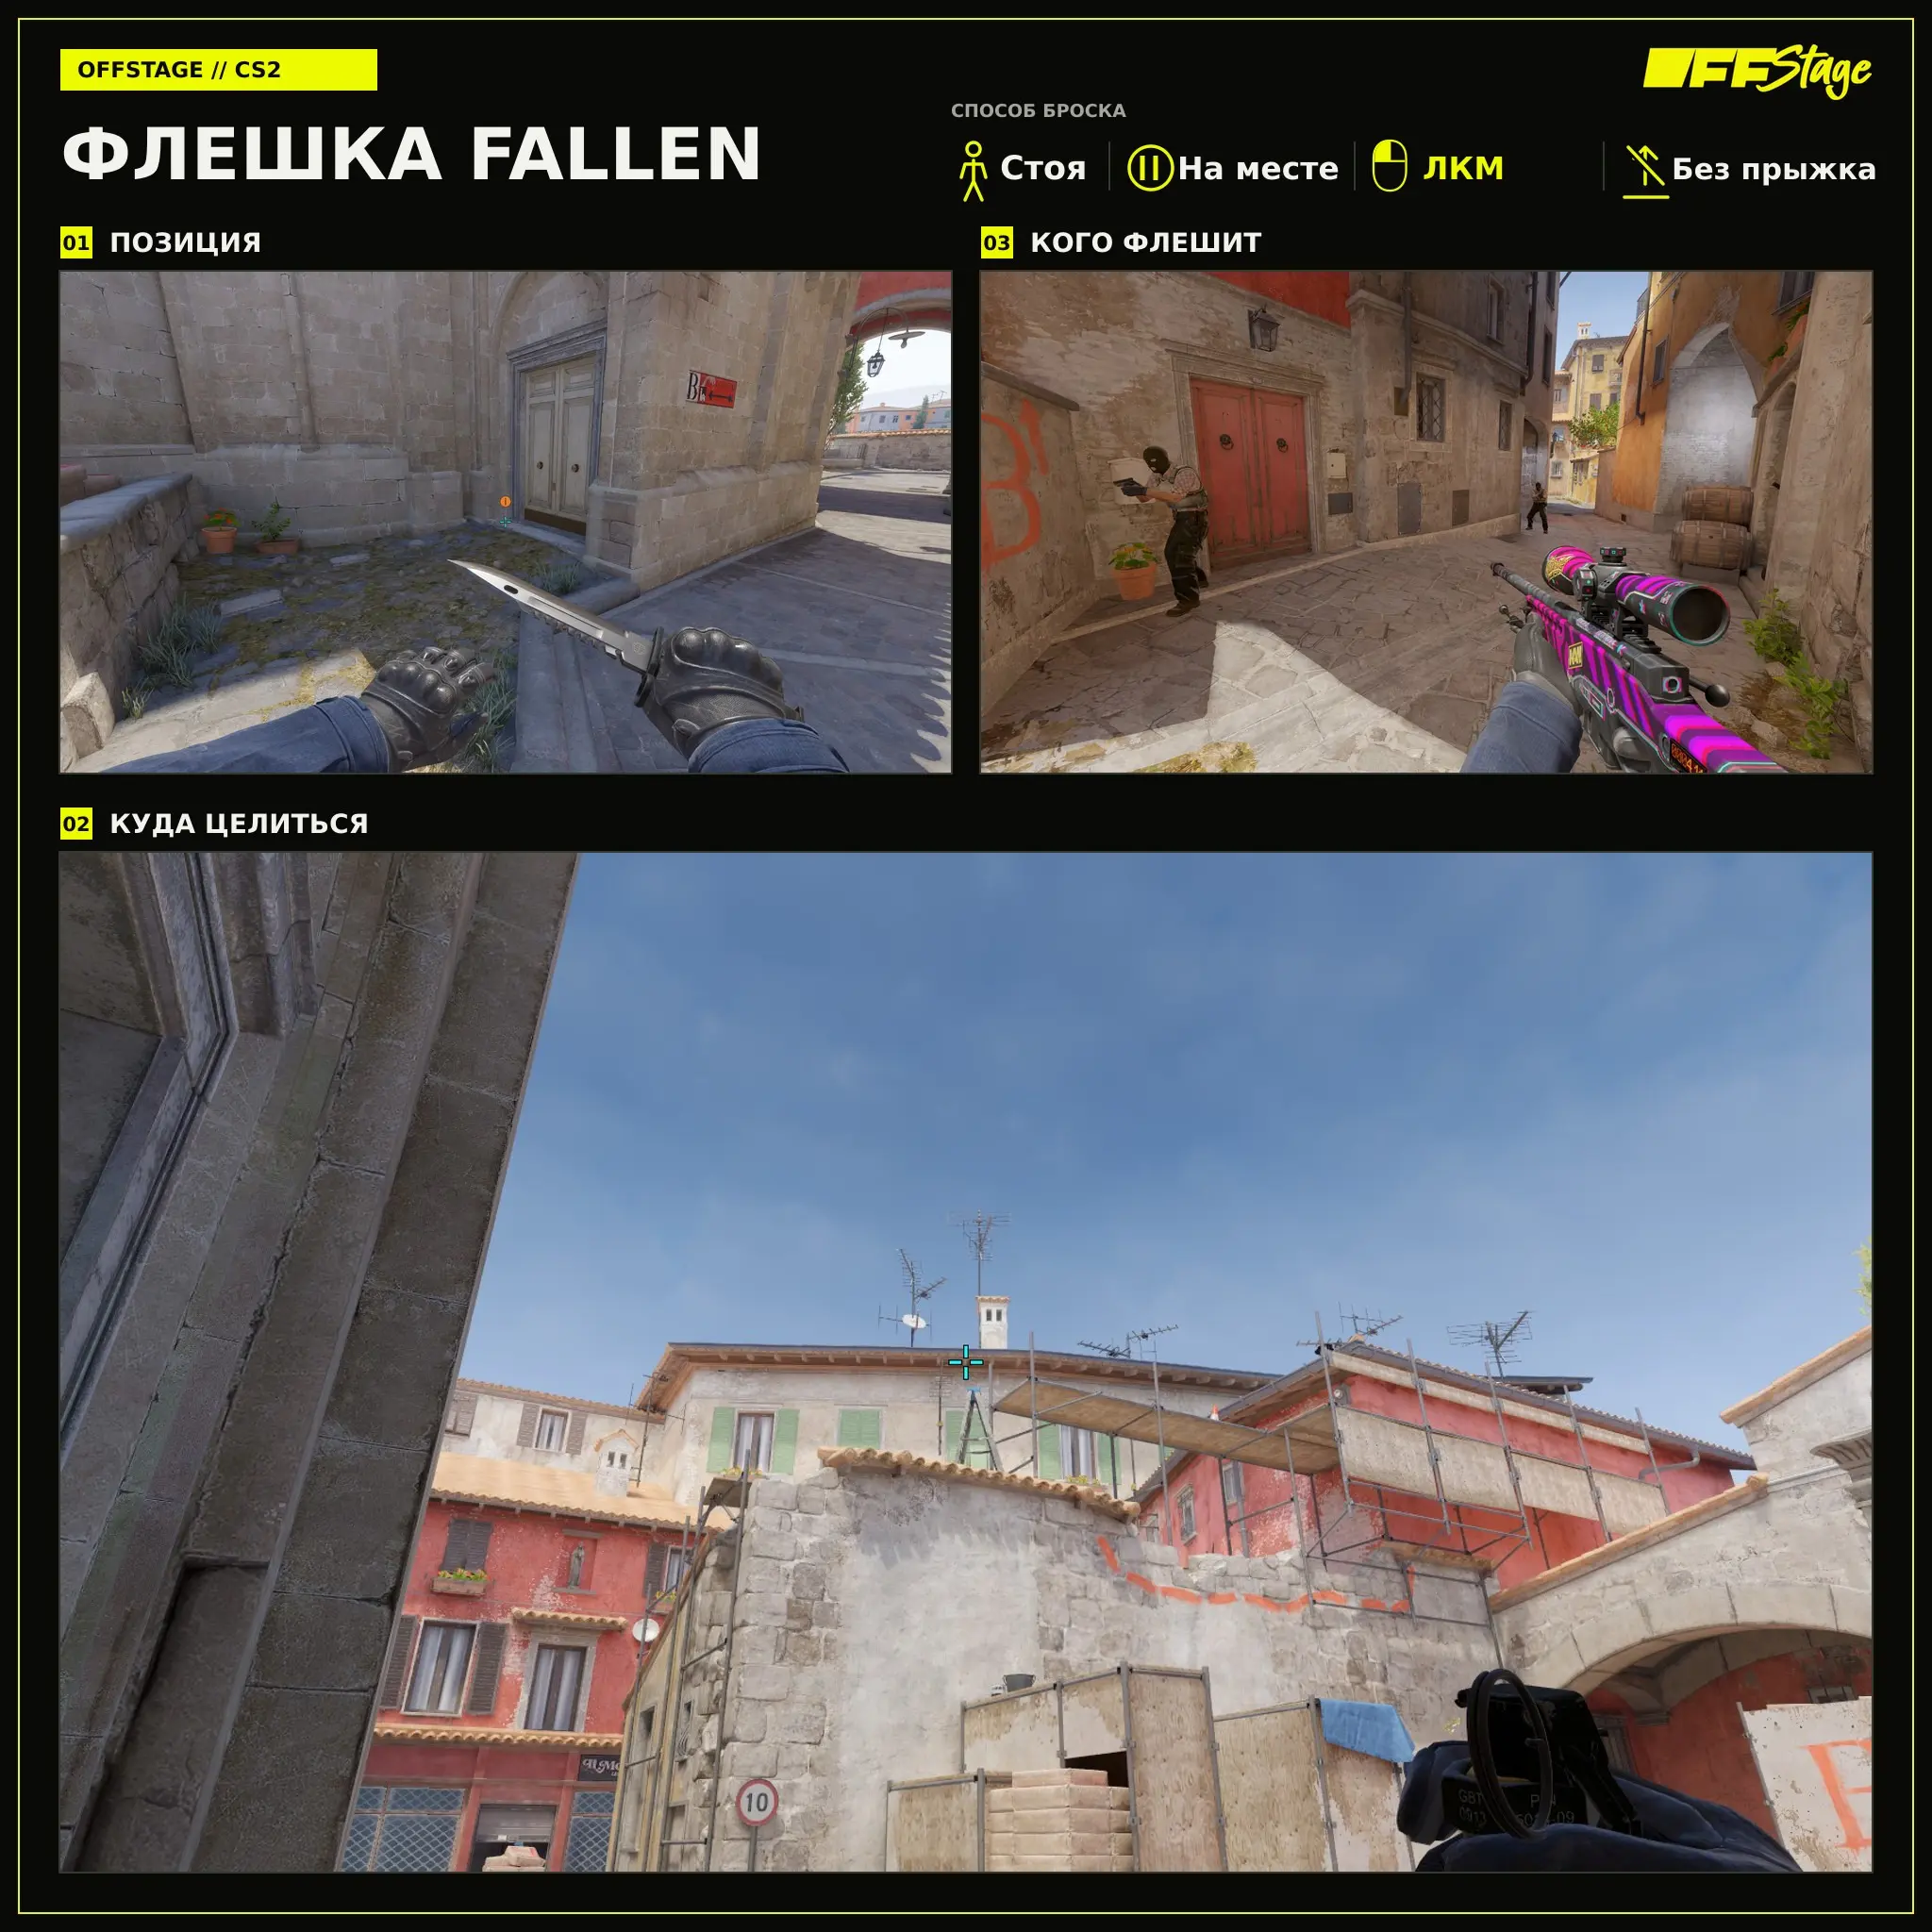
FalleN’s Flashbang
Gabriel “FalleN” Toledo’s variation helps the support player throw a quick flashbang from a safe position. Stand as shown in the first frame, aim at the designated landmark, and throw the grenade with a left-click without jumping.
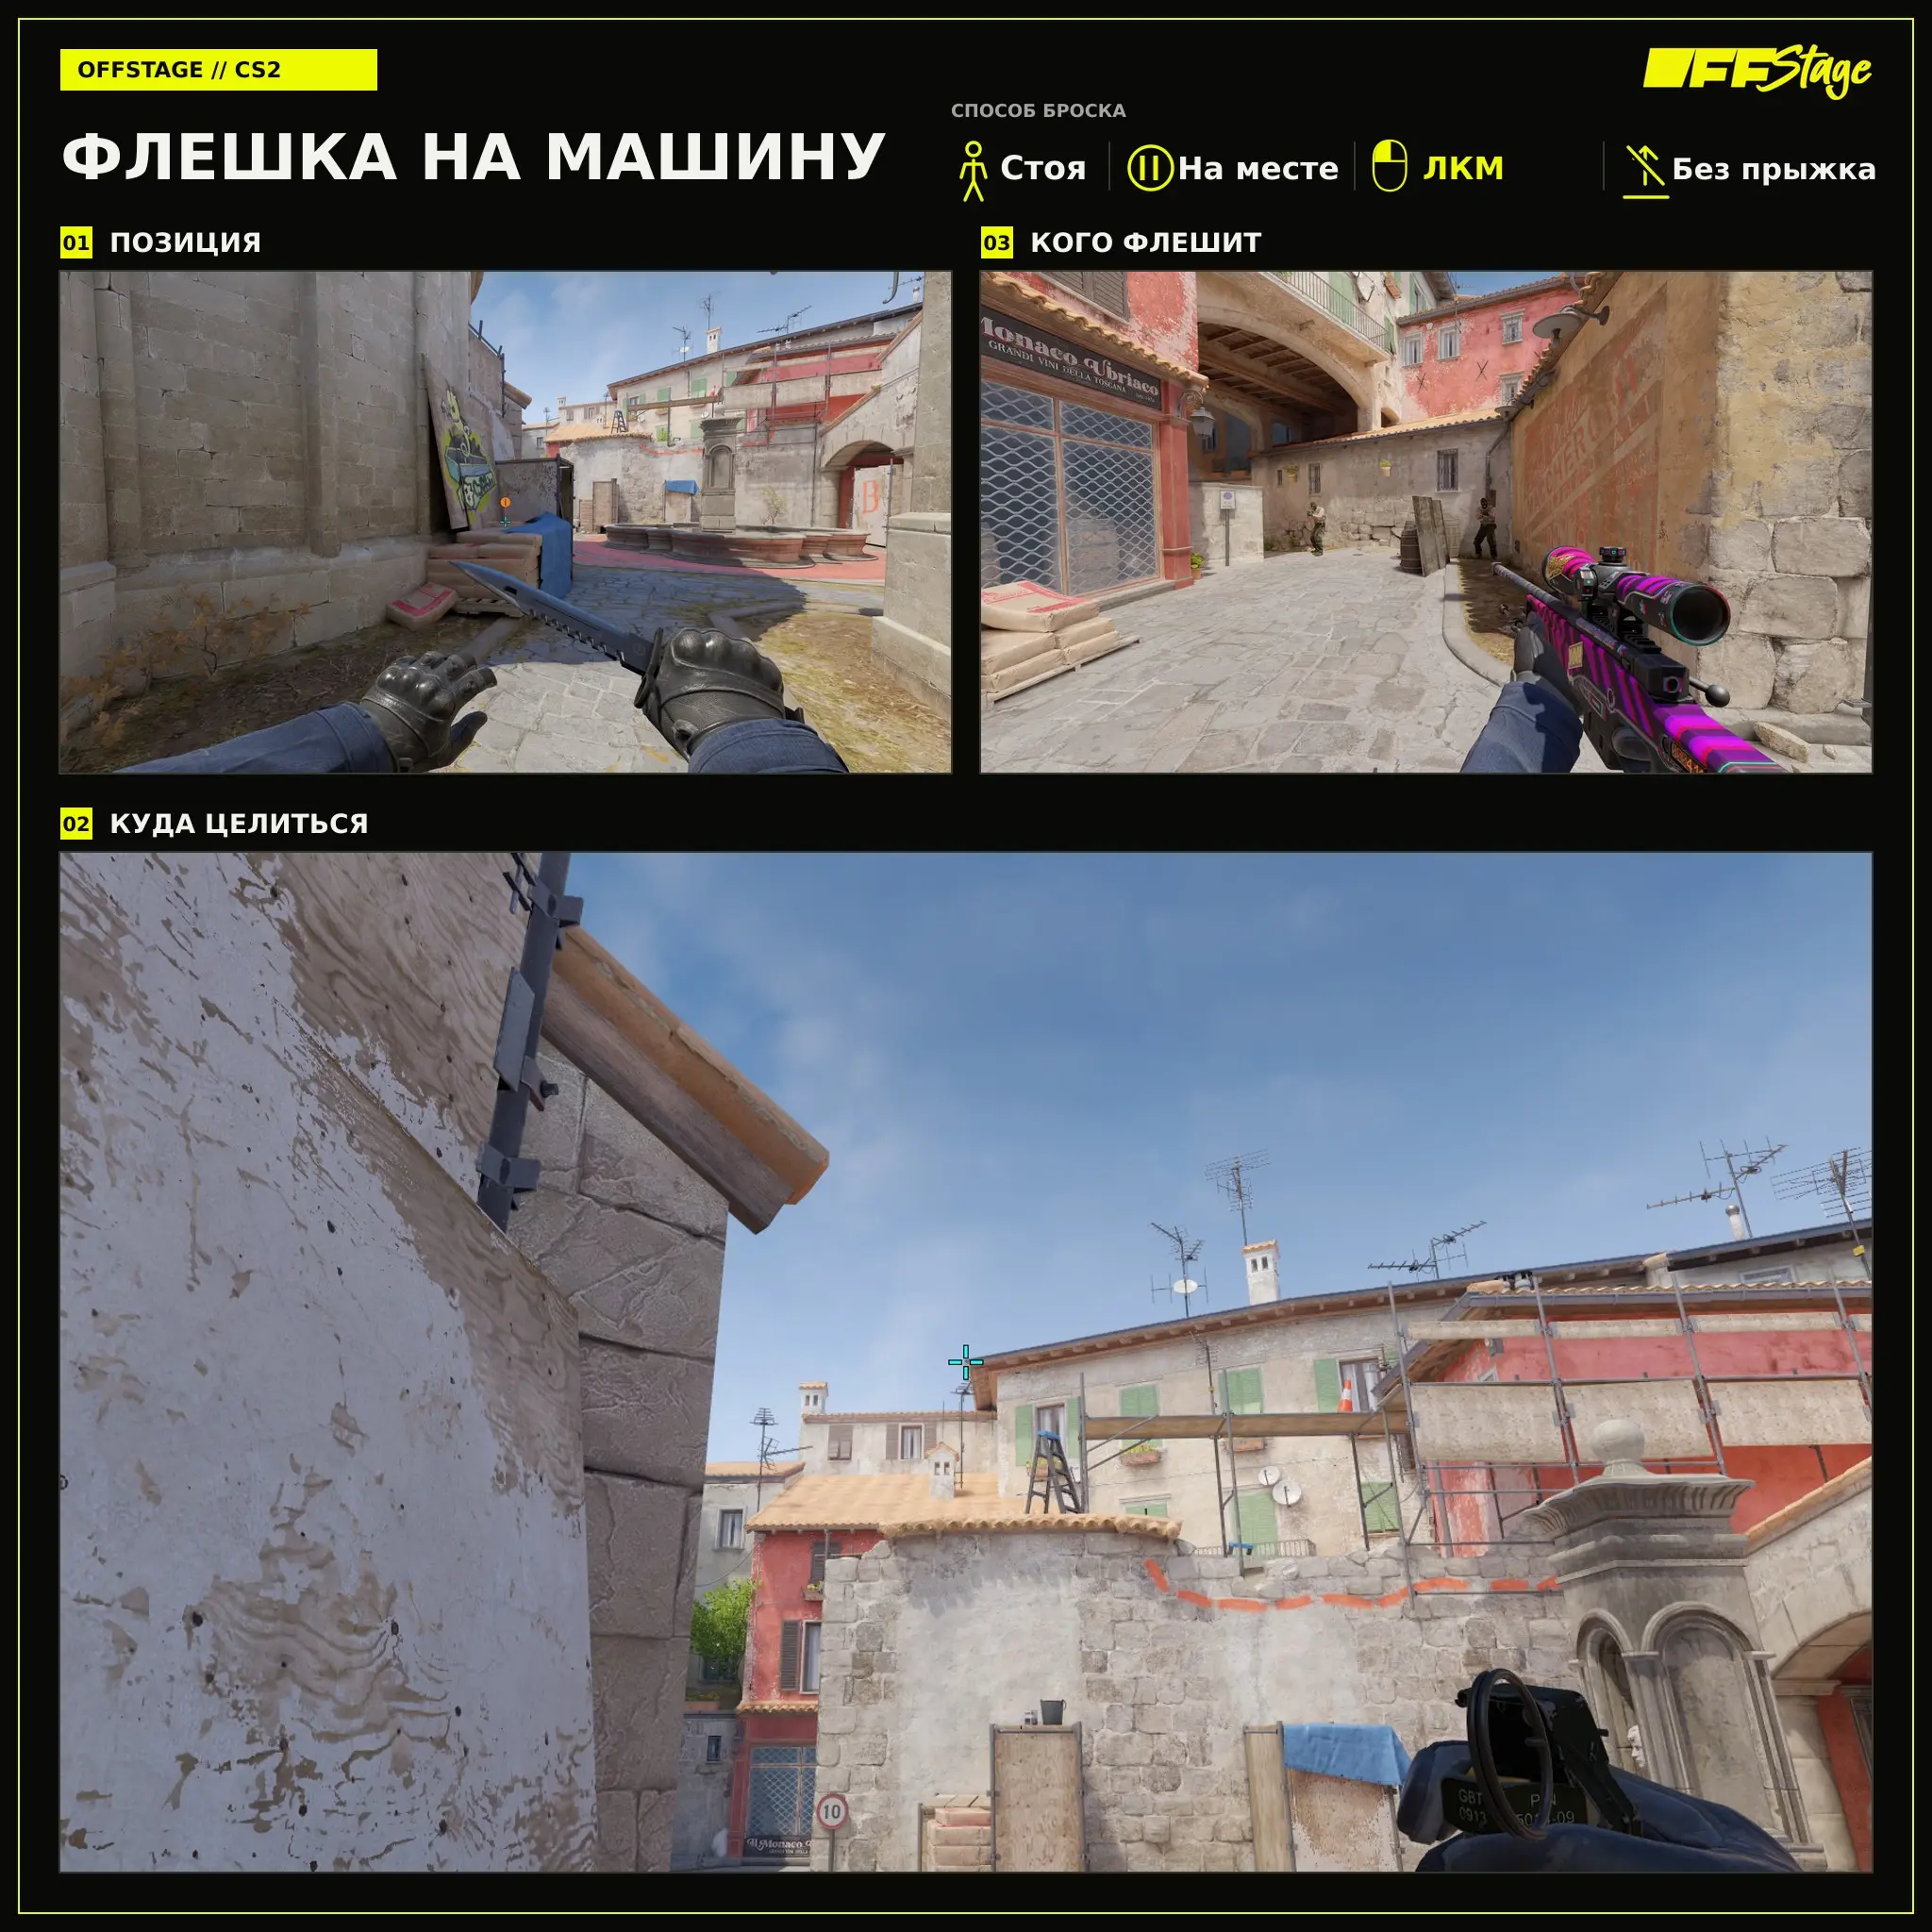
Flashbang for Retaking the Car
The flashbang for retaking a vehicle helps reclaim the “banana” when attackers have already secured the area. Stand as shown in the first frame, aim at the indicated landmark, and throw the flashbang with a left-click without jumping.
What to Learn First
On the attack, start by learning the flashbang at Site B and one variation at Site A. On defense, choose a grenade based on your position: the banana, the ups, or the long. Timing is especially important on Inferno. If the grenade explodes too early, the opponent will have time to re-aim, and if it’s too late, your teammate will walk right into your own flashbang.
Frequently Asked Questions (FAQ)
Для атаки полезнее всего граната в сайт B и флешка на A. За КТ начните с банана и позиции, которую обычно держите.
Для атаки полезнее всего граната в сайт B и флешка на A. За КТ начните с банана и позиции, которую обычно держите.
Она помогает КТ вернуть банан и вынуждает атакующего отвернуться перед повторной дуэлью.