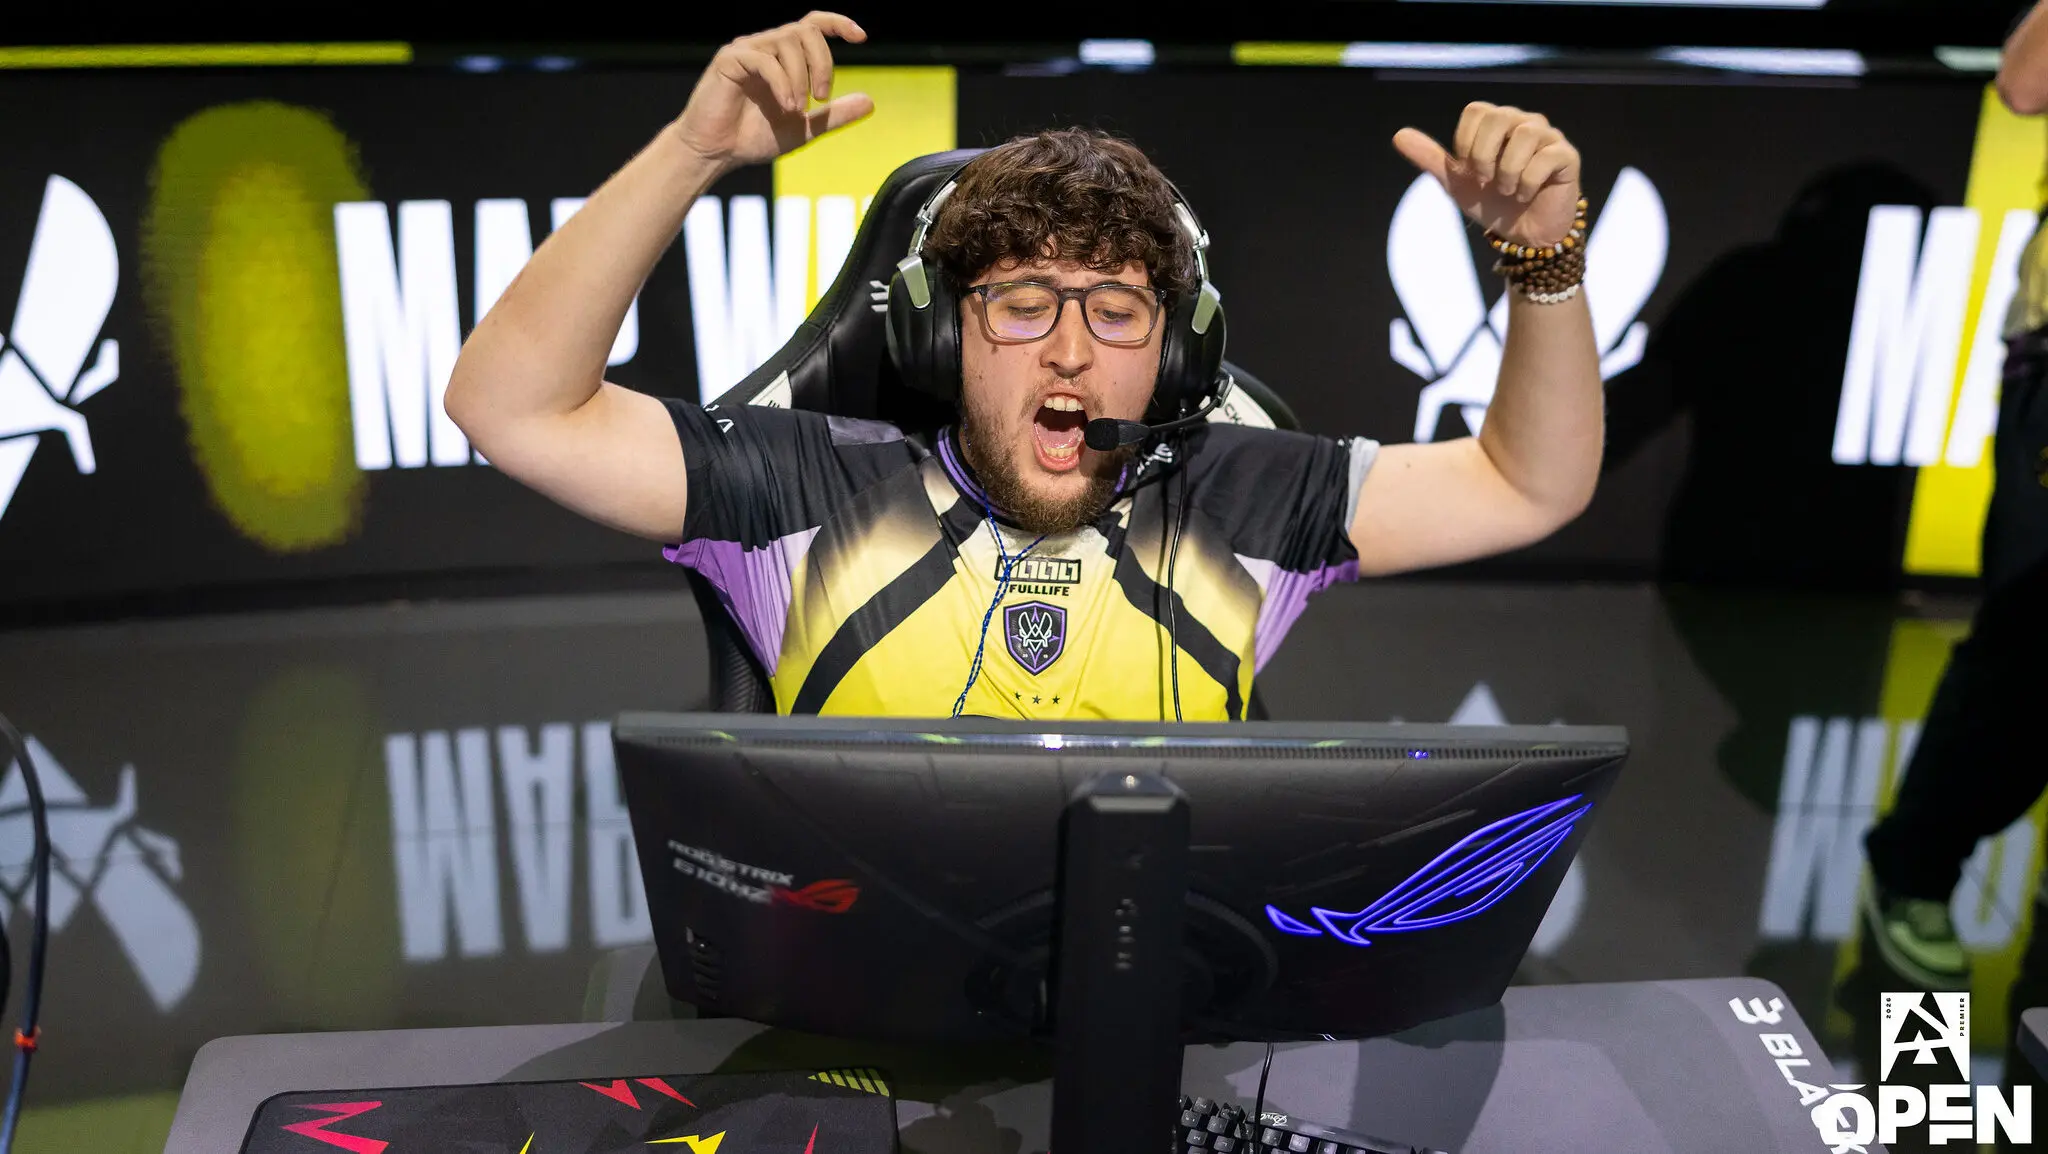
Flashbang placement on the Mirage map in CS2


On Mirage, flashbangs help secure mid, the connector, B, and positions around the window. This guide compiles ten setups for both attack and defense. Each diagram includes the throw point, a zoomed-in shot with the crosshair, and a view of the player under the flashbang. Using these three screenshots, you can quickly practice throwing the flashbang on the practice server. Both the player throwing the flashbang and the teammate positioned to receive it must know the placement. Without precise timing, the player will come out too early or won’t have time to take advantage of the flashbang’s effect.
Throw Patterns for Attacking
Offensive grenade throws help open up mid, the connector, the window, and B. Some grenades are thrown without a jump, so they’re easy to throw while taking up a position.
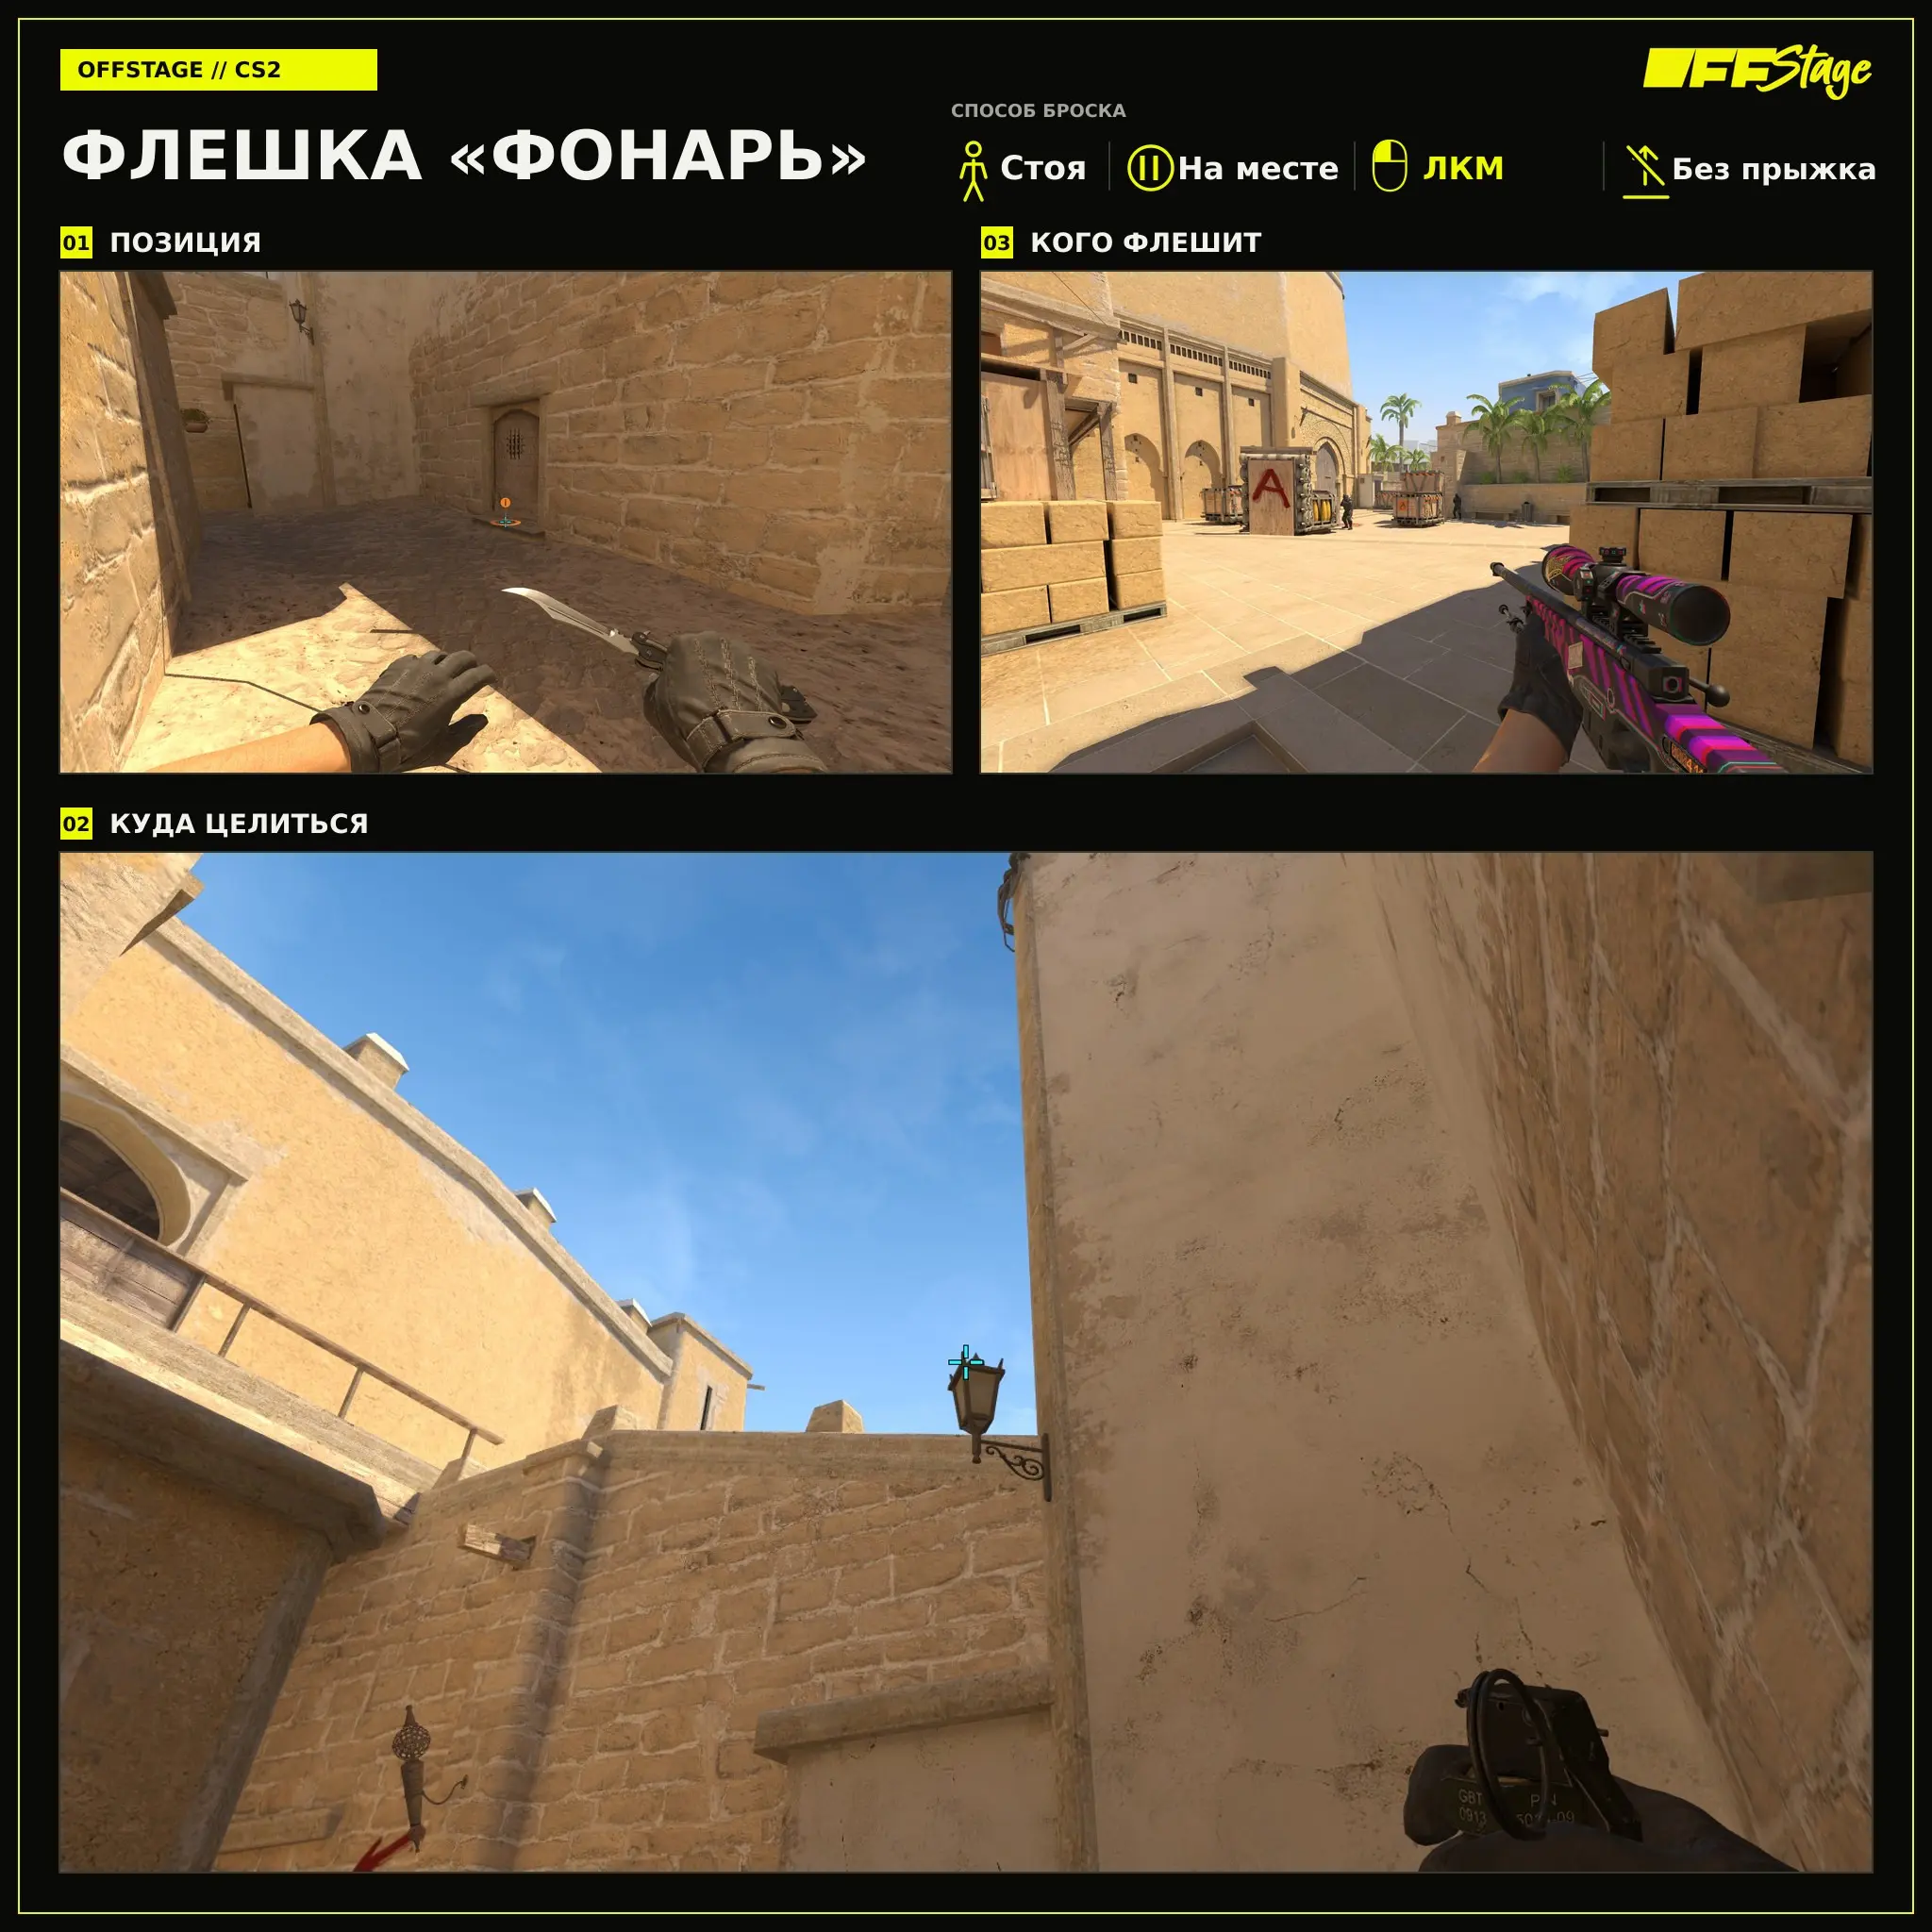
“Lantern” Flashbang
The “Lantern” flashbang helps the attacker initiate contact at A and check nearby positions. Stand as shown in the first frame, aim at the indicated landmark, and throw the grenade with a left-click without jumping.
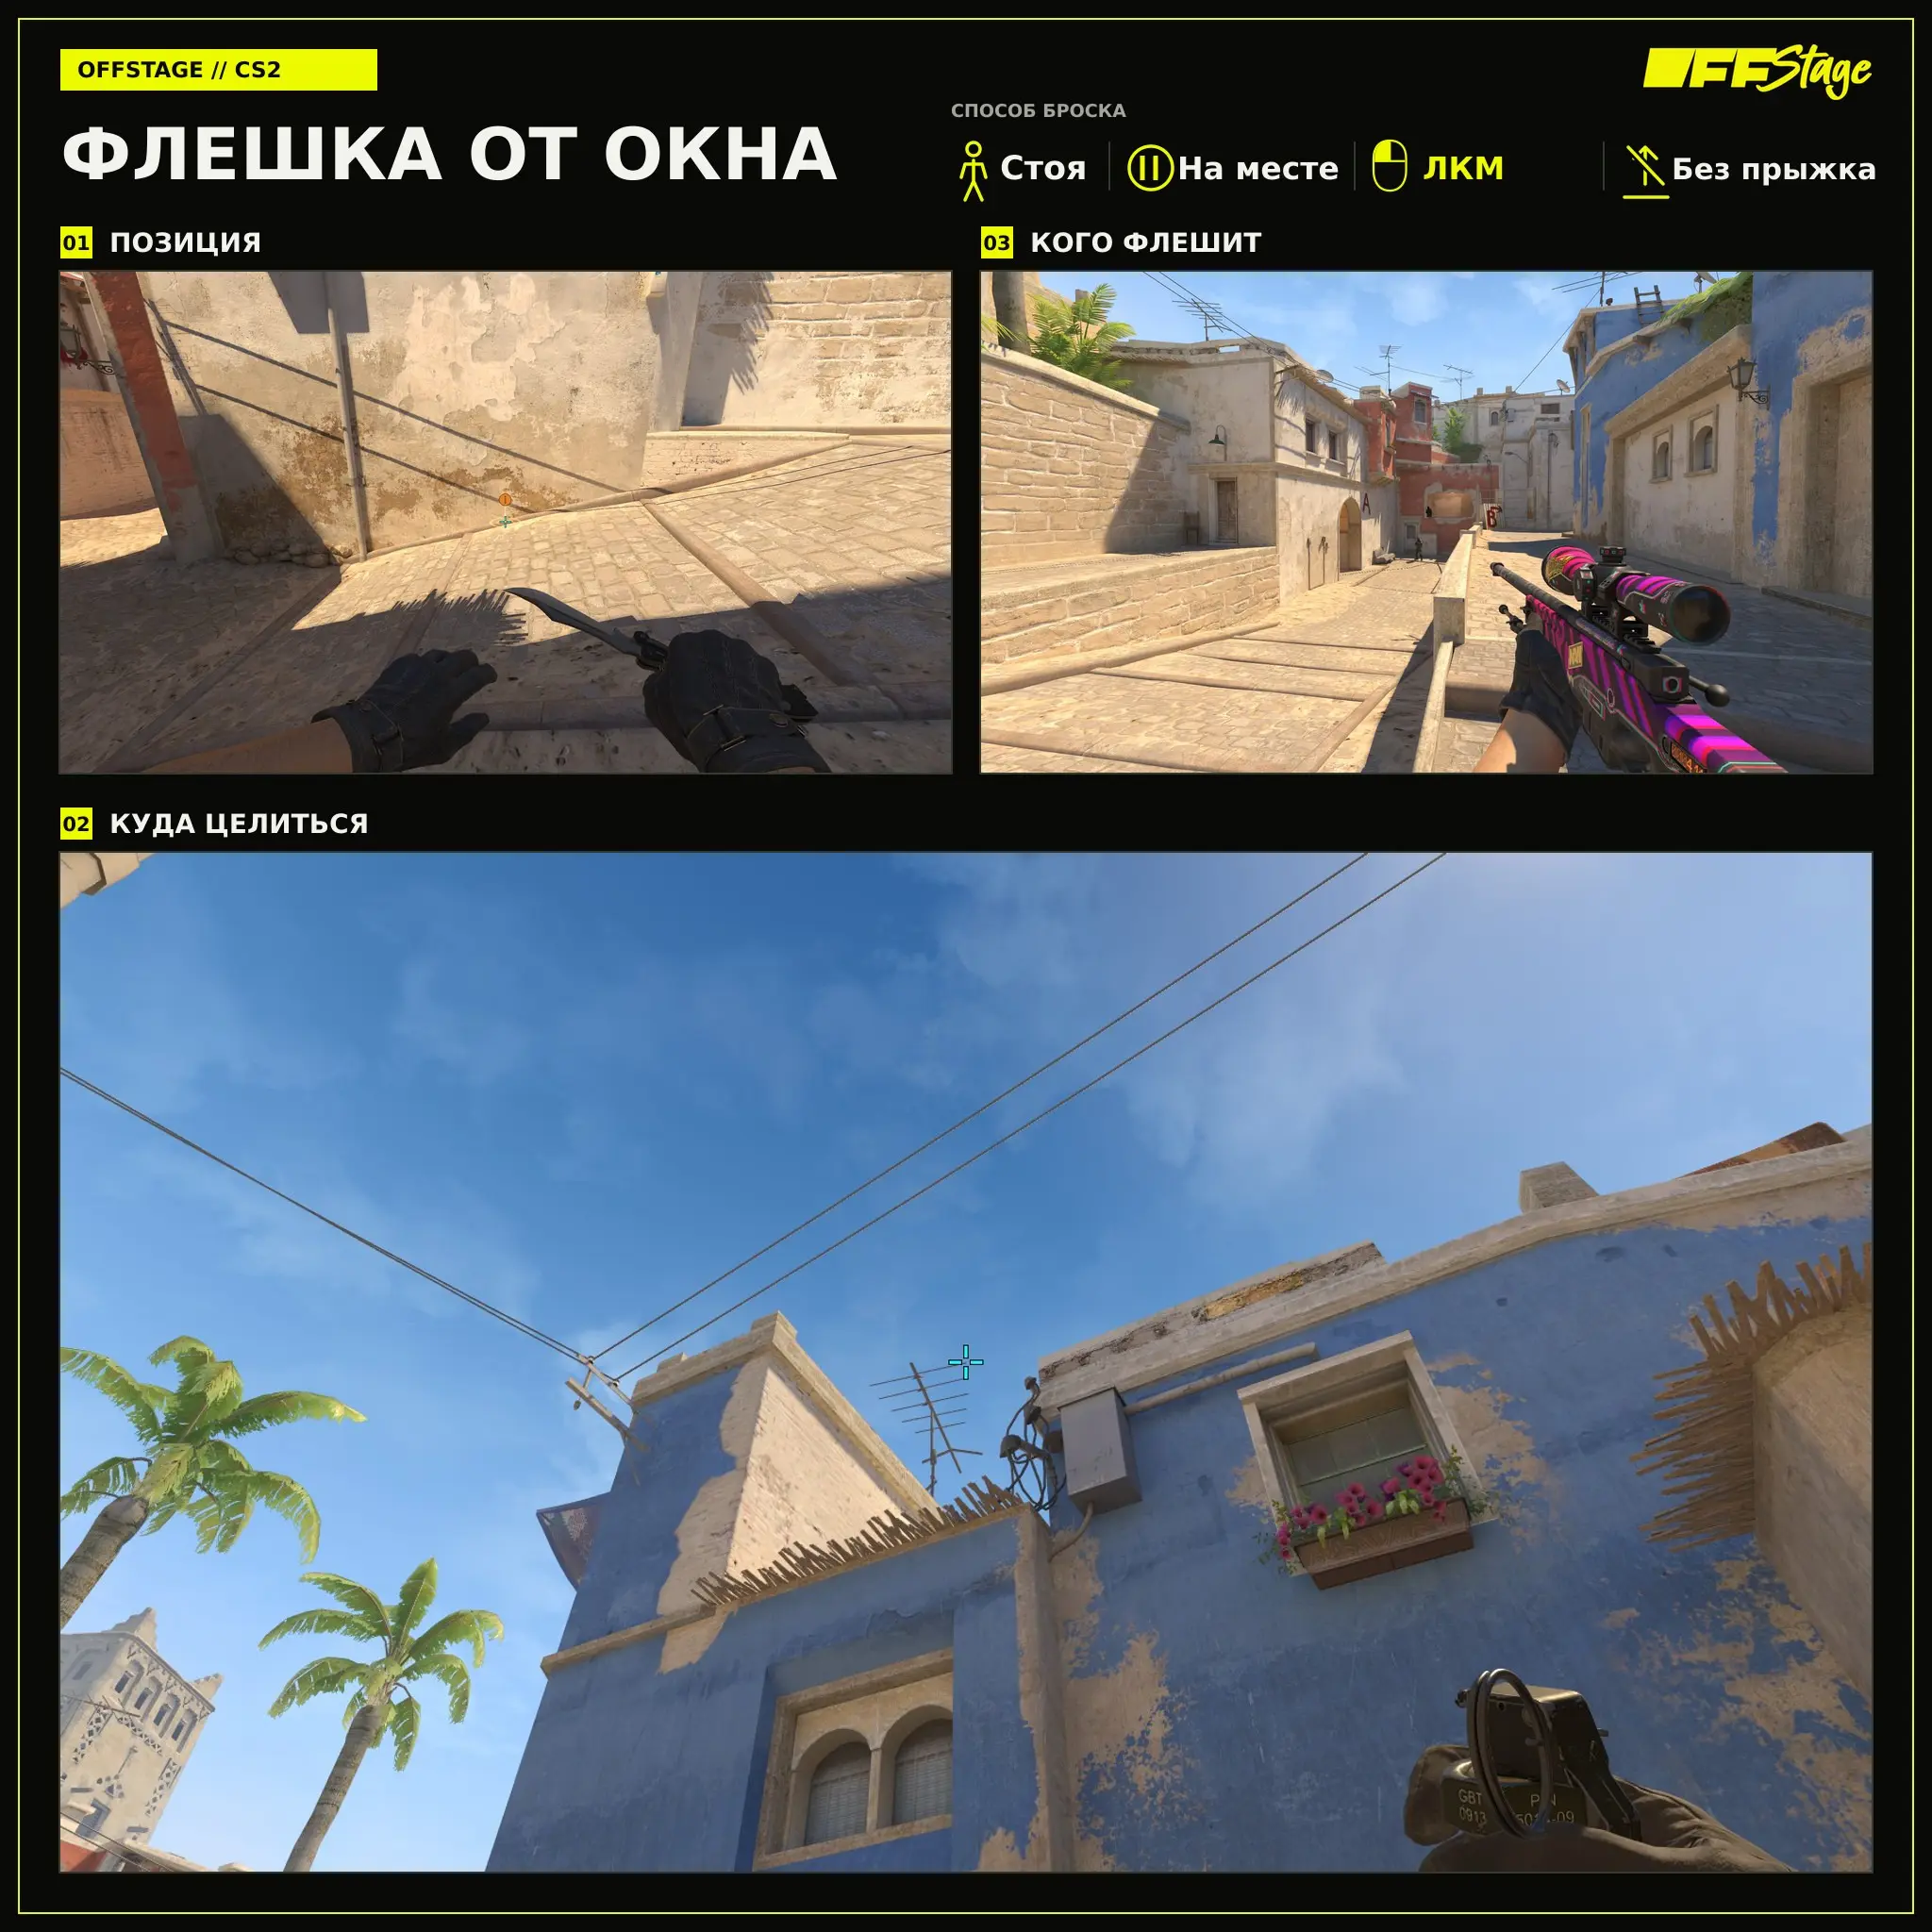
Flashbang from the Window
The “From the Window” variant is useful for a teammate who is ready to continue advancing down the mid lane. Stand as shown in the first frame, aim at the indicated landmark, and throw the grenade with the left mouse button without jumping.
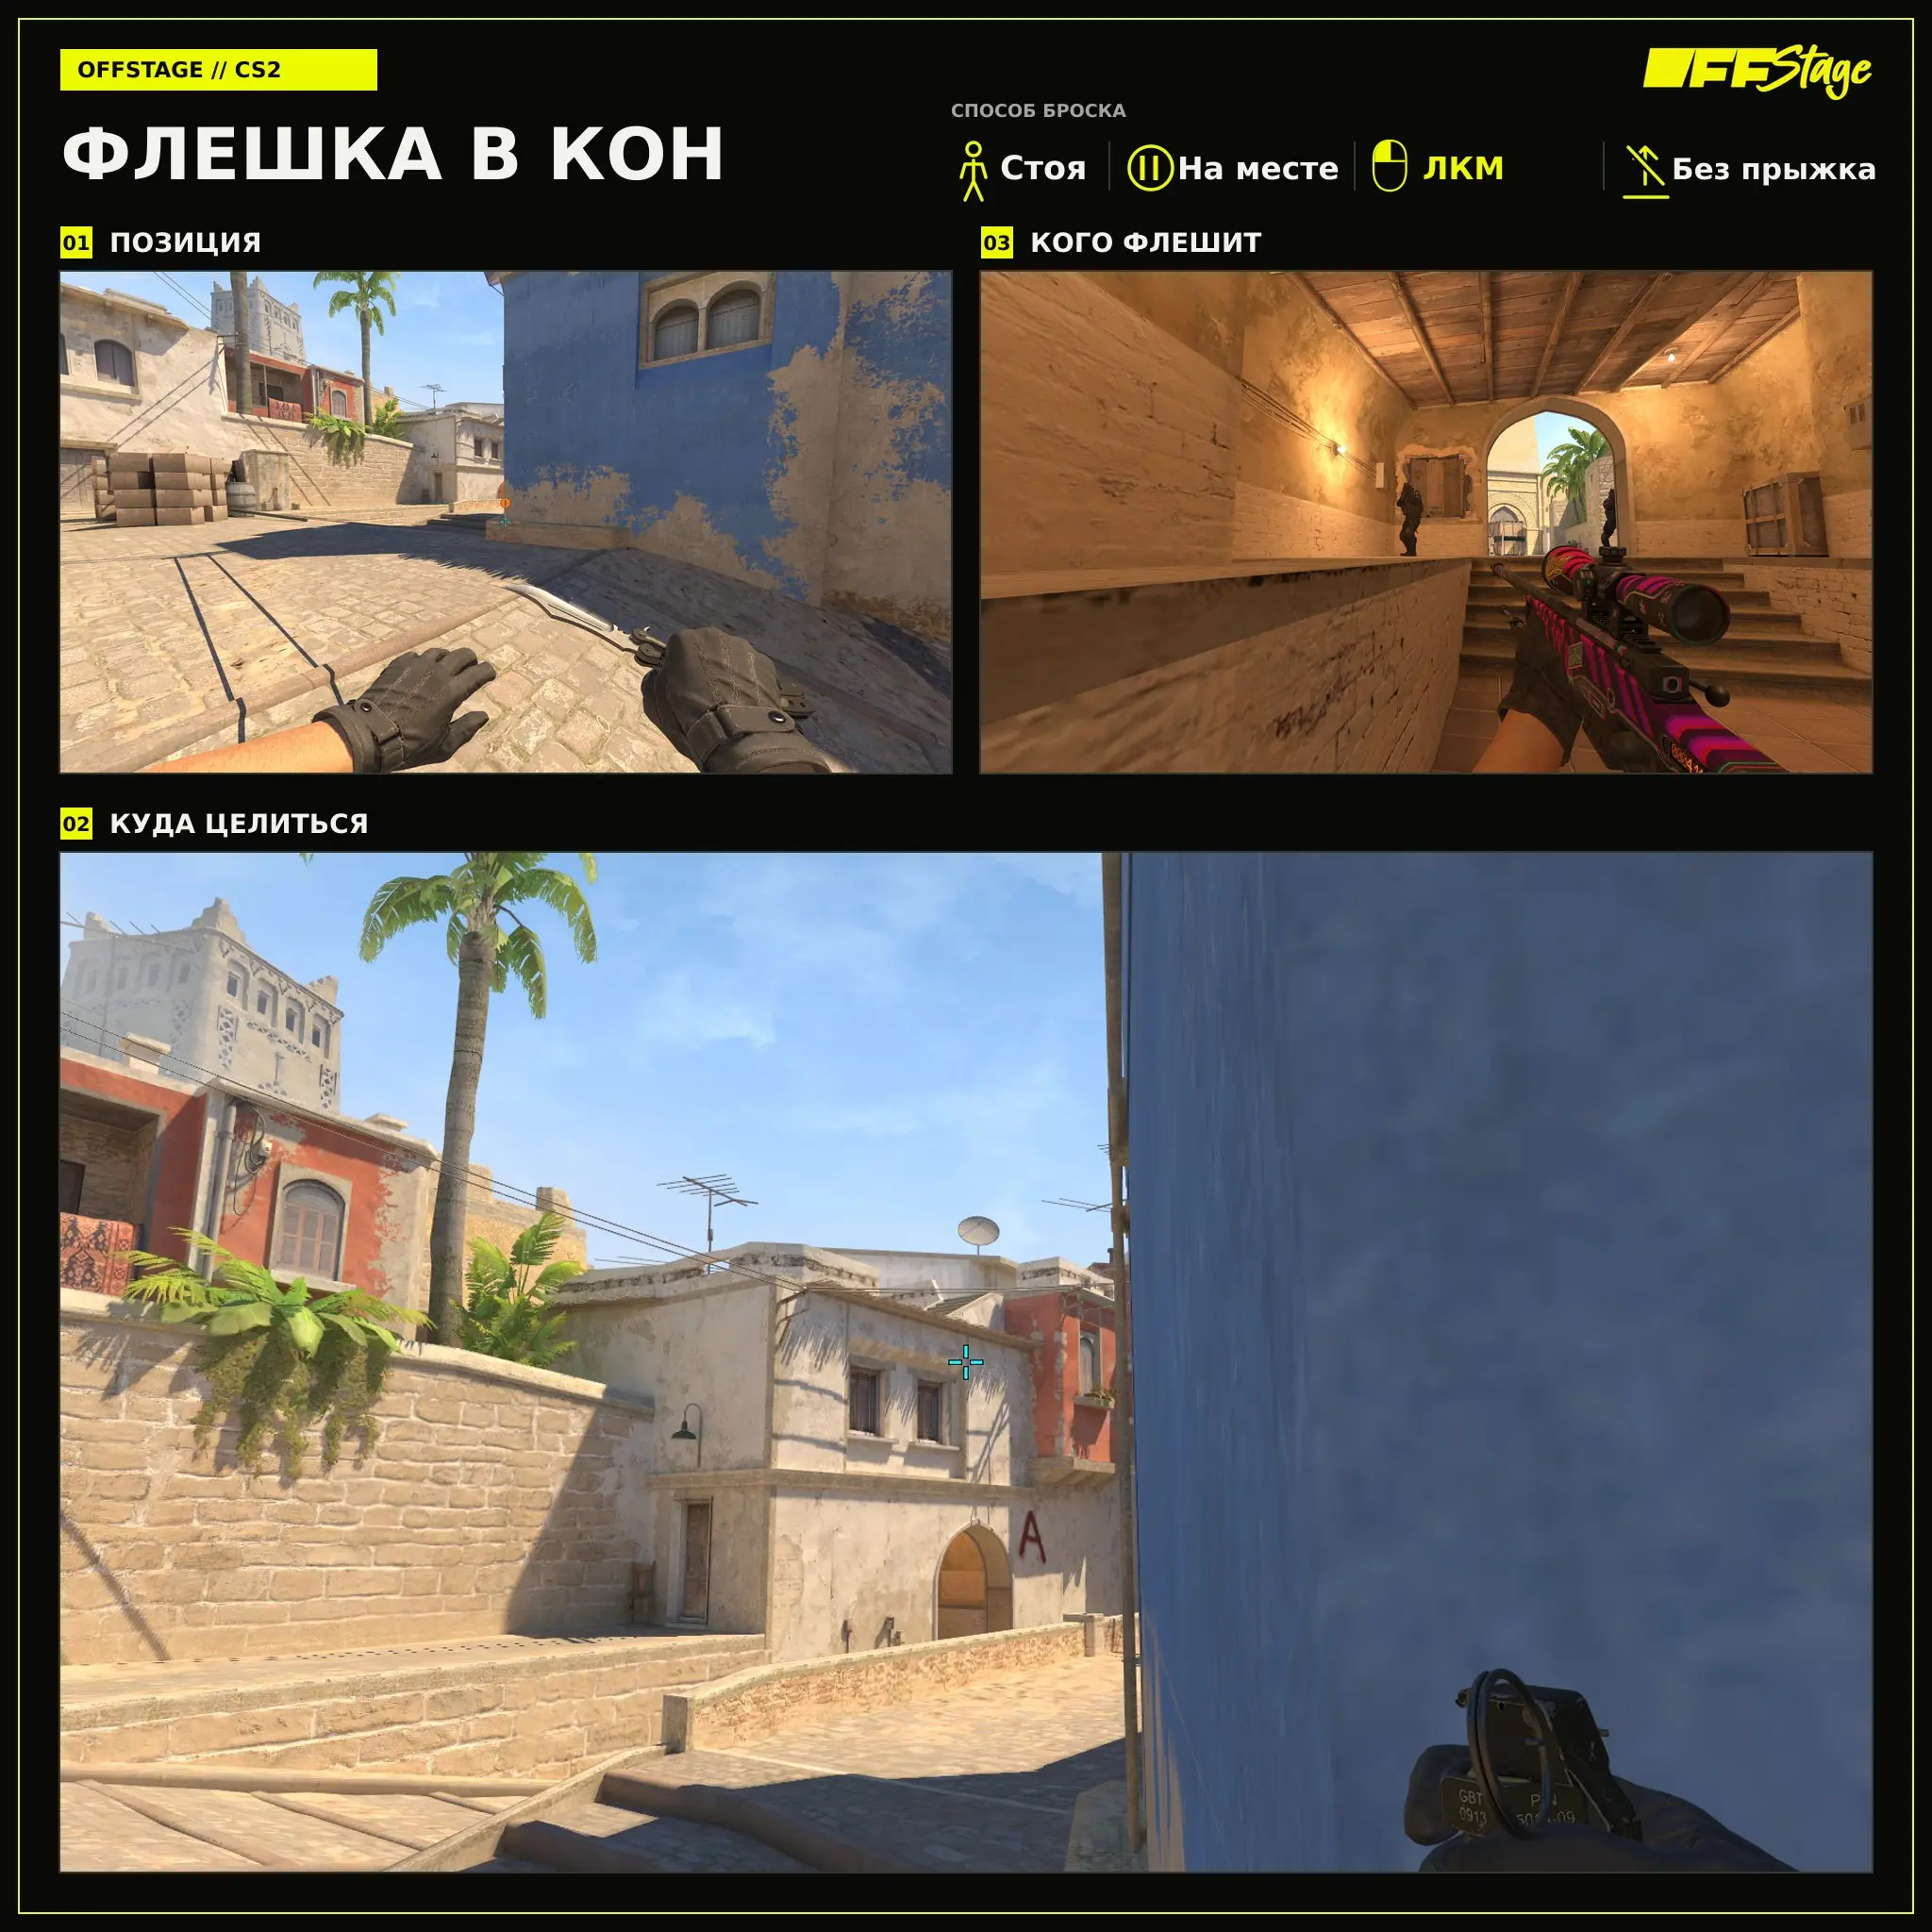
Flashbang into the corner
A flashbang into the corner disrupts the player holding the mid-A lane. Position yourself as shown in the first frame, aim at the indicated landmark, and throw the flashbang with a left-click without jumping.
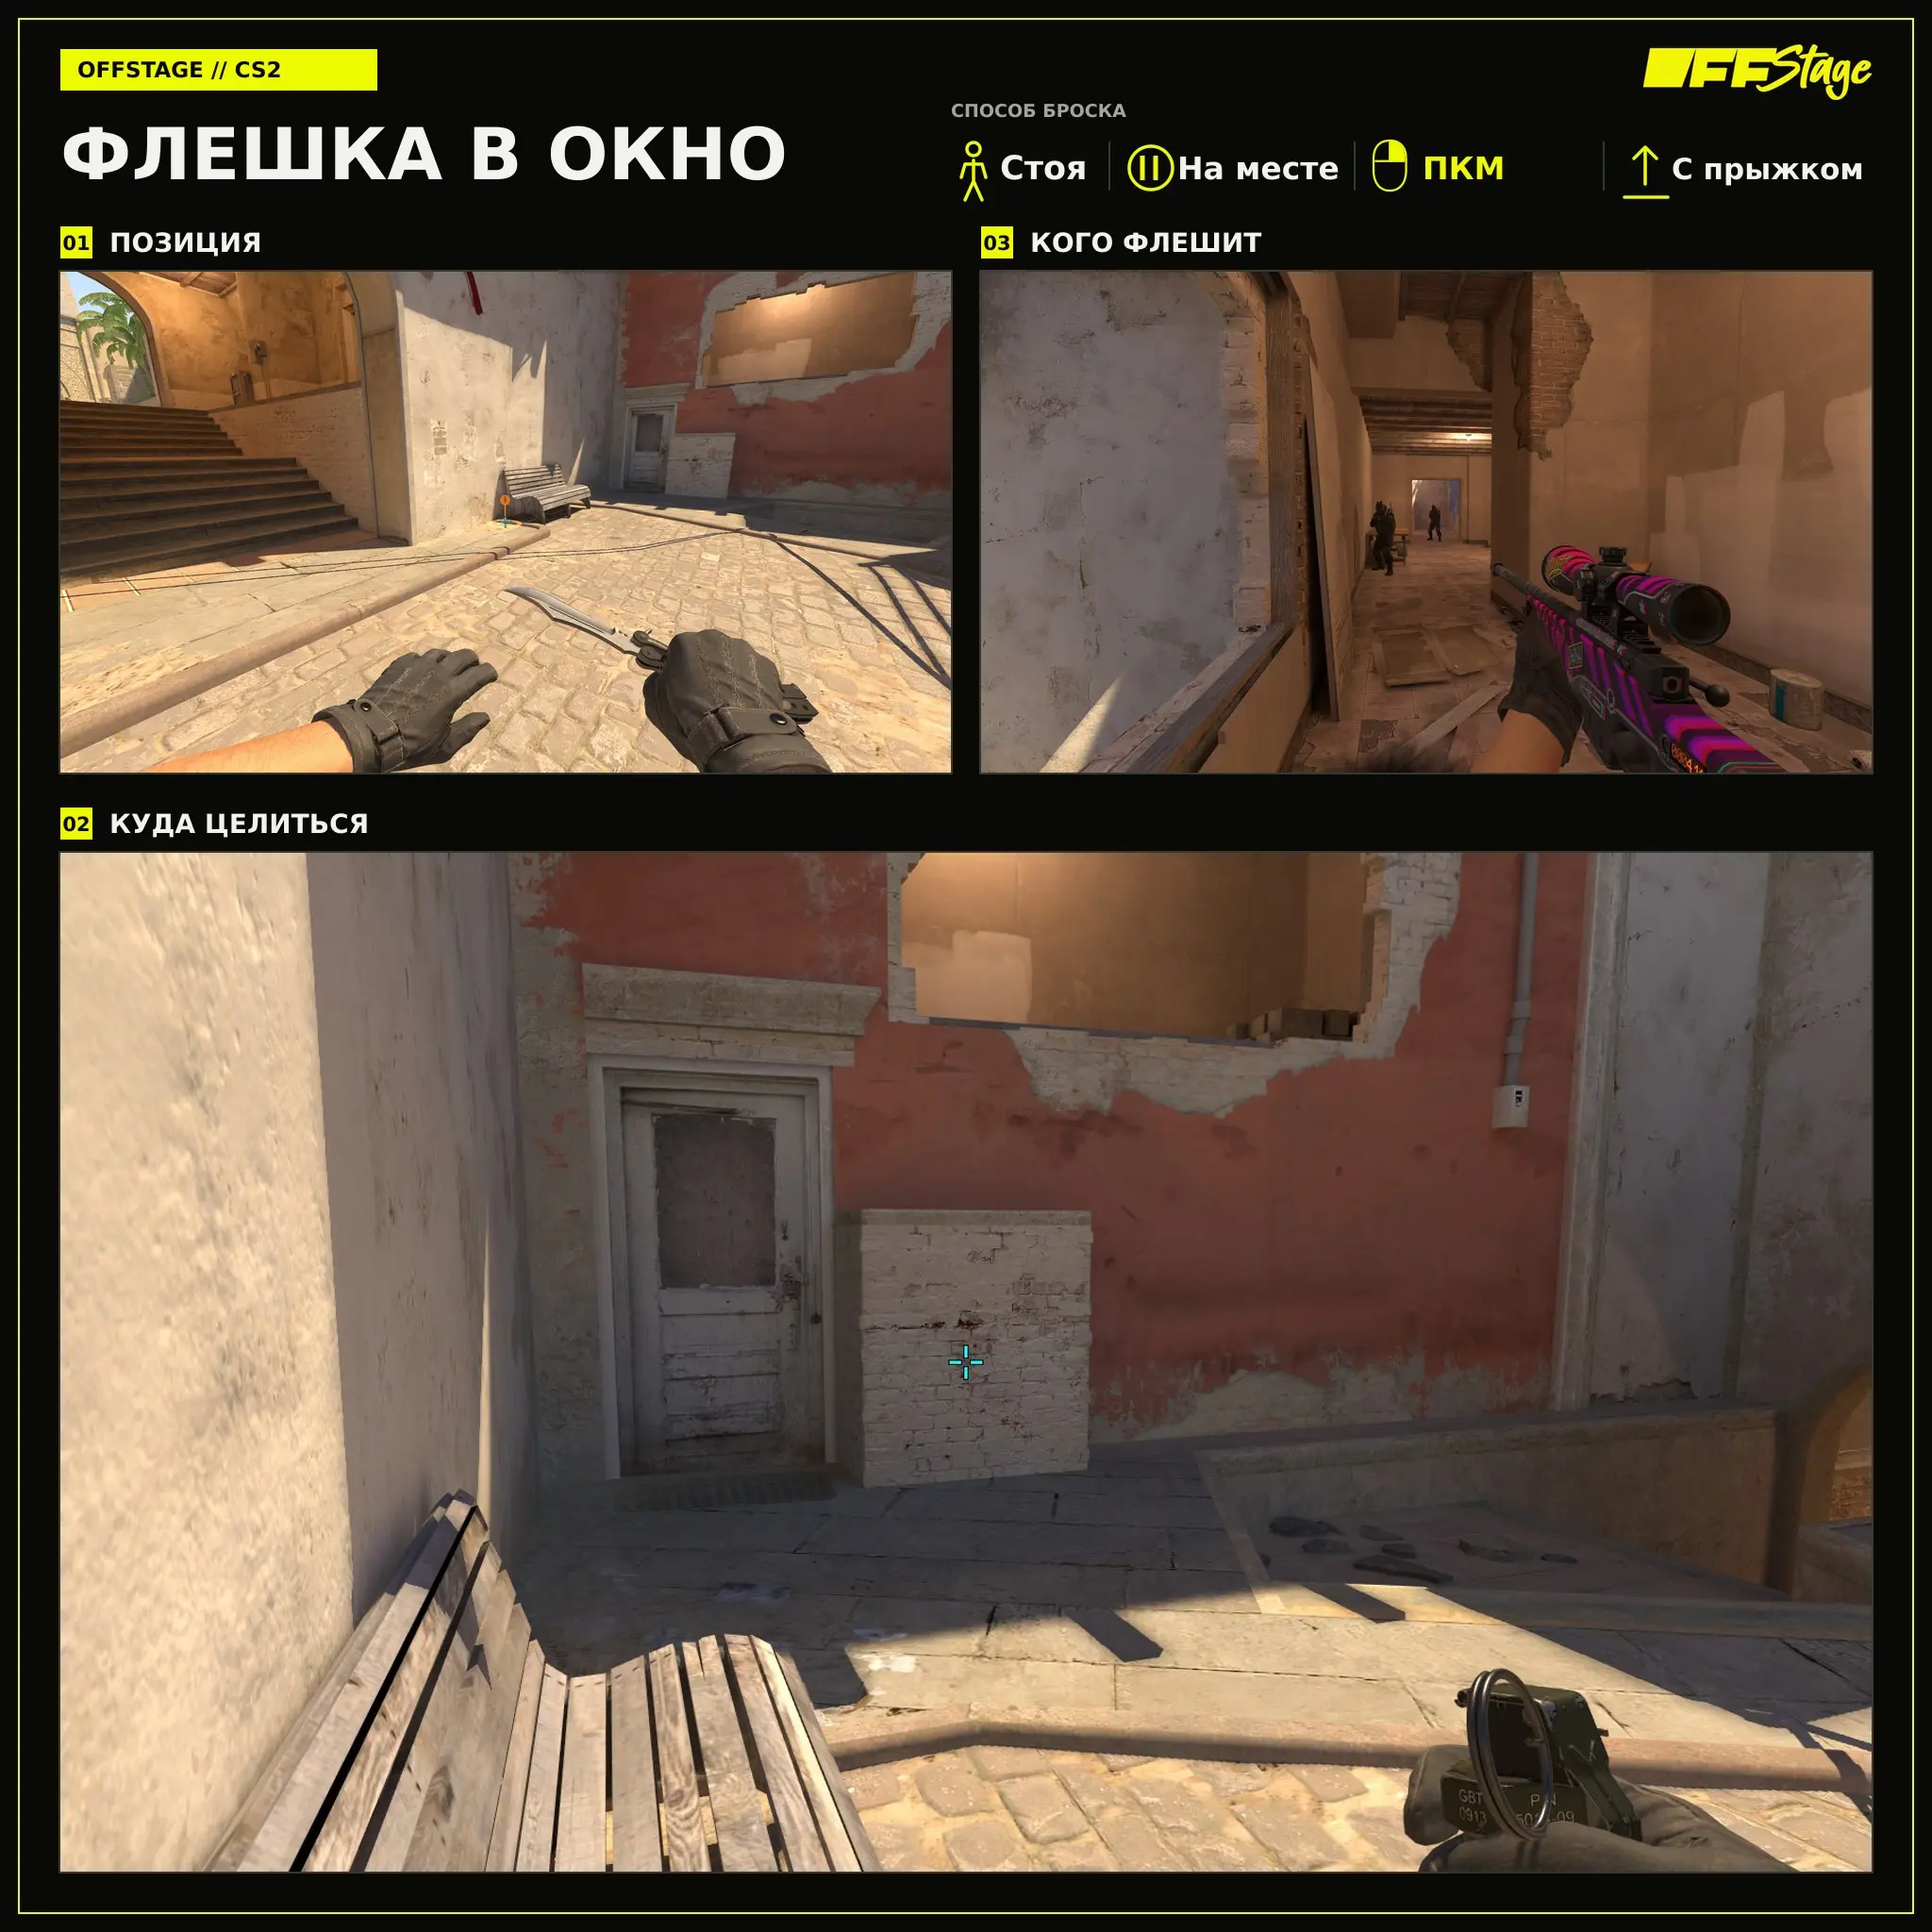
Flashbang into the window
The flashbang into the window is thrown by right-clicking with a jump throw and explodes inside the desired area. Stand as shown in the first frame, aim, and right-click + jump throw from a standing position.
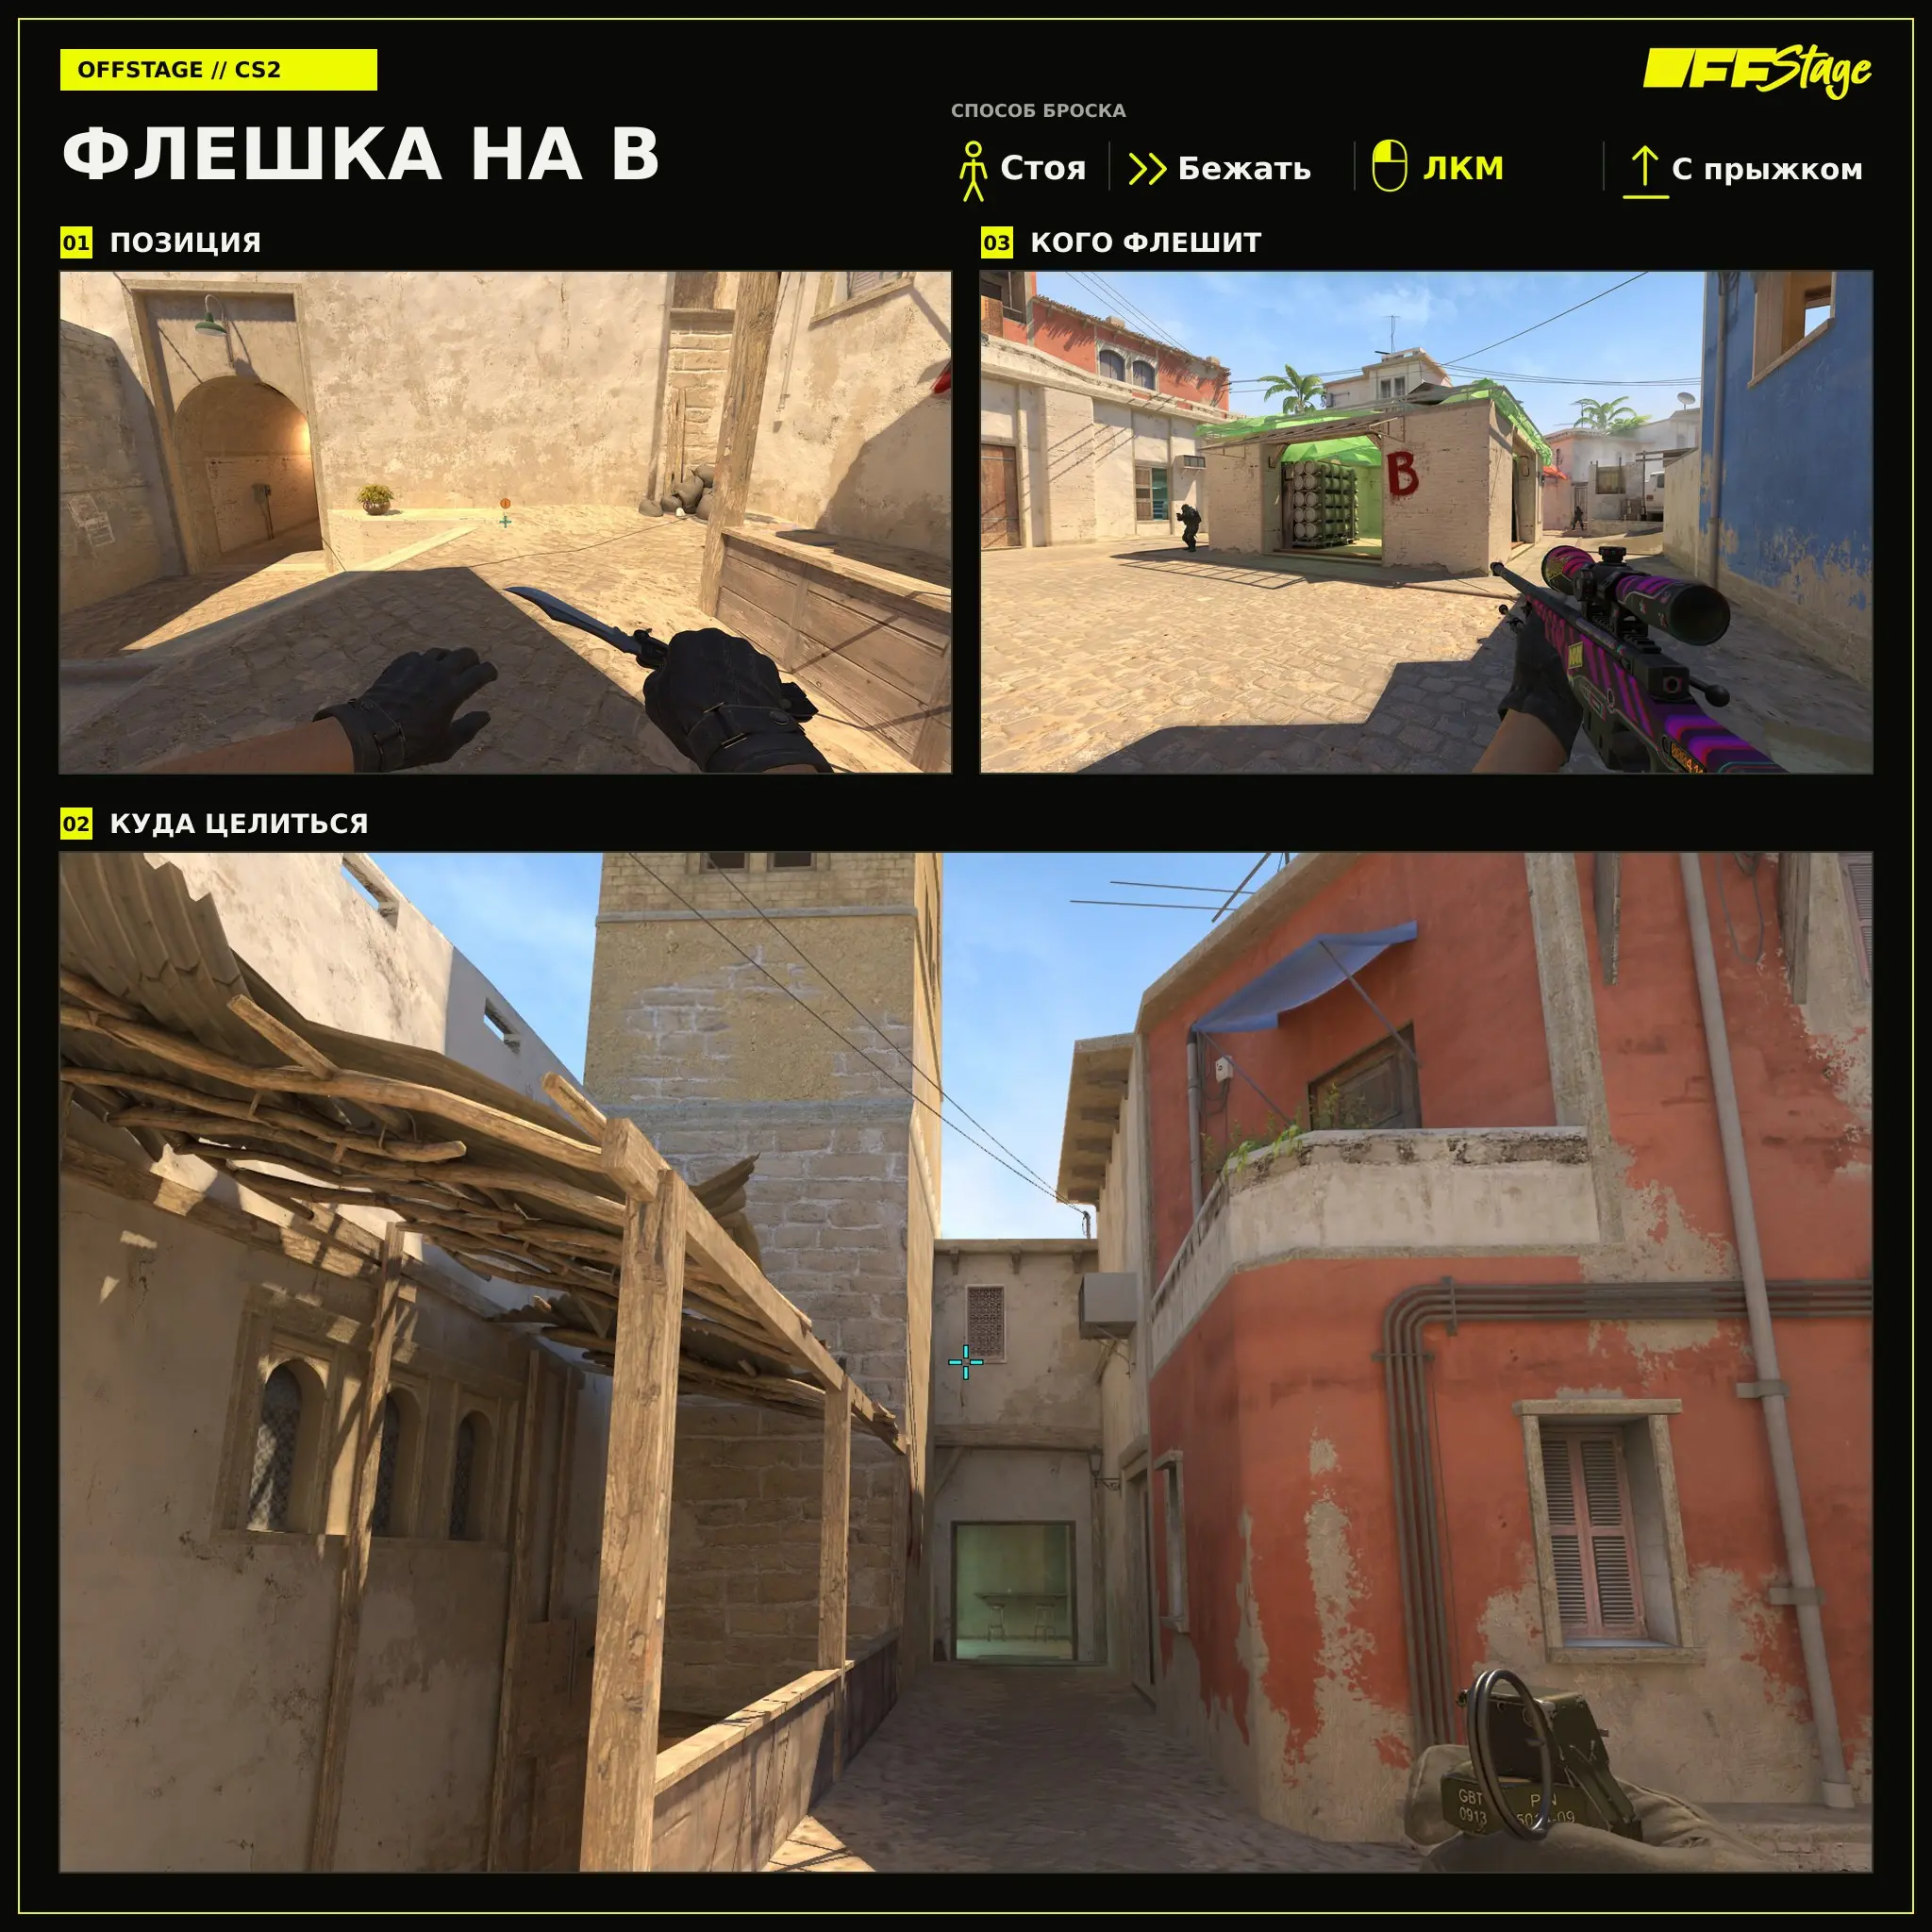
Flashbang at B
A running flashbang to B helps the first player exit the apartment before the grenade explodes. Aim at the landmark, start your run, and while running, press LMB + jumpthrow.
Throws for Defense
On CT, flashbangs are needed to support the A-site defender, control the midlane, and counter the under. These grenades are especially useful for a follow-up push.
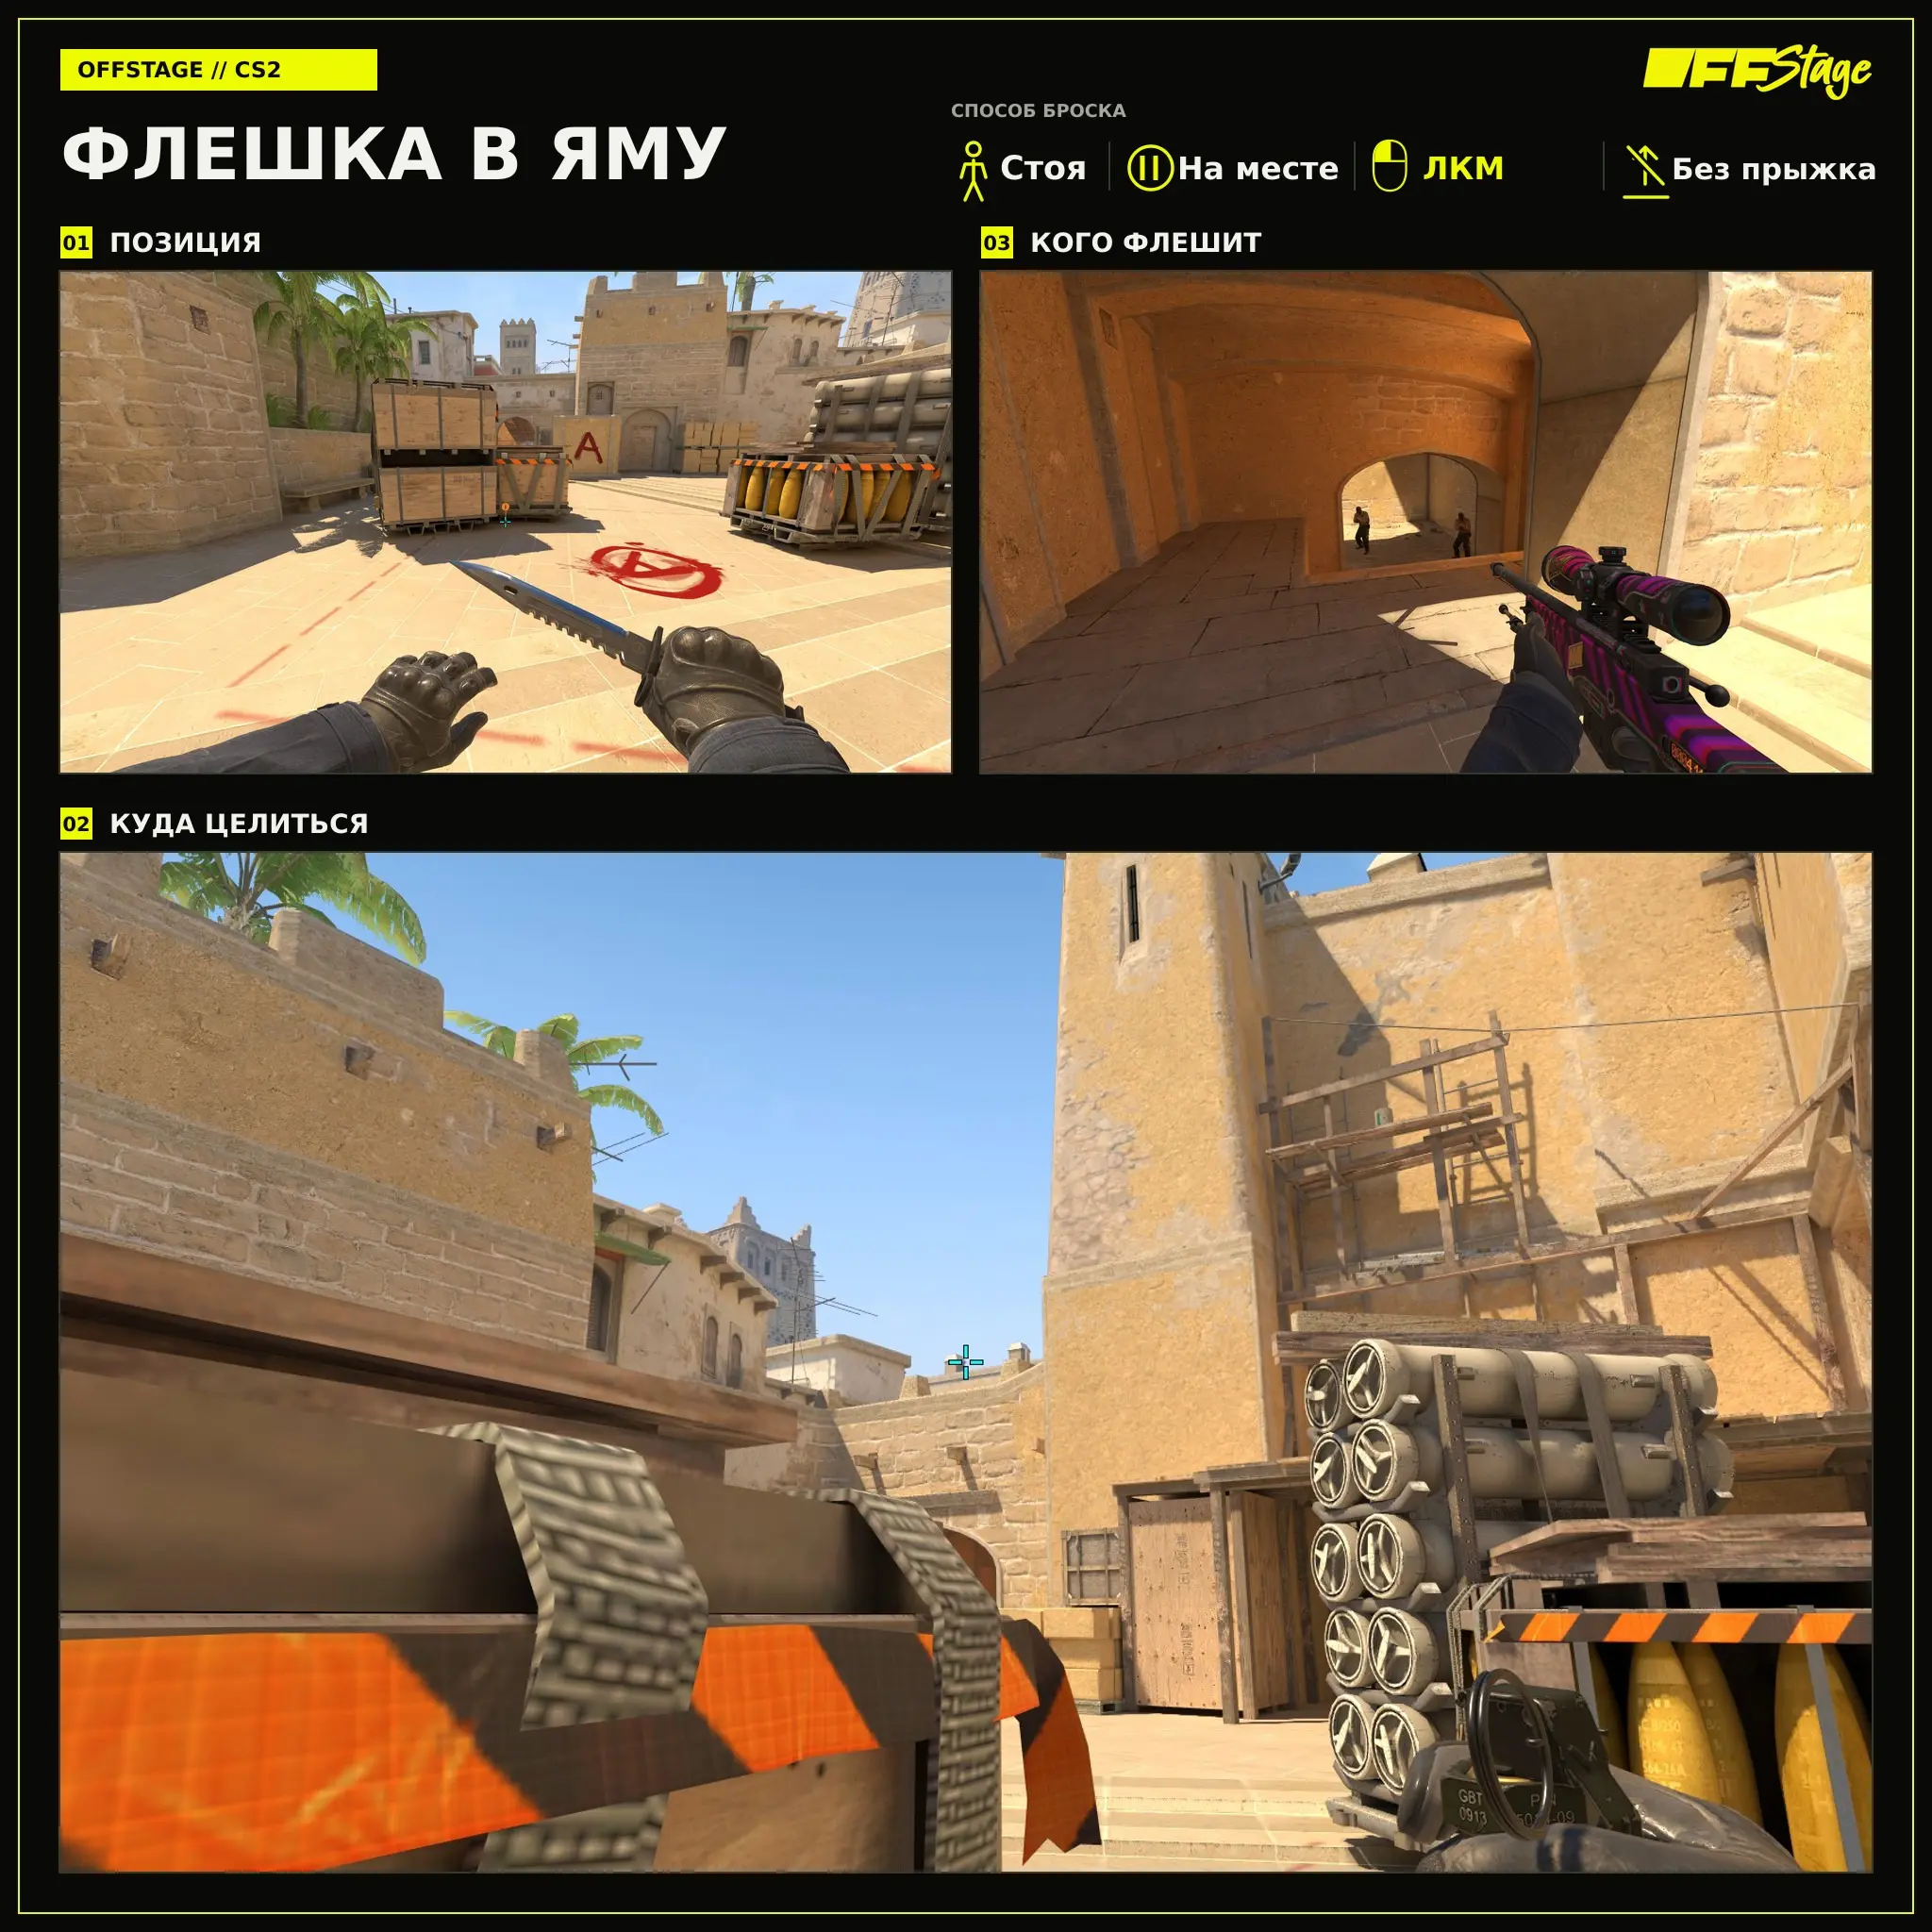
Flashbang into the pit
For CT, a flashbang into the pit helps the A-site defender make an aggressive push or initiate a retake. Stand as shown in the first frame, aim at the designated landmark, and throw the grenade with LMB without jumping.
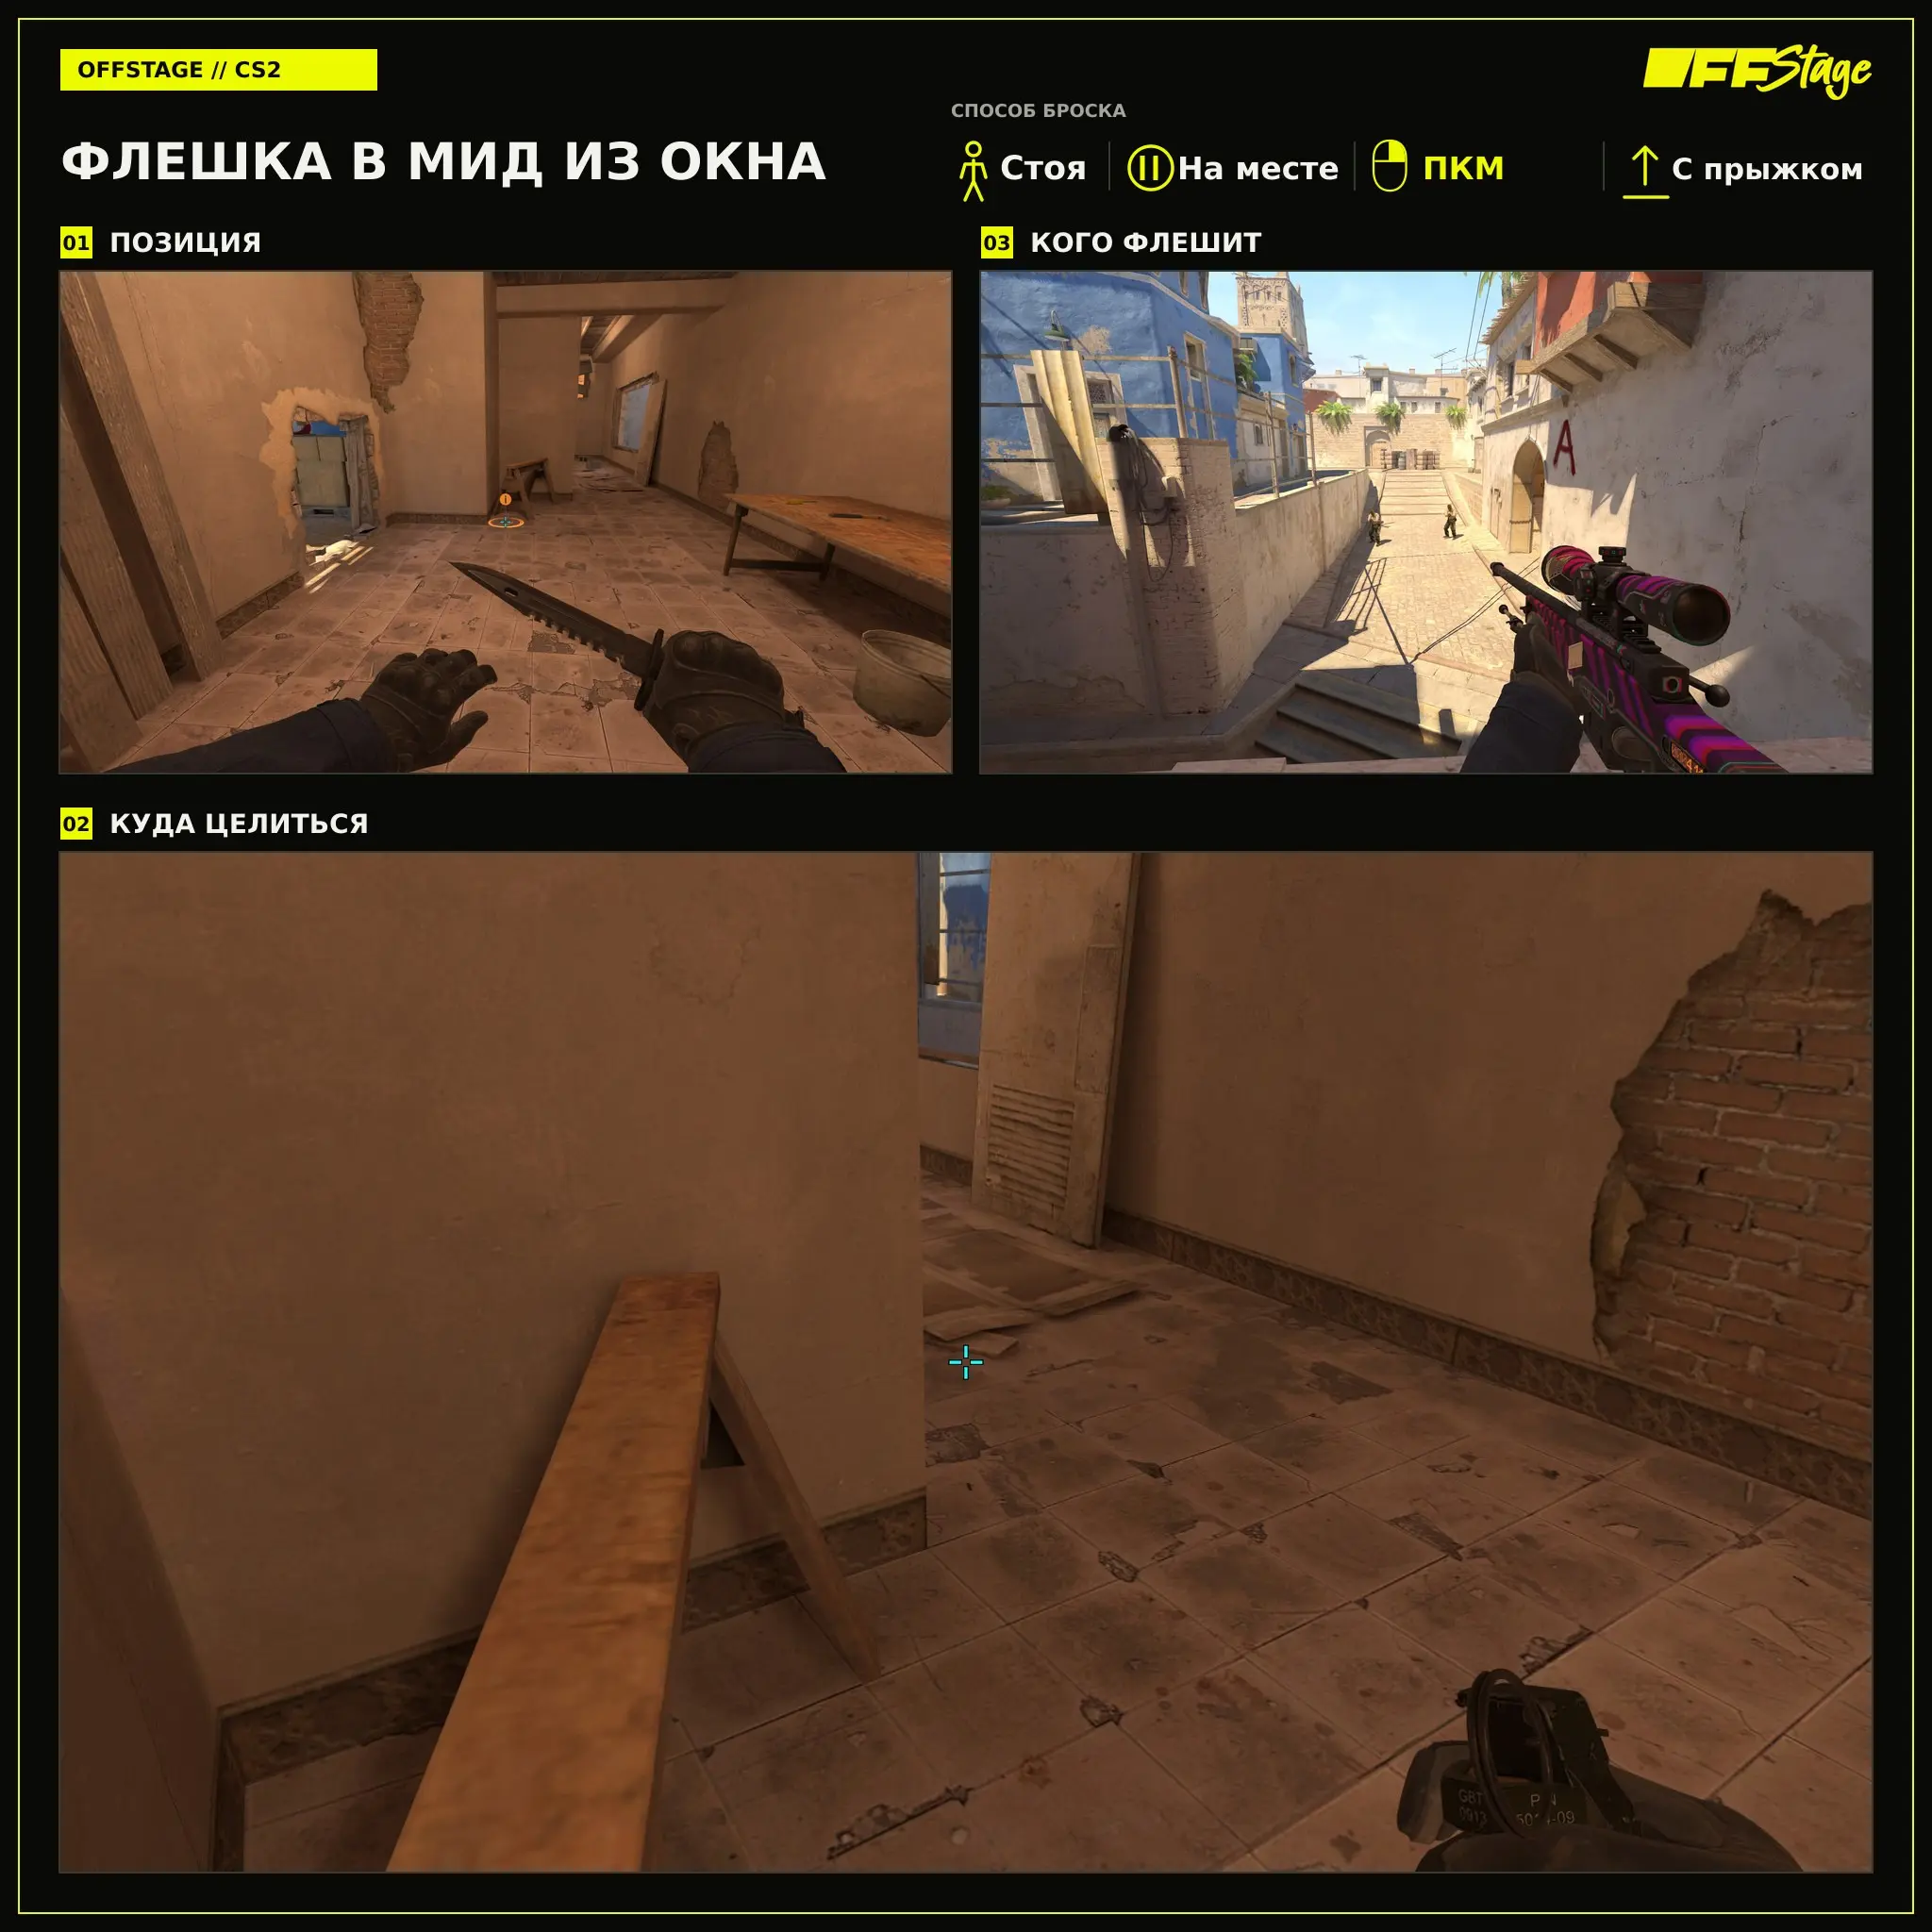
Flashbang into mid from the window
The mid-lane throw from the window is performed with a right-click and jump throw, helping to regain control of the center. Position yourself as shown in the first frame, aim, and perform a right-click + jump throw from a standing position.
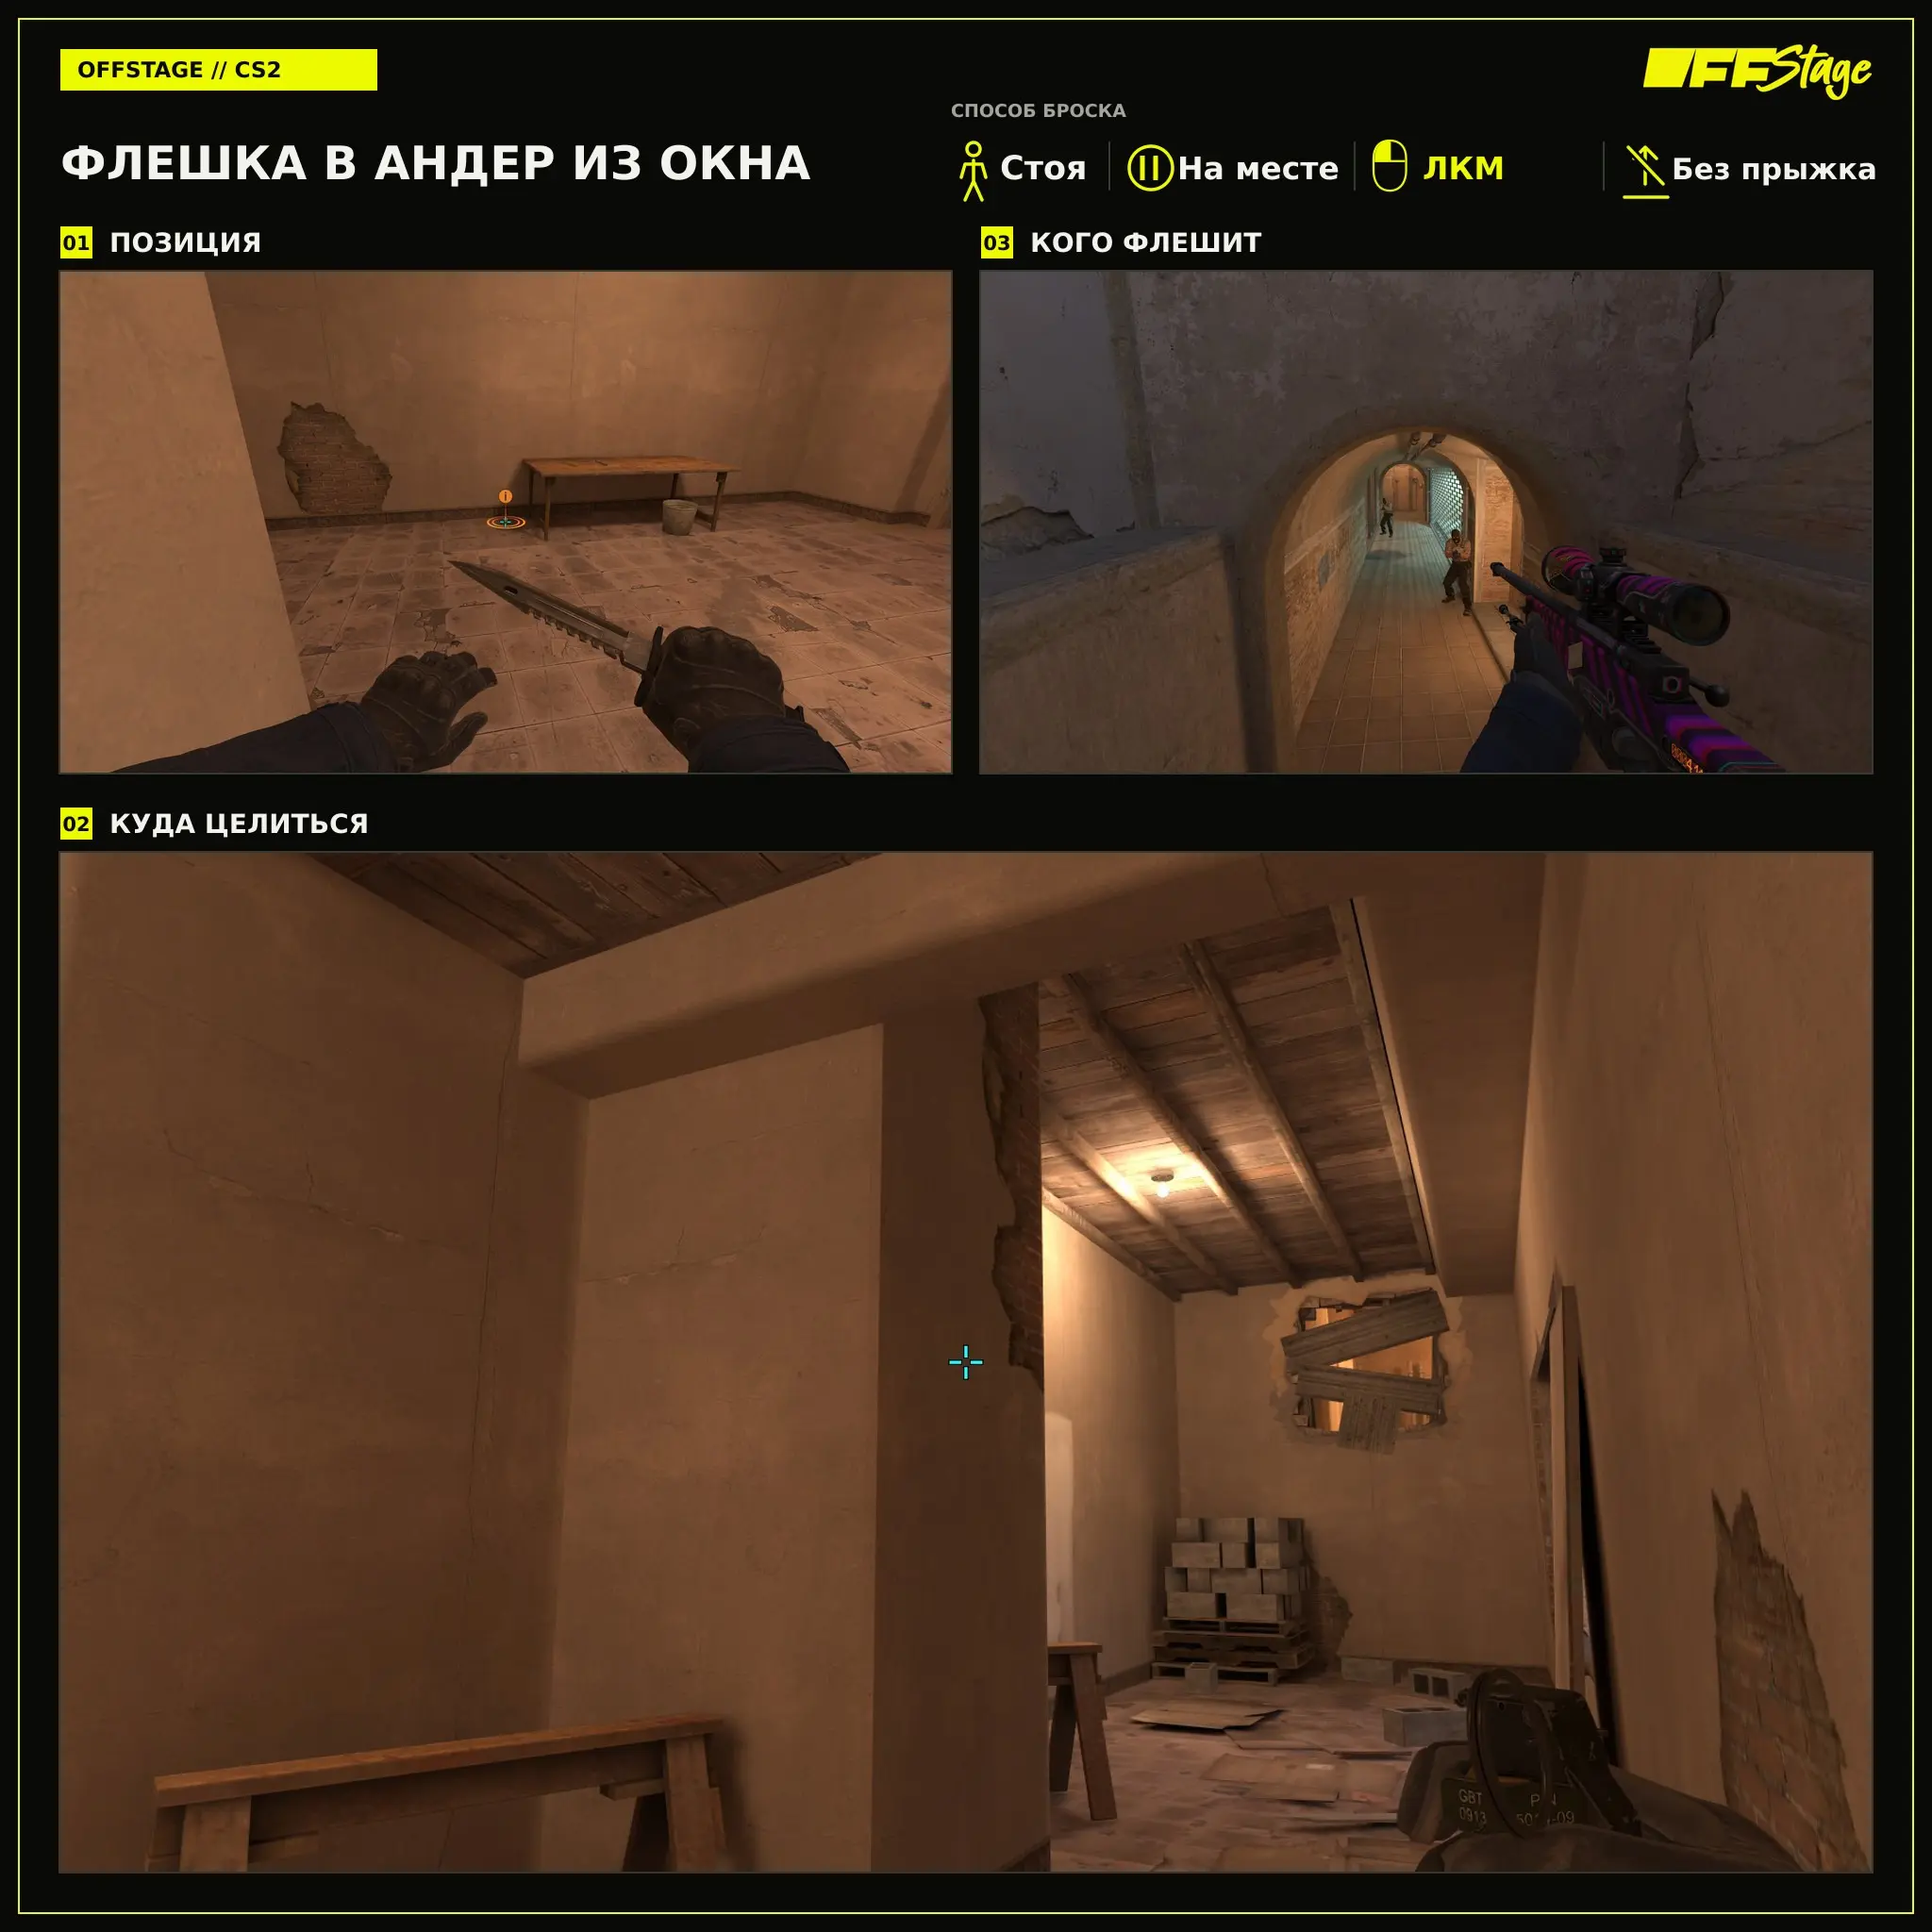
Flashbang to the bottom lane from the window
Throwing a flashbang into the under from the window is useful for assisting a player checking the lower passage. Position yourself as shown in the first frame, aim at the designated landmark, and throw the flashbang with a left-click without jumping.
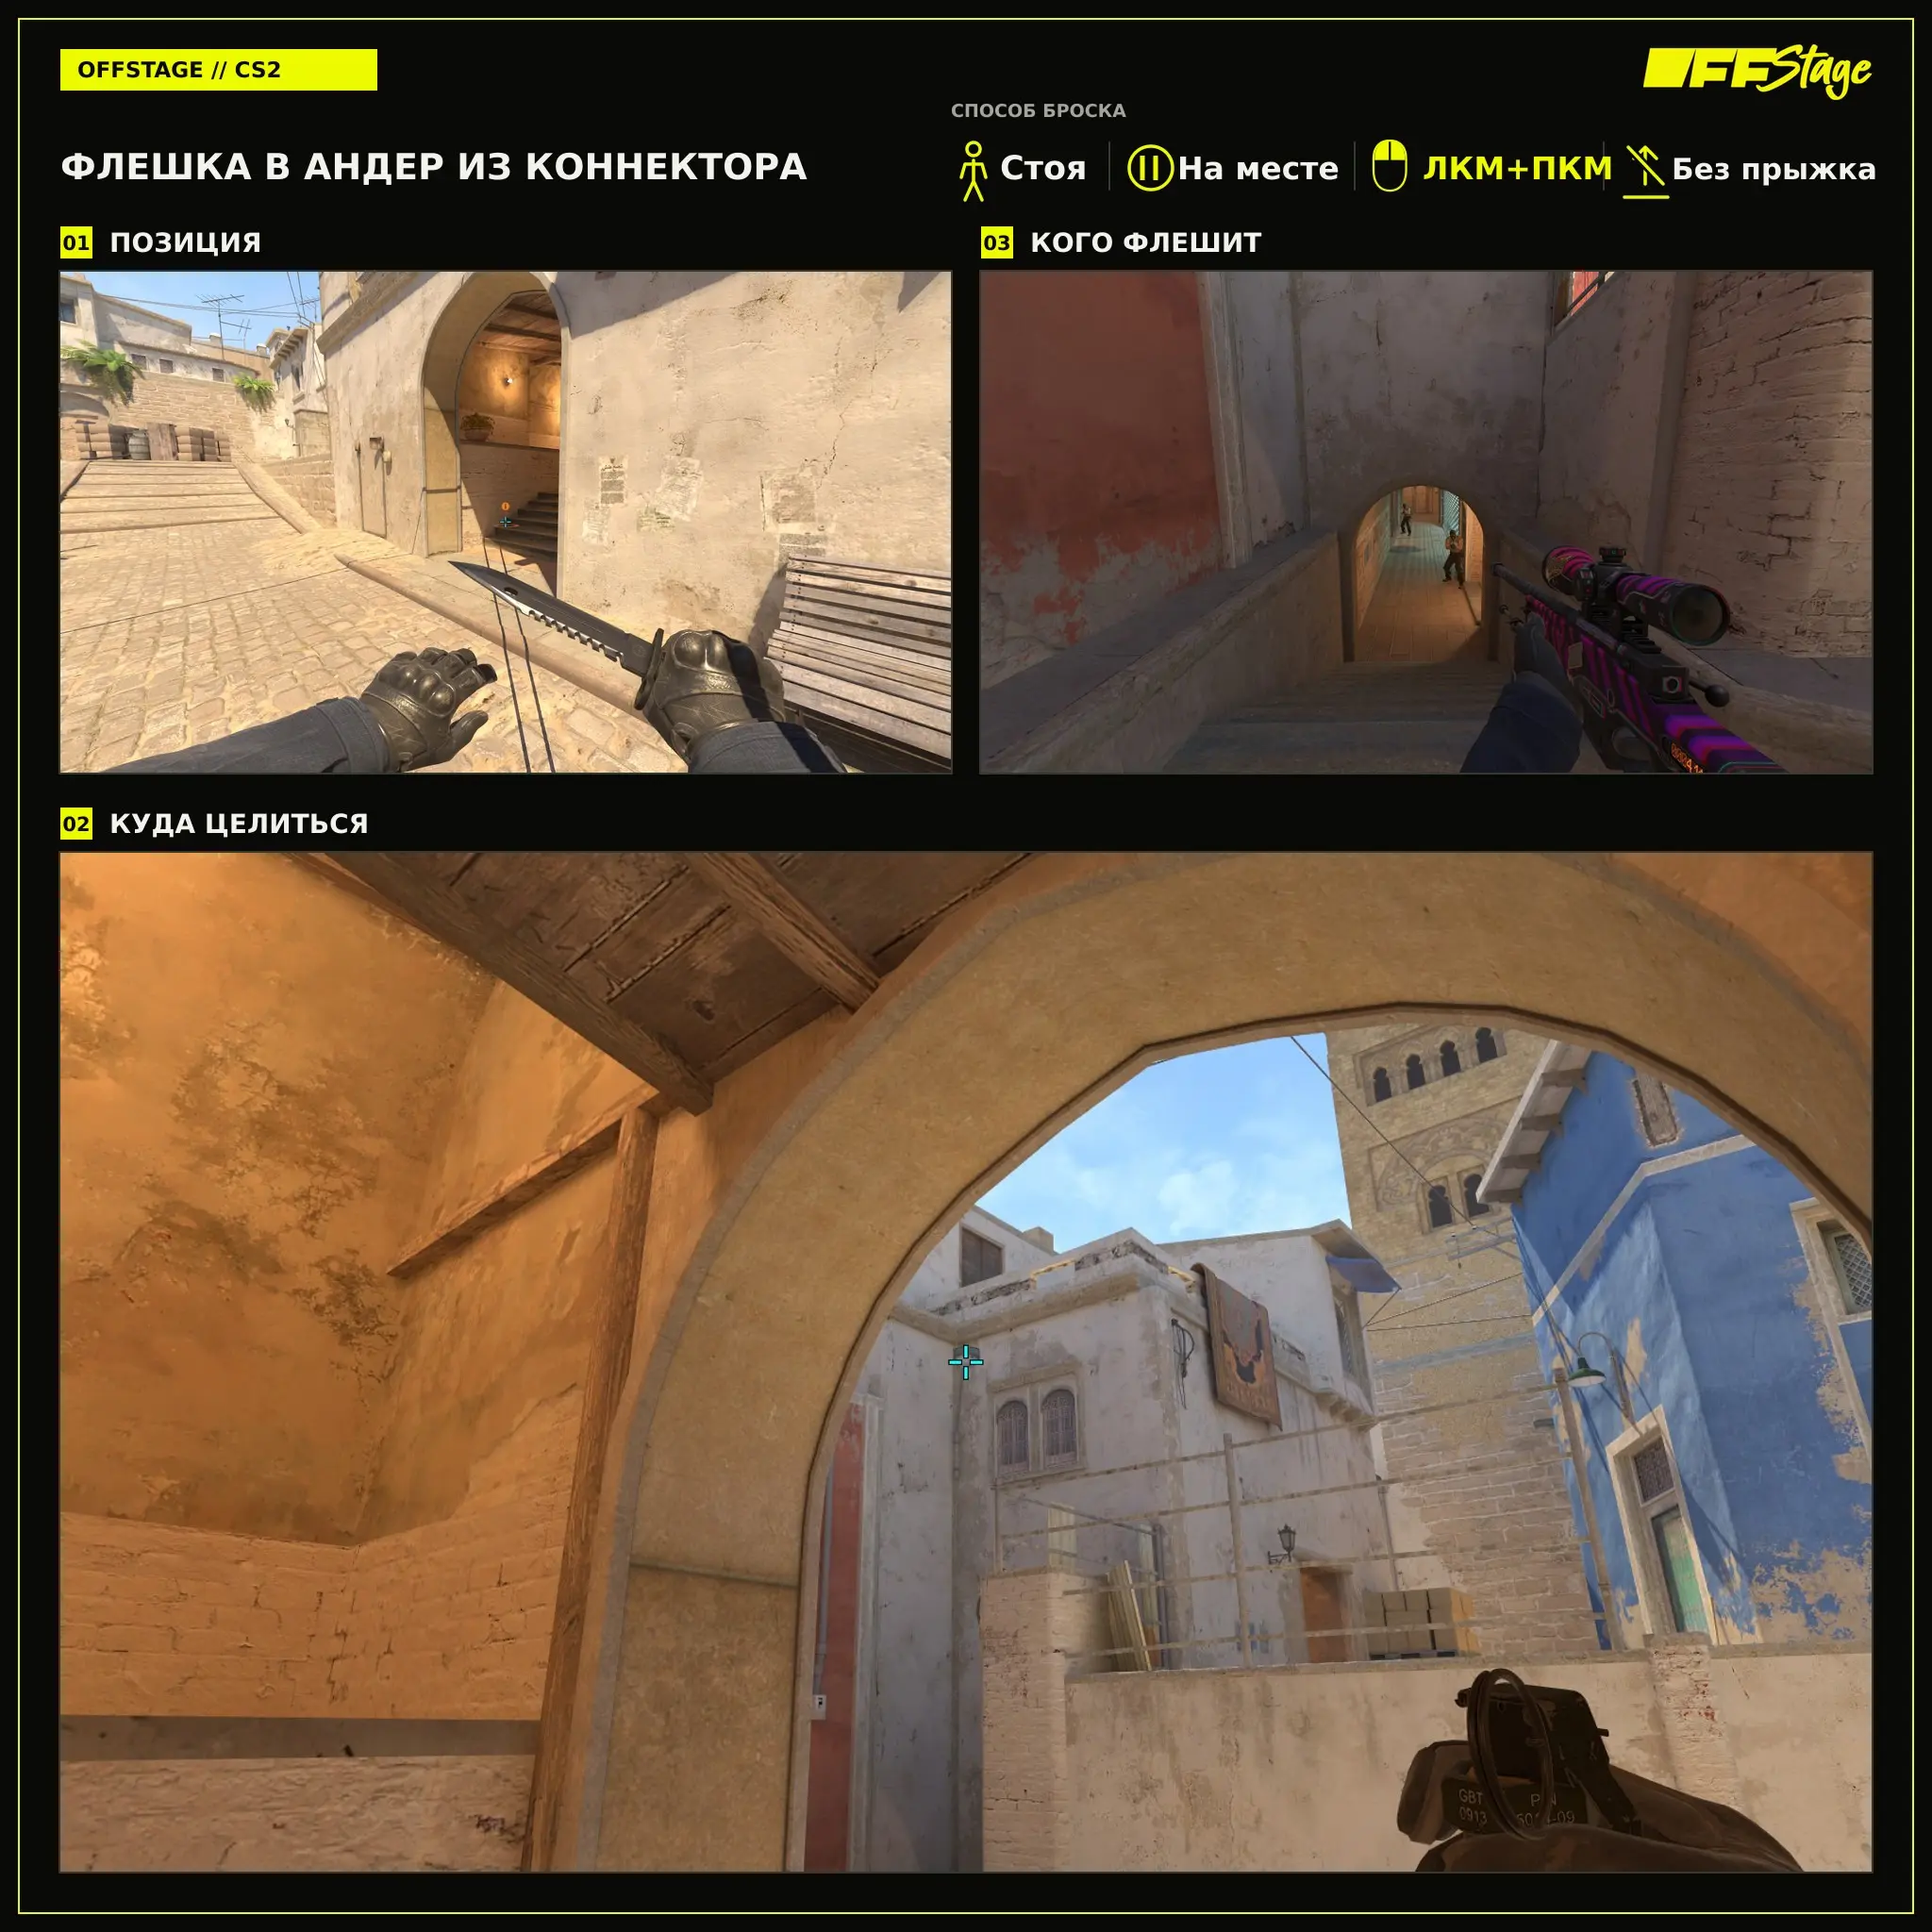
Flashbang into the under from the connector
The “Under” throw from the connector is performed by pressing the left and right mouse buttons simultaneously without jumping. Stand as shown in the first frame and press the left and right mouse buttons simultaneously, without jumping.
What to Learn First
For offense, start with a flashbang through the window and one of the B or A variations. For defense, flashbangs in the mid and under areas are most useful because they help multiple positions at once.
On Mirage, after throwing, it’s important to immediately take up the right space. Otherwise, your opponent will have time to re-aim before the next engagement.
Frequently Asked Questions (FAQ)
Для атаки пригодятся варианты в окно, кон и на B. За КТ начните с мида и флешки под свою точку.
Давайте её перед первым контактом на A, когда открывающий игрок готов сразу выйти под взрыв.
Броски из окна и коннектора позволяют помочь партнёру с разных позиций и не раскрывать один и тот же маршрут.
Проверьте, что бросаете ПКМ, выполняете jumpthrow с места и не смещаете прицел после наведения.