Smoke placements on the Anubis map in CS2
On Anubis, smoke grenades cover long lines to mid and at Point B. Without them, the attack has to check multiple directions at once, and it’s harder for the defense to stop a quick push. This guide compiles eleven smoke placements for both sides. For the attackers, we’ll cover smoke placements at the connector, the window, the doors, the “9,” the camera, and the main B positions. For the defenders—two options on the stairs, also known as “stairs.” Most grenades are thrown from a standing position using LMB + Jumpthrow. Practice the smoke grenade into the door with SHIFT steps separately, as well as Ilya “m0NESY” Osipov’s technique involving simultaneously pressing W and Jumpthrow, and the right smoke grenade at B from a crouching position.
Smoke Placements for Attack
These smoke grenades help secure the center of the map and block defensive positions at B. For a single push, it’s enough to select two or three smoke grenades and assign them to players in advance.
Smoke in the Connector
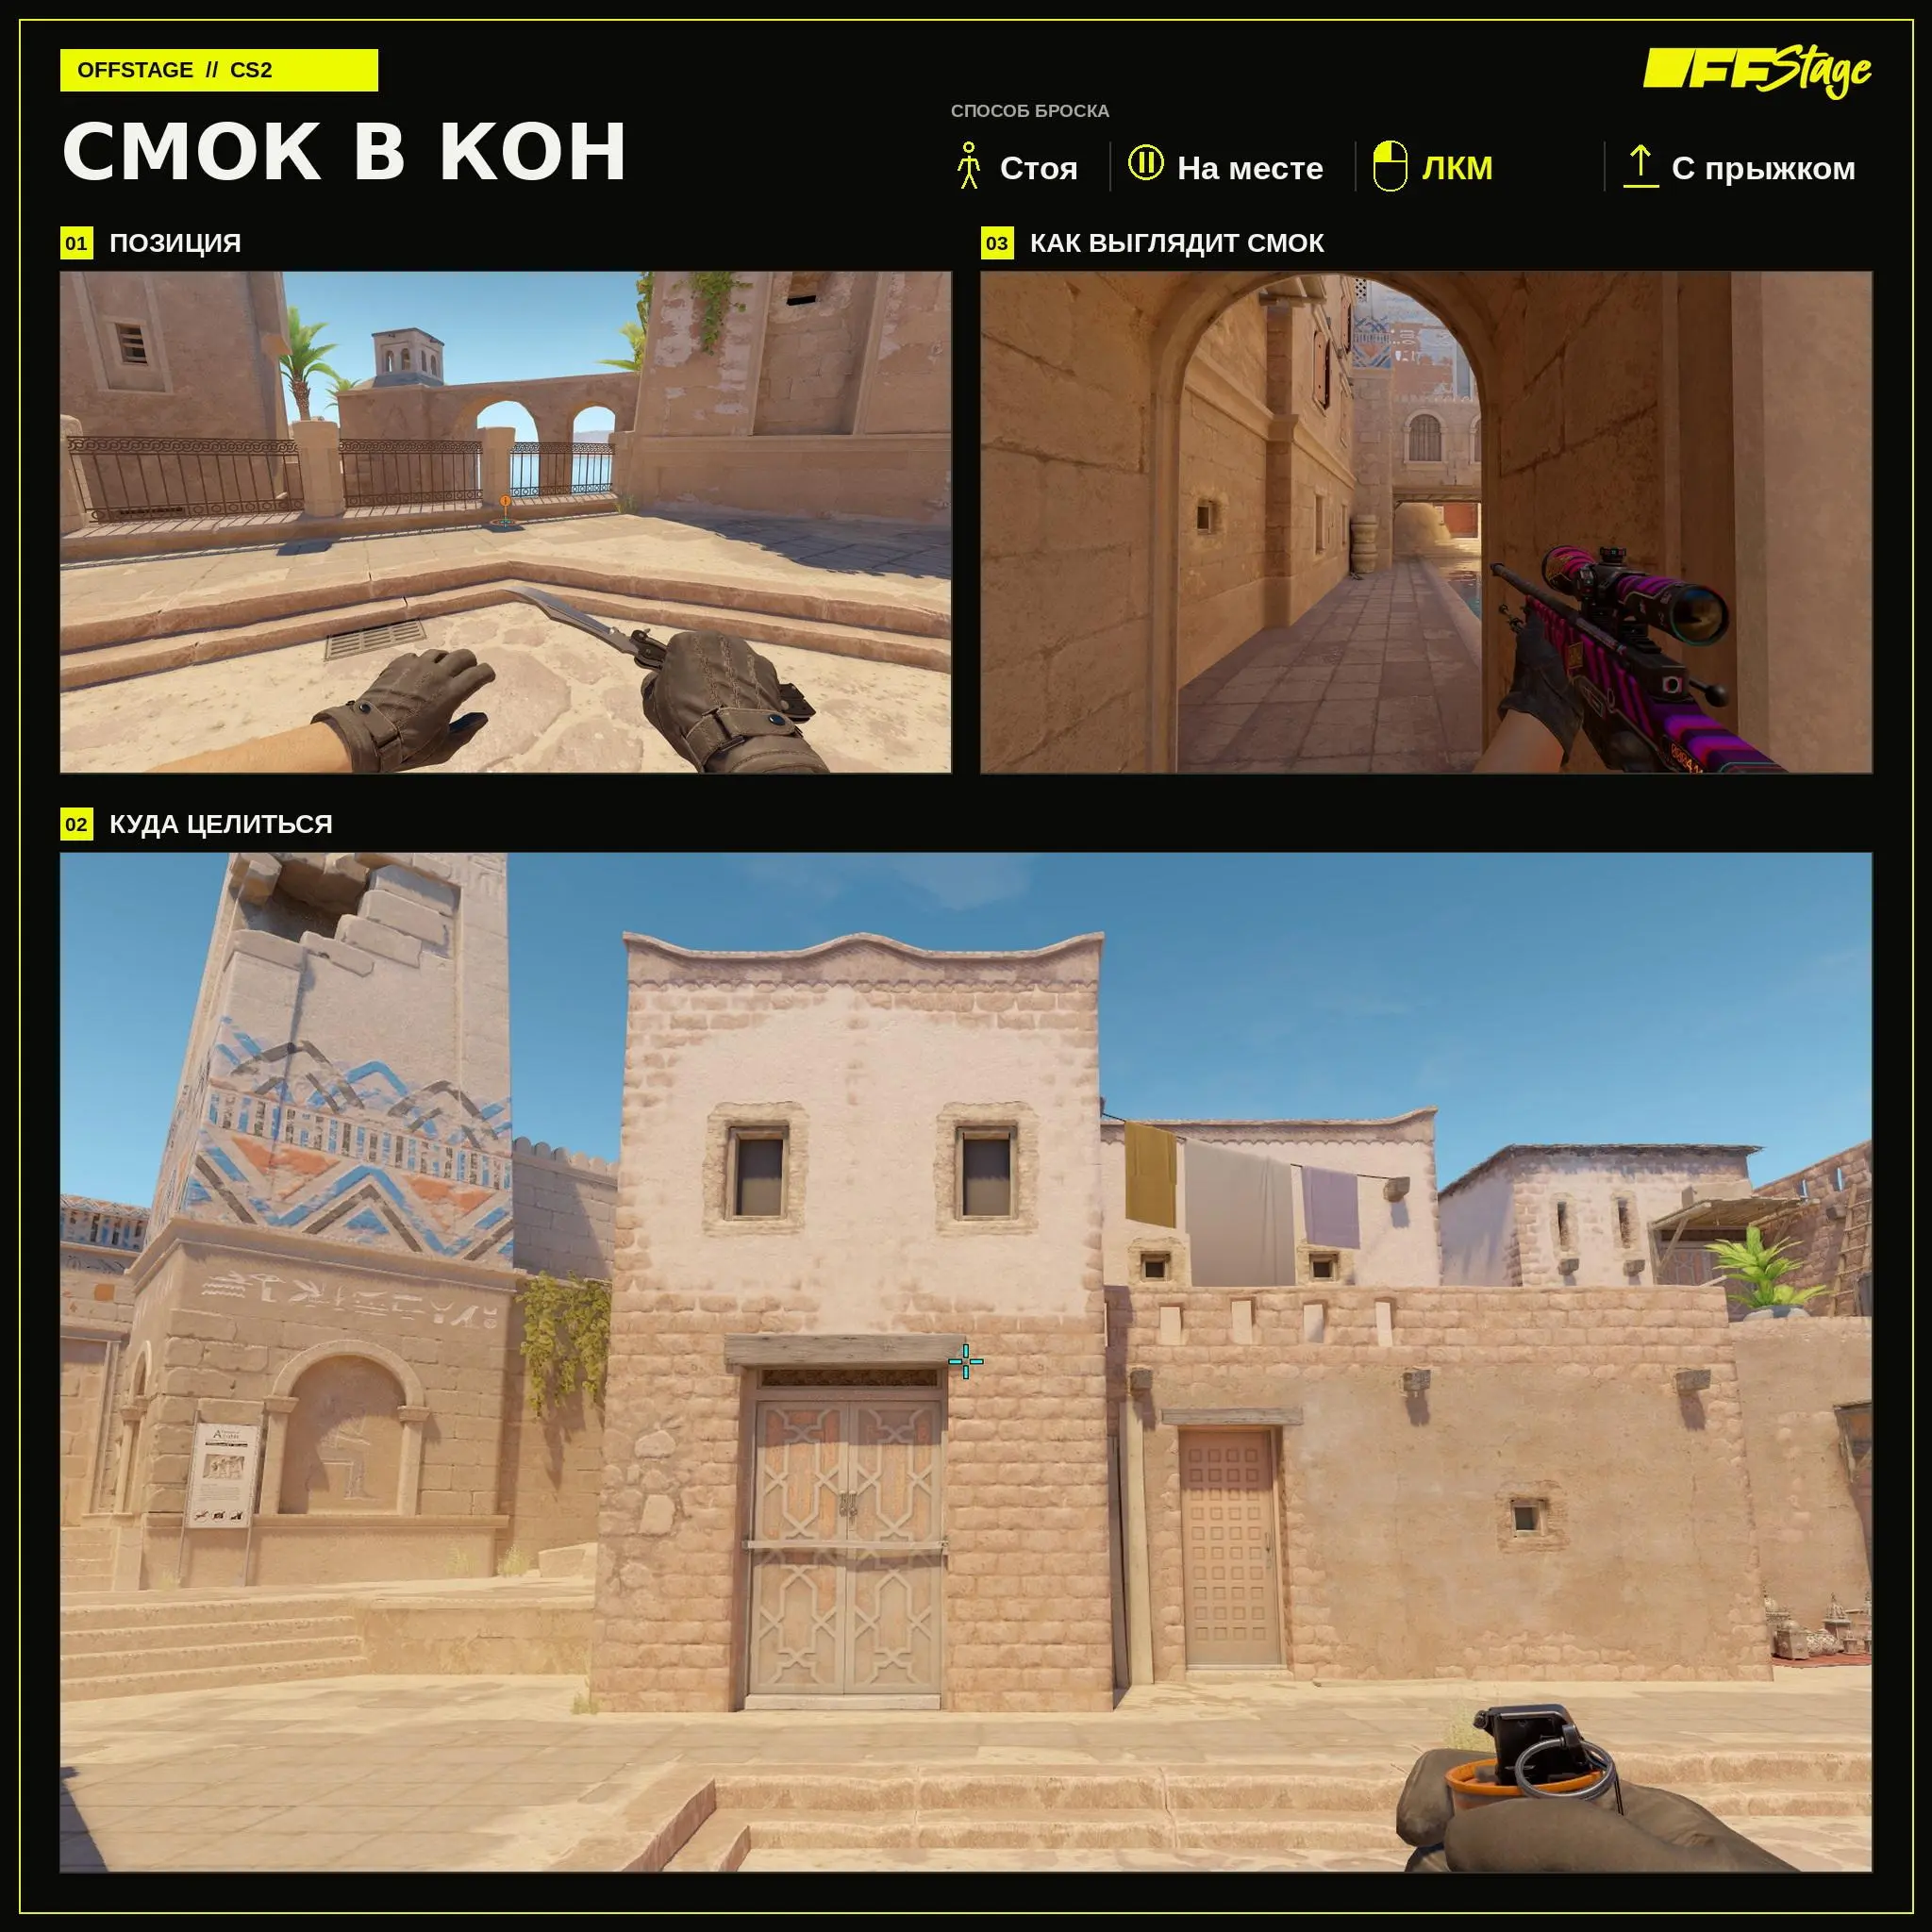
A smoke in the connector blocks the view of mid. Stand at the marked spot, aim at the landmark, and press LMB + Jumpthrow without moving. After deploying, monitor the smoke’s near edge.
Smoke in the window
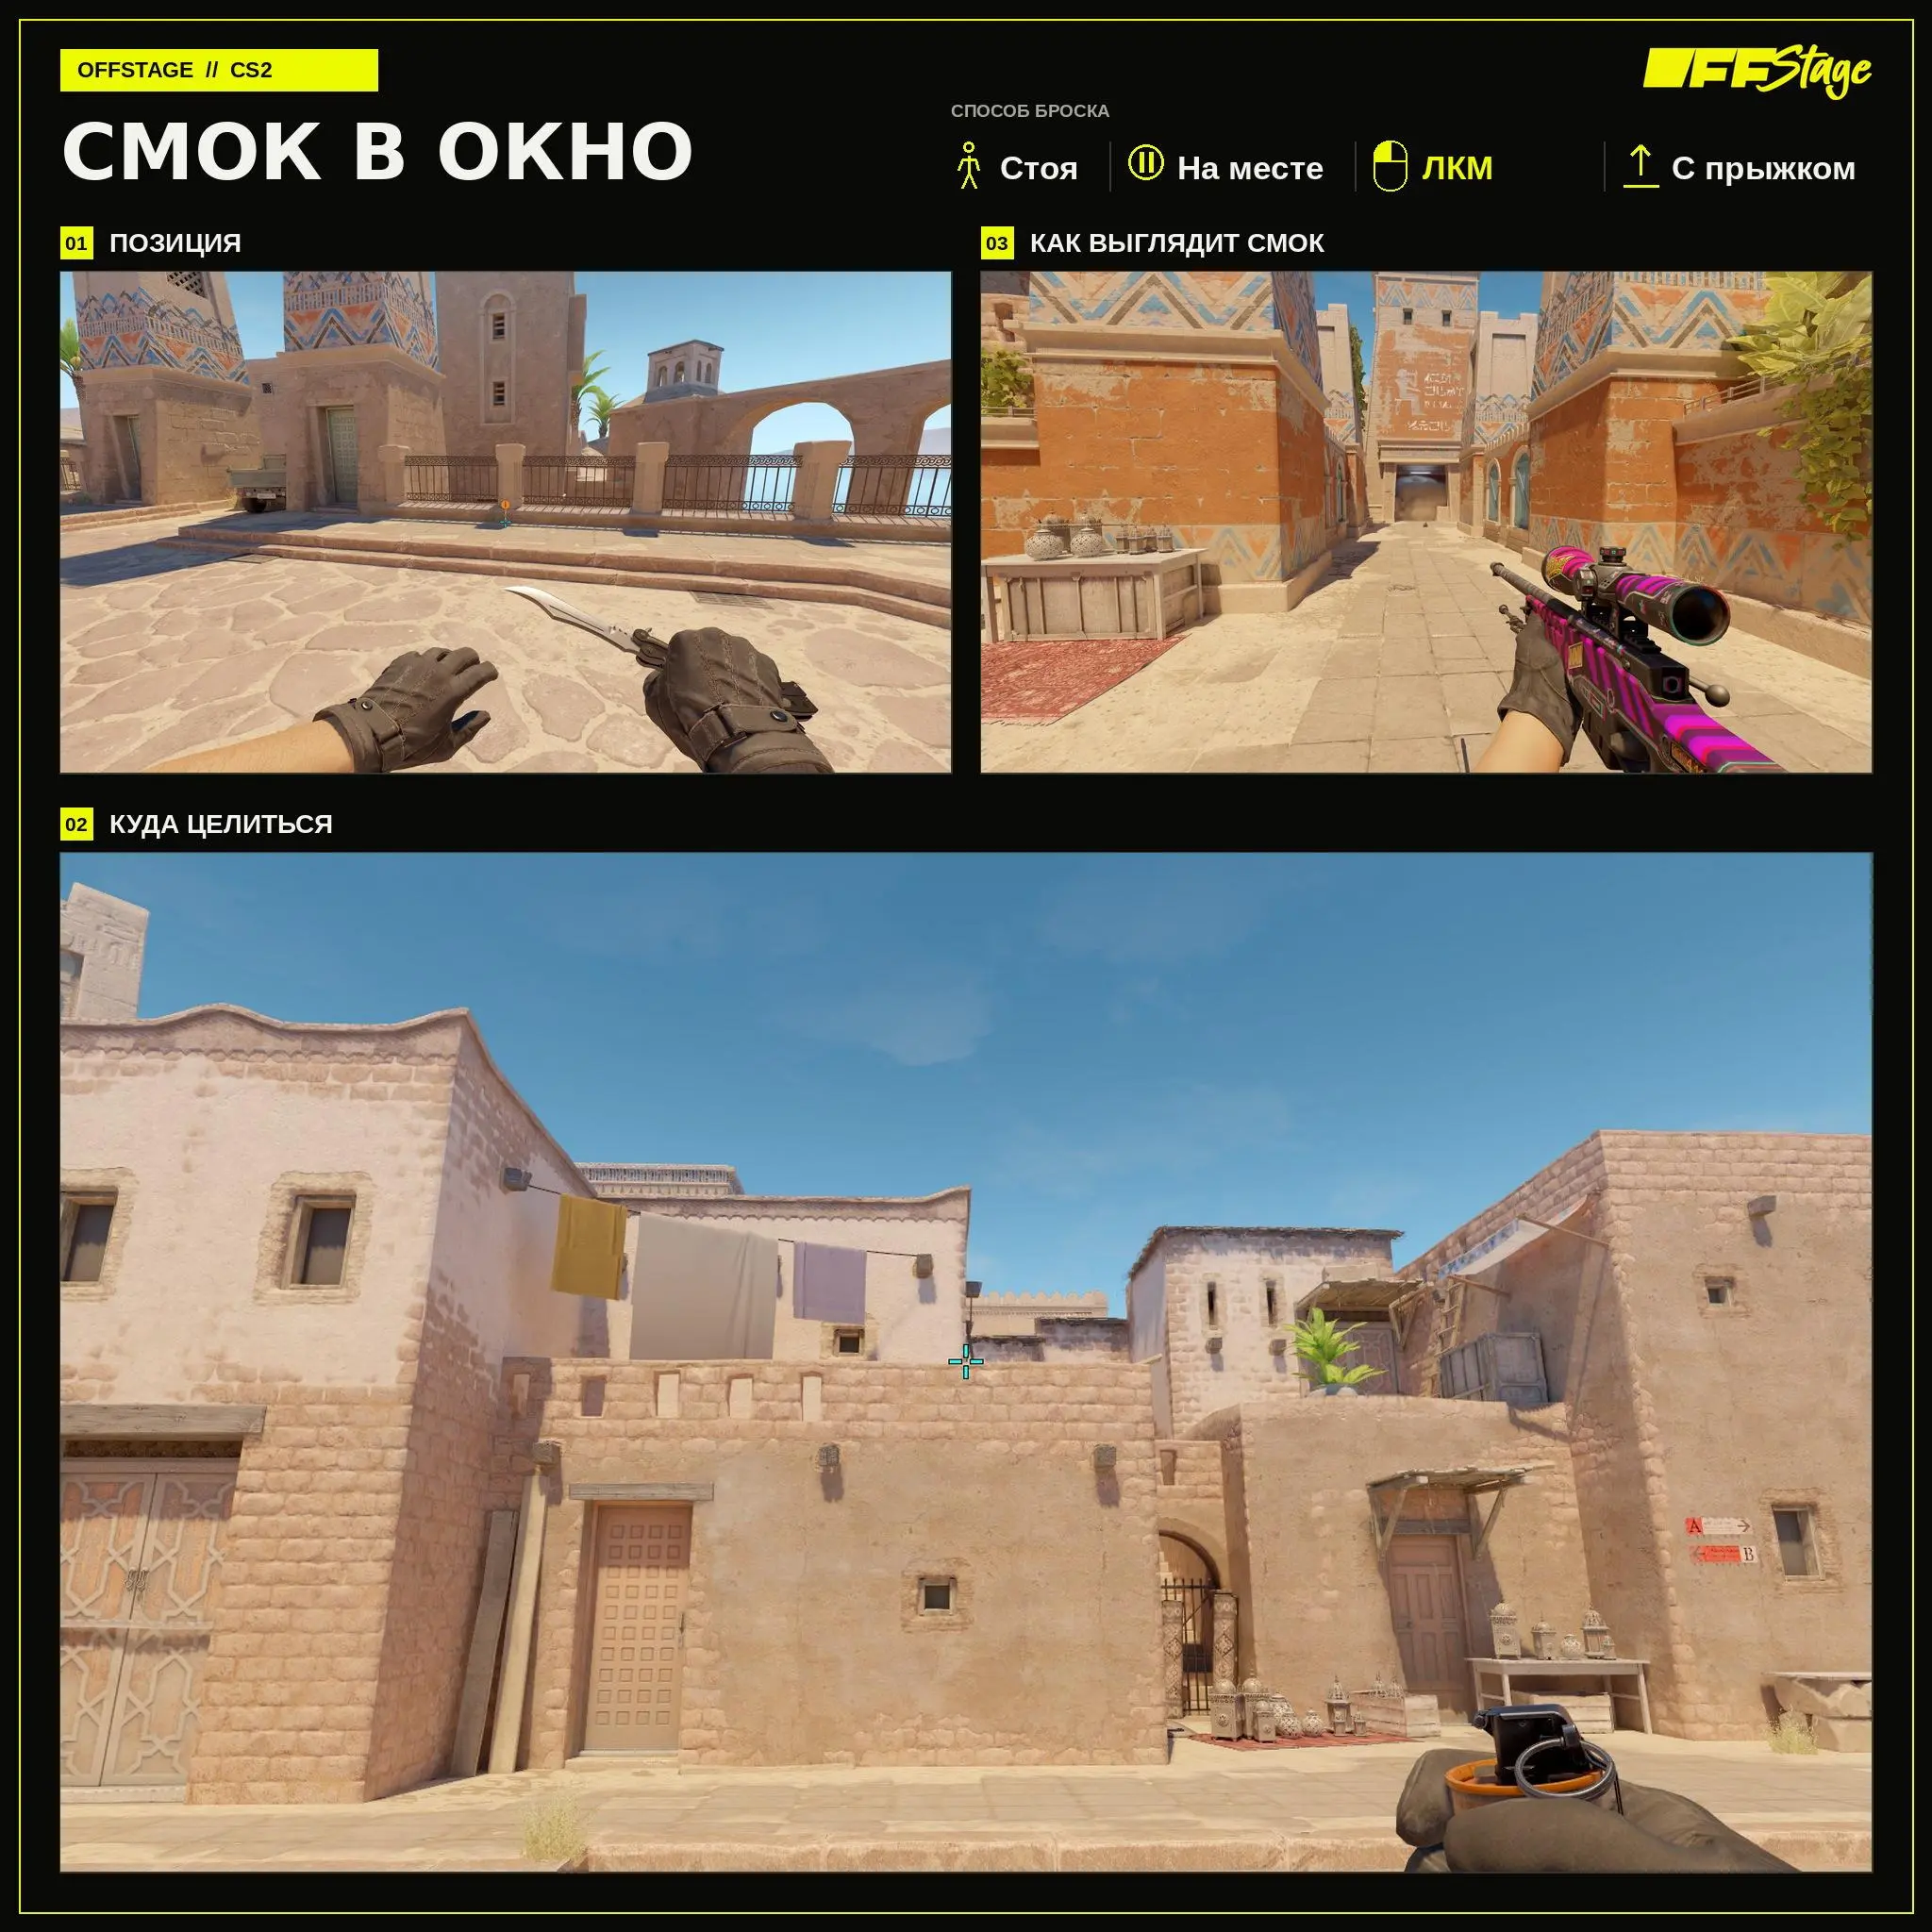
A smoke in the window complements the smoke in the connector and blocks another line of sight to mid. The throw is performed while standing still using Left Click + Jump Throw. It’s best to deploy both smokes almost simultaneously.
Smoke into the door
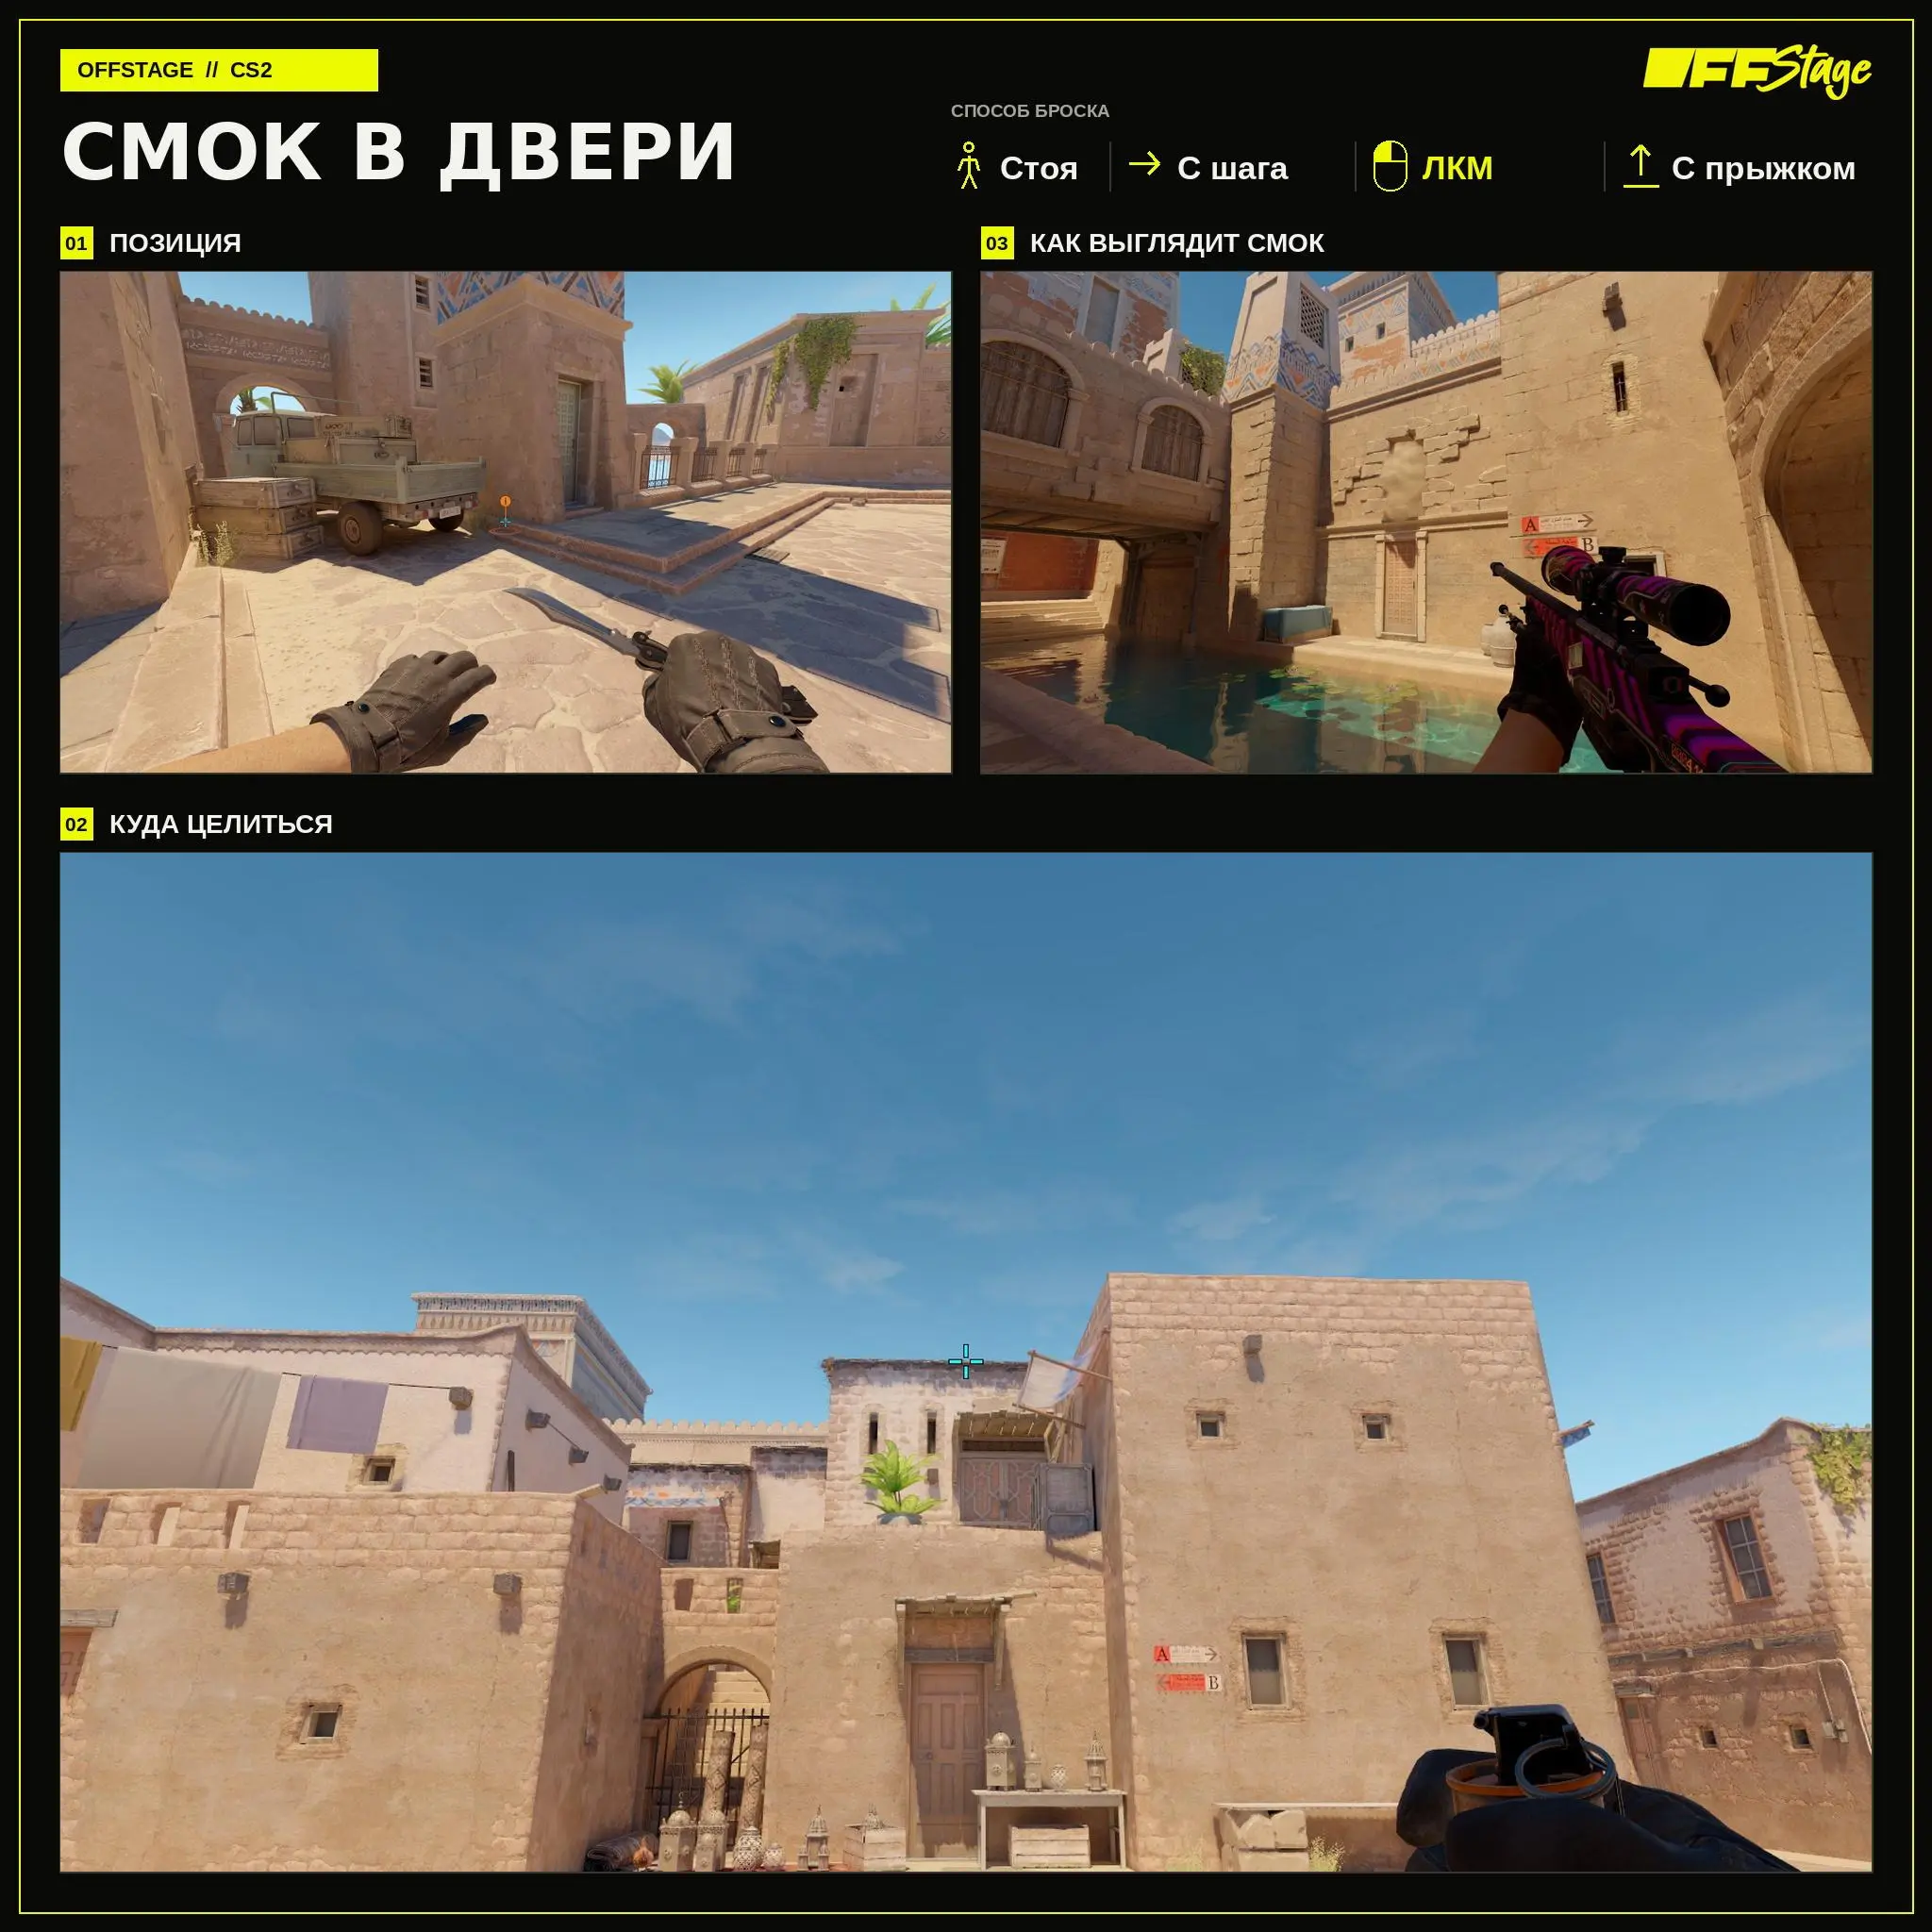
A smoke grenade at the door blocks the passage as the attack continues. Take a couple of steps while holding SHIFT and, while moving, press LMB + Jumpthrow. If you walk a longer distance, the trajectory will change.
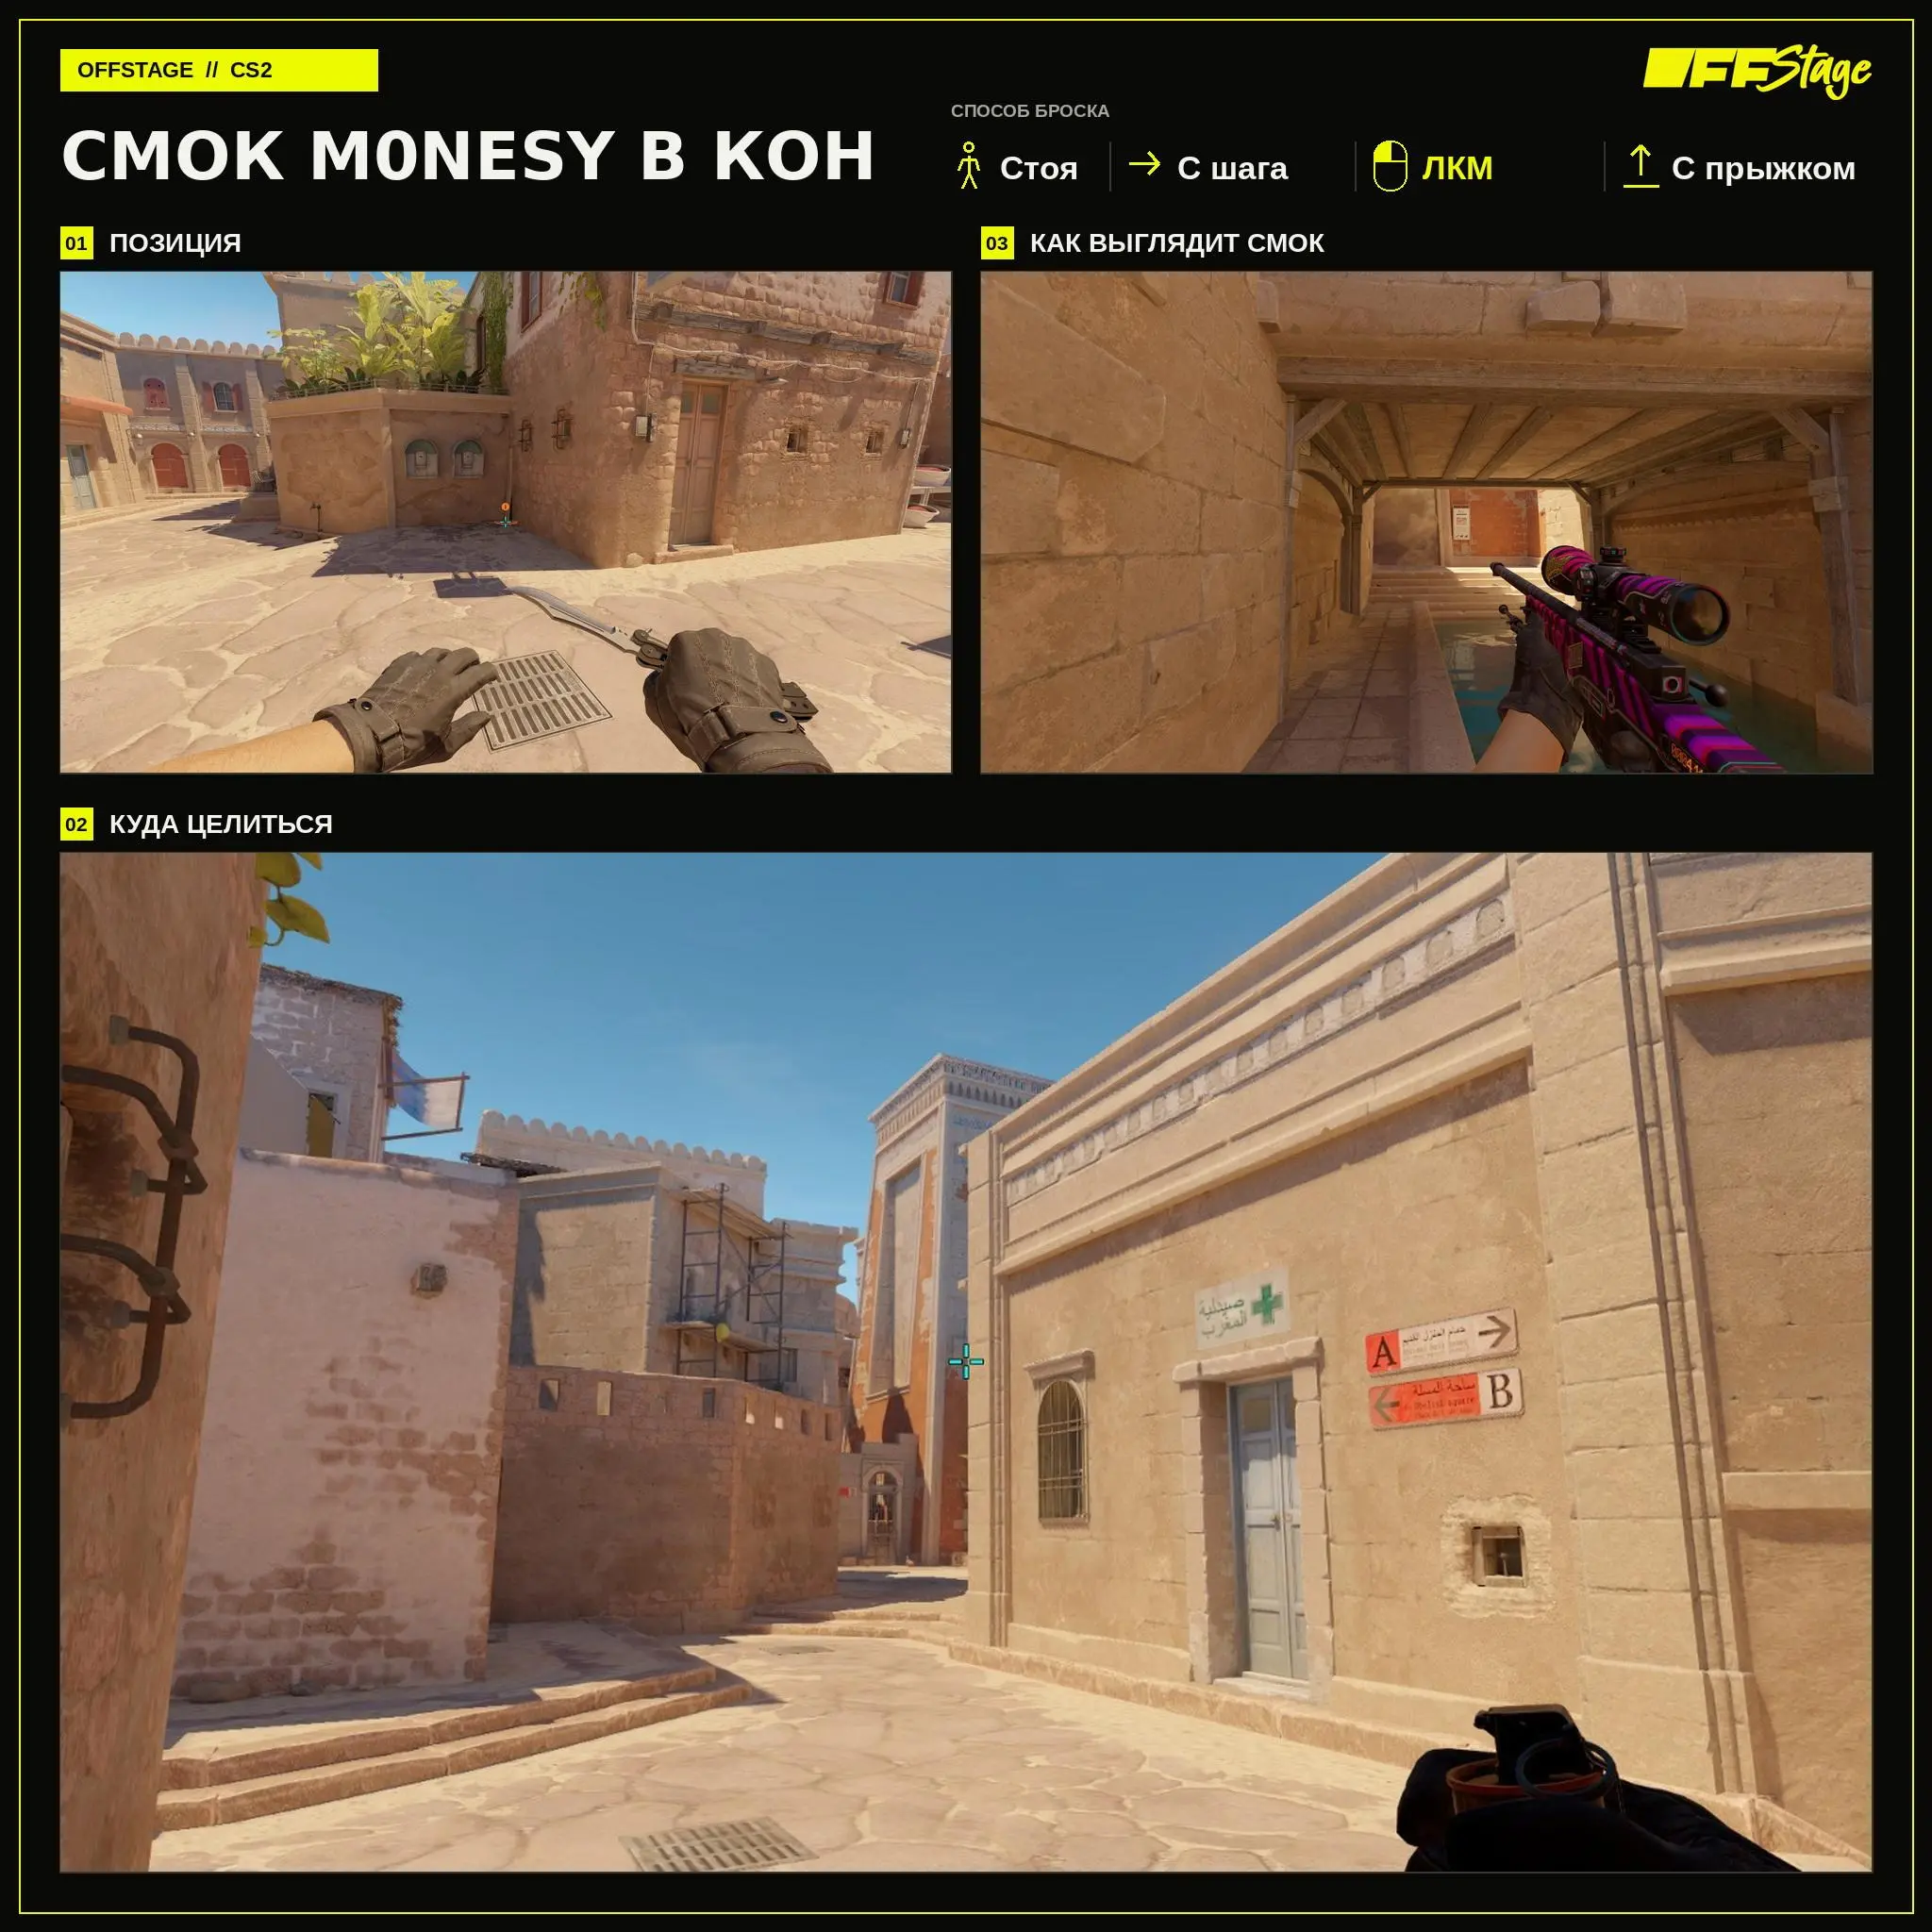
m0NESY’s smoke into the connector
This is the second option for a smoke into the connector. Stand at the marked spot, press W and Left Click + Jump Throw simultaneously. You don’t need to start moving ahead of time.
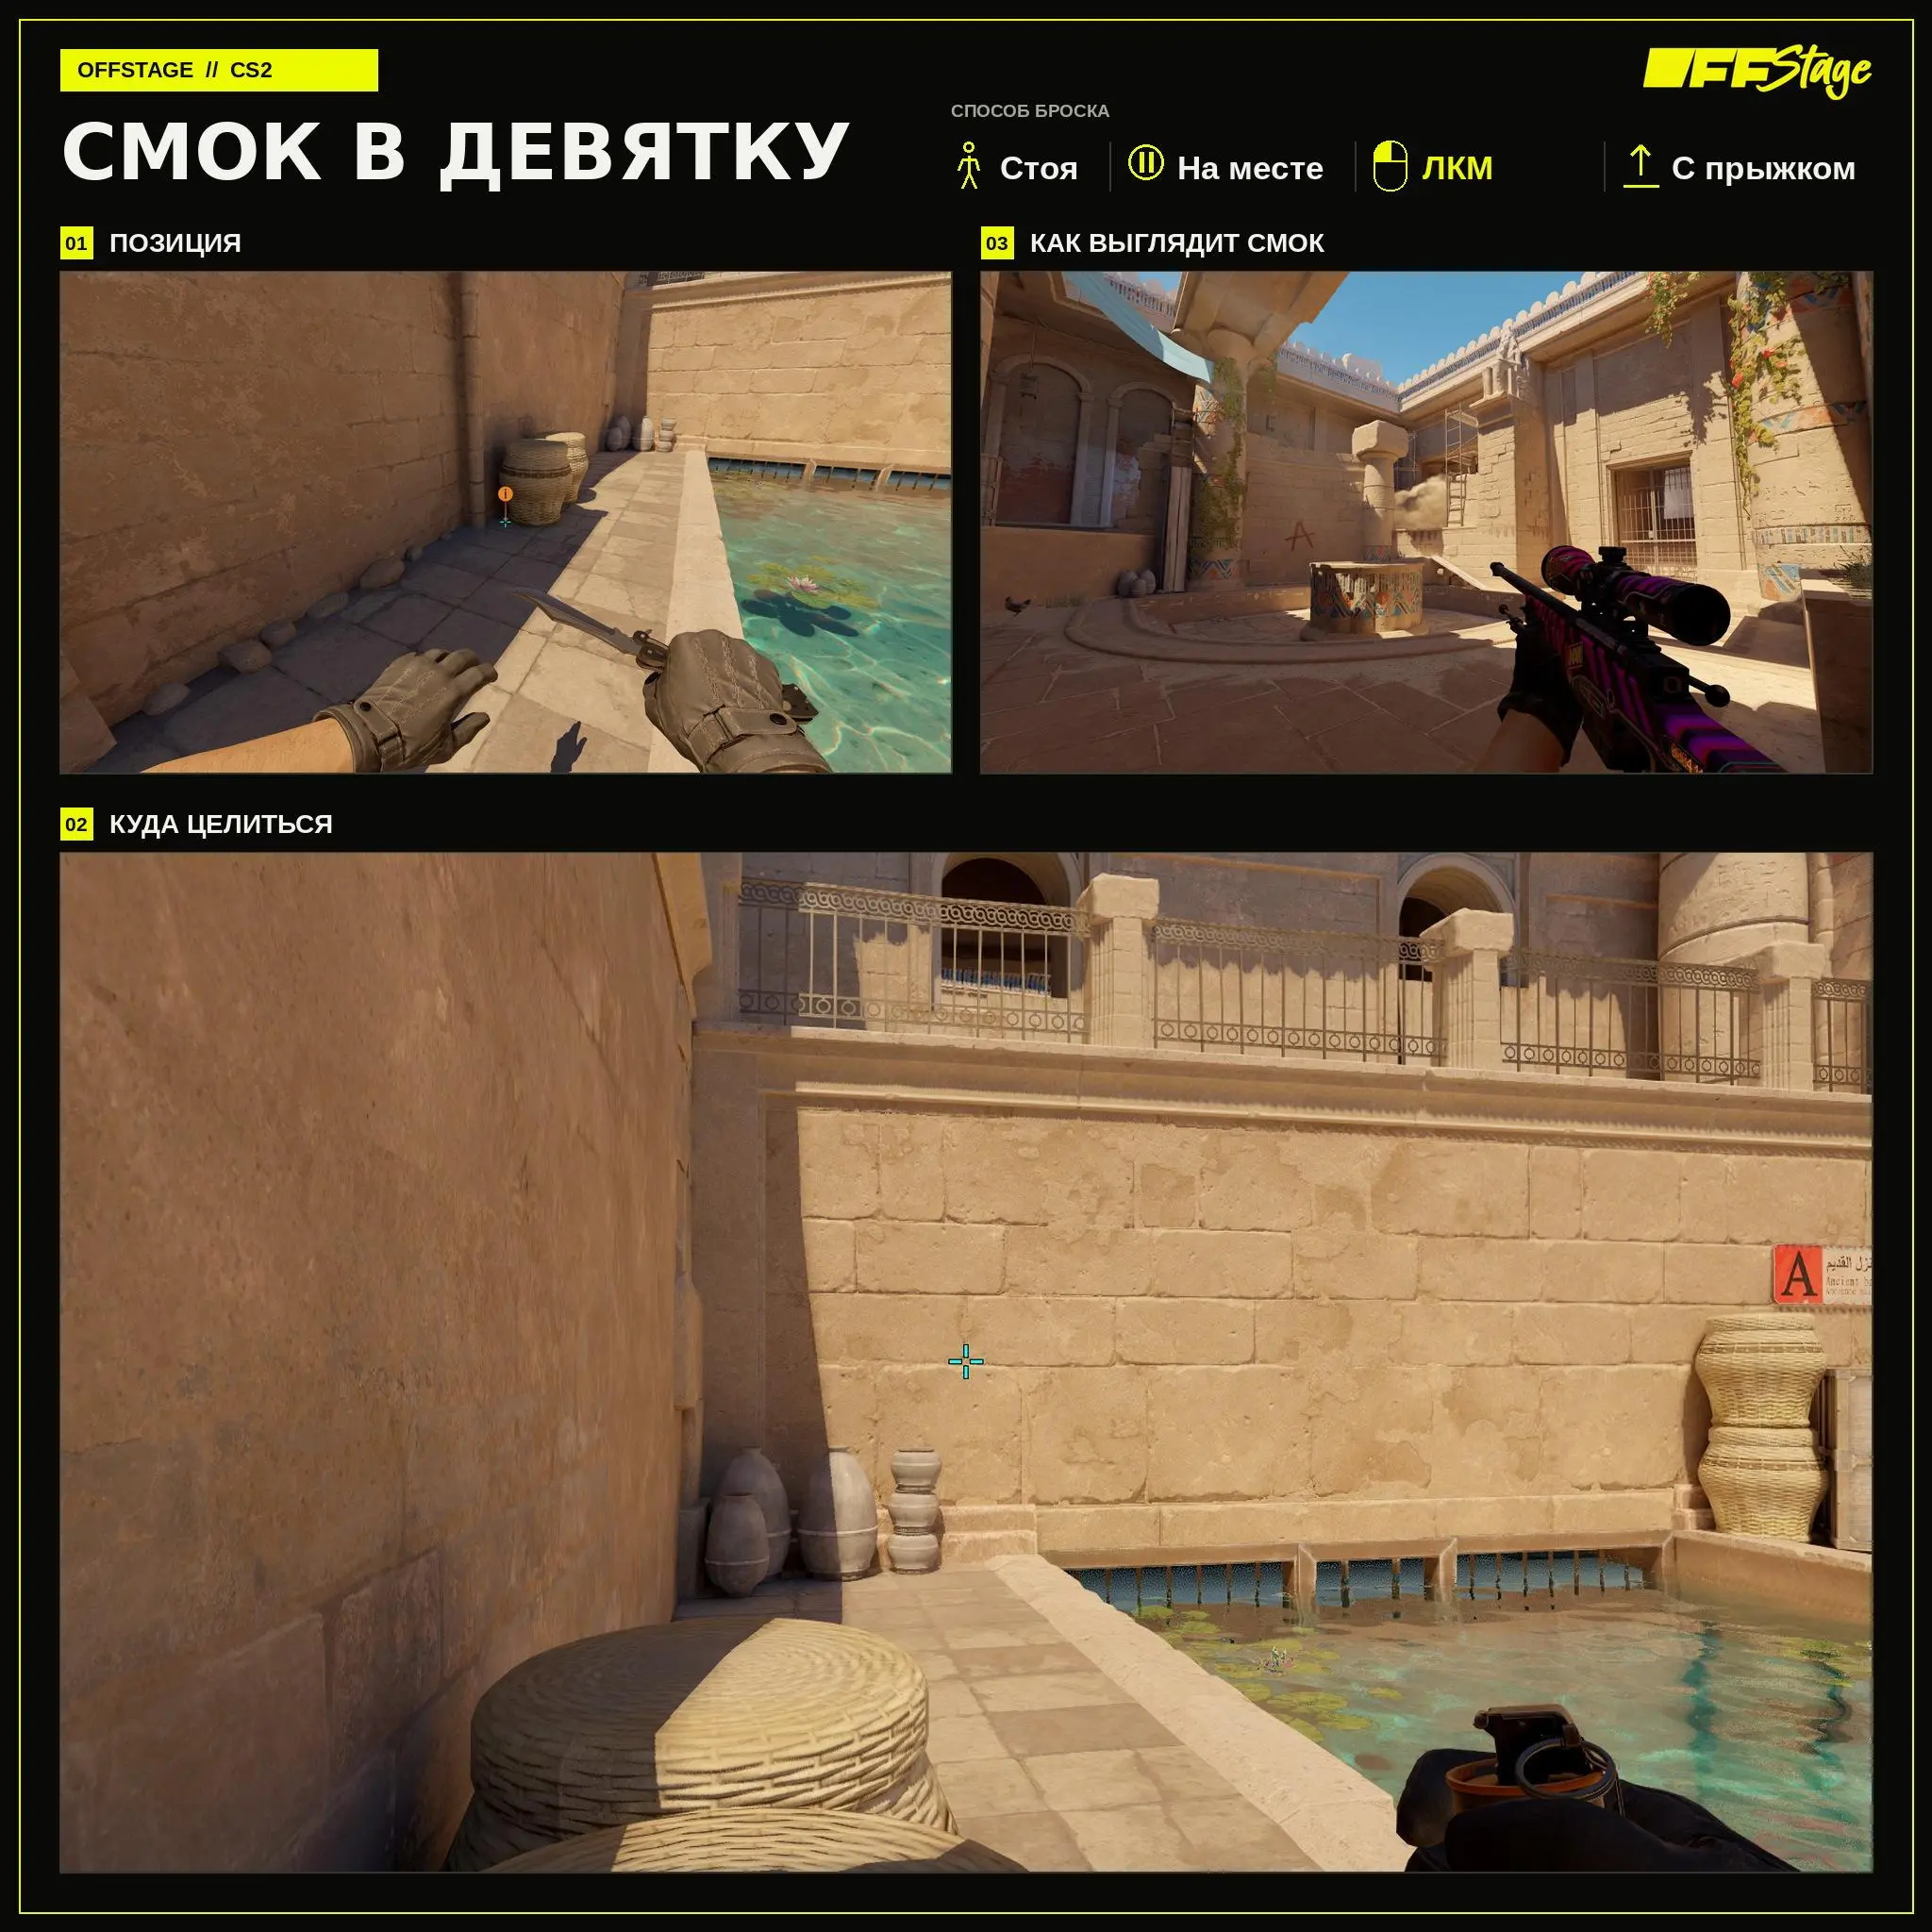
Smoke into the 9
Smoke into the 9 covers this position when exiting. Stand in the position shown in the first frame and perform LMB + Jumpthrow without moving. Before the game, agree with your team on what name to use for this position.
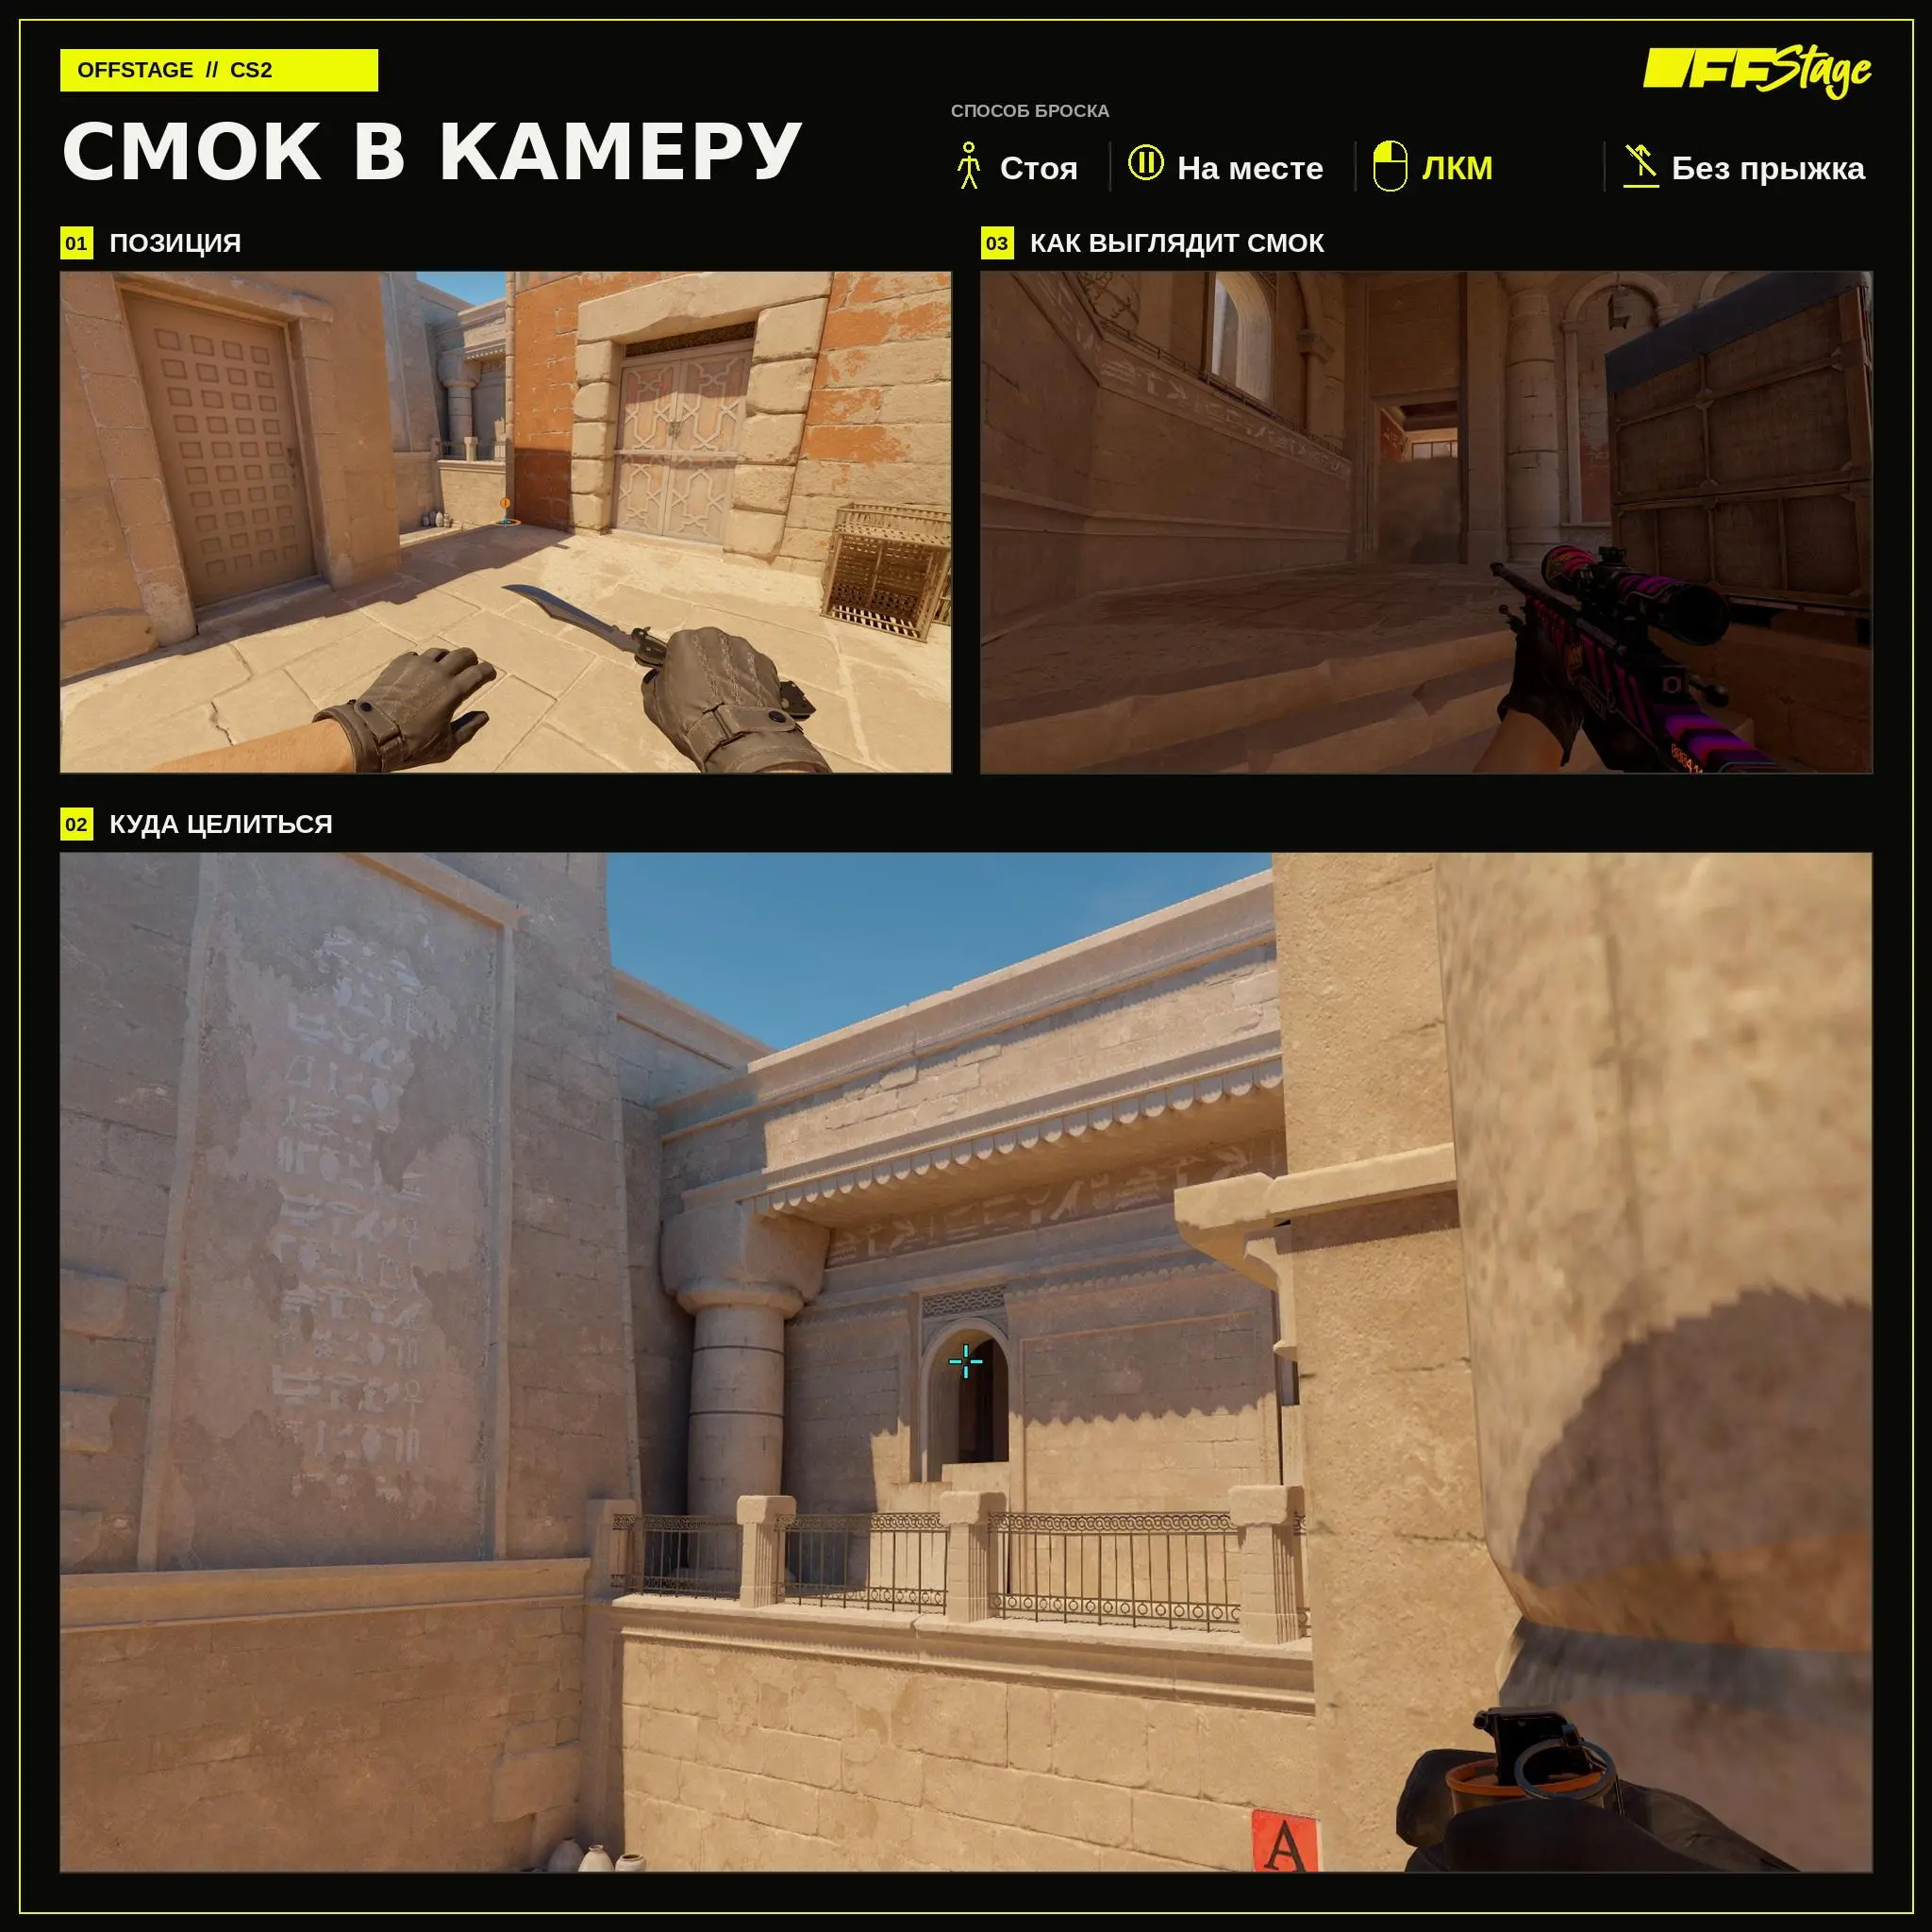
Smoke into the camera
A grenade is thrown at the camera with a standard left-click without jumping or moving. First, position yourself exactly at the shown spot, then aim at the reference point.
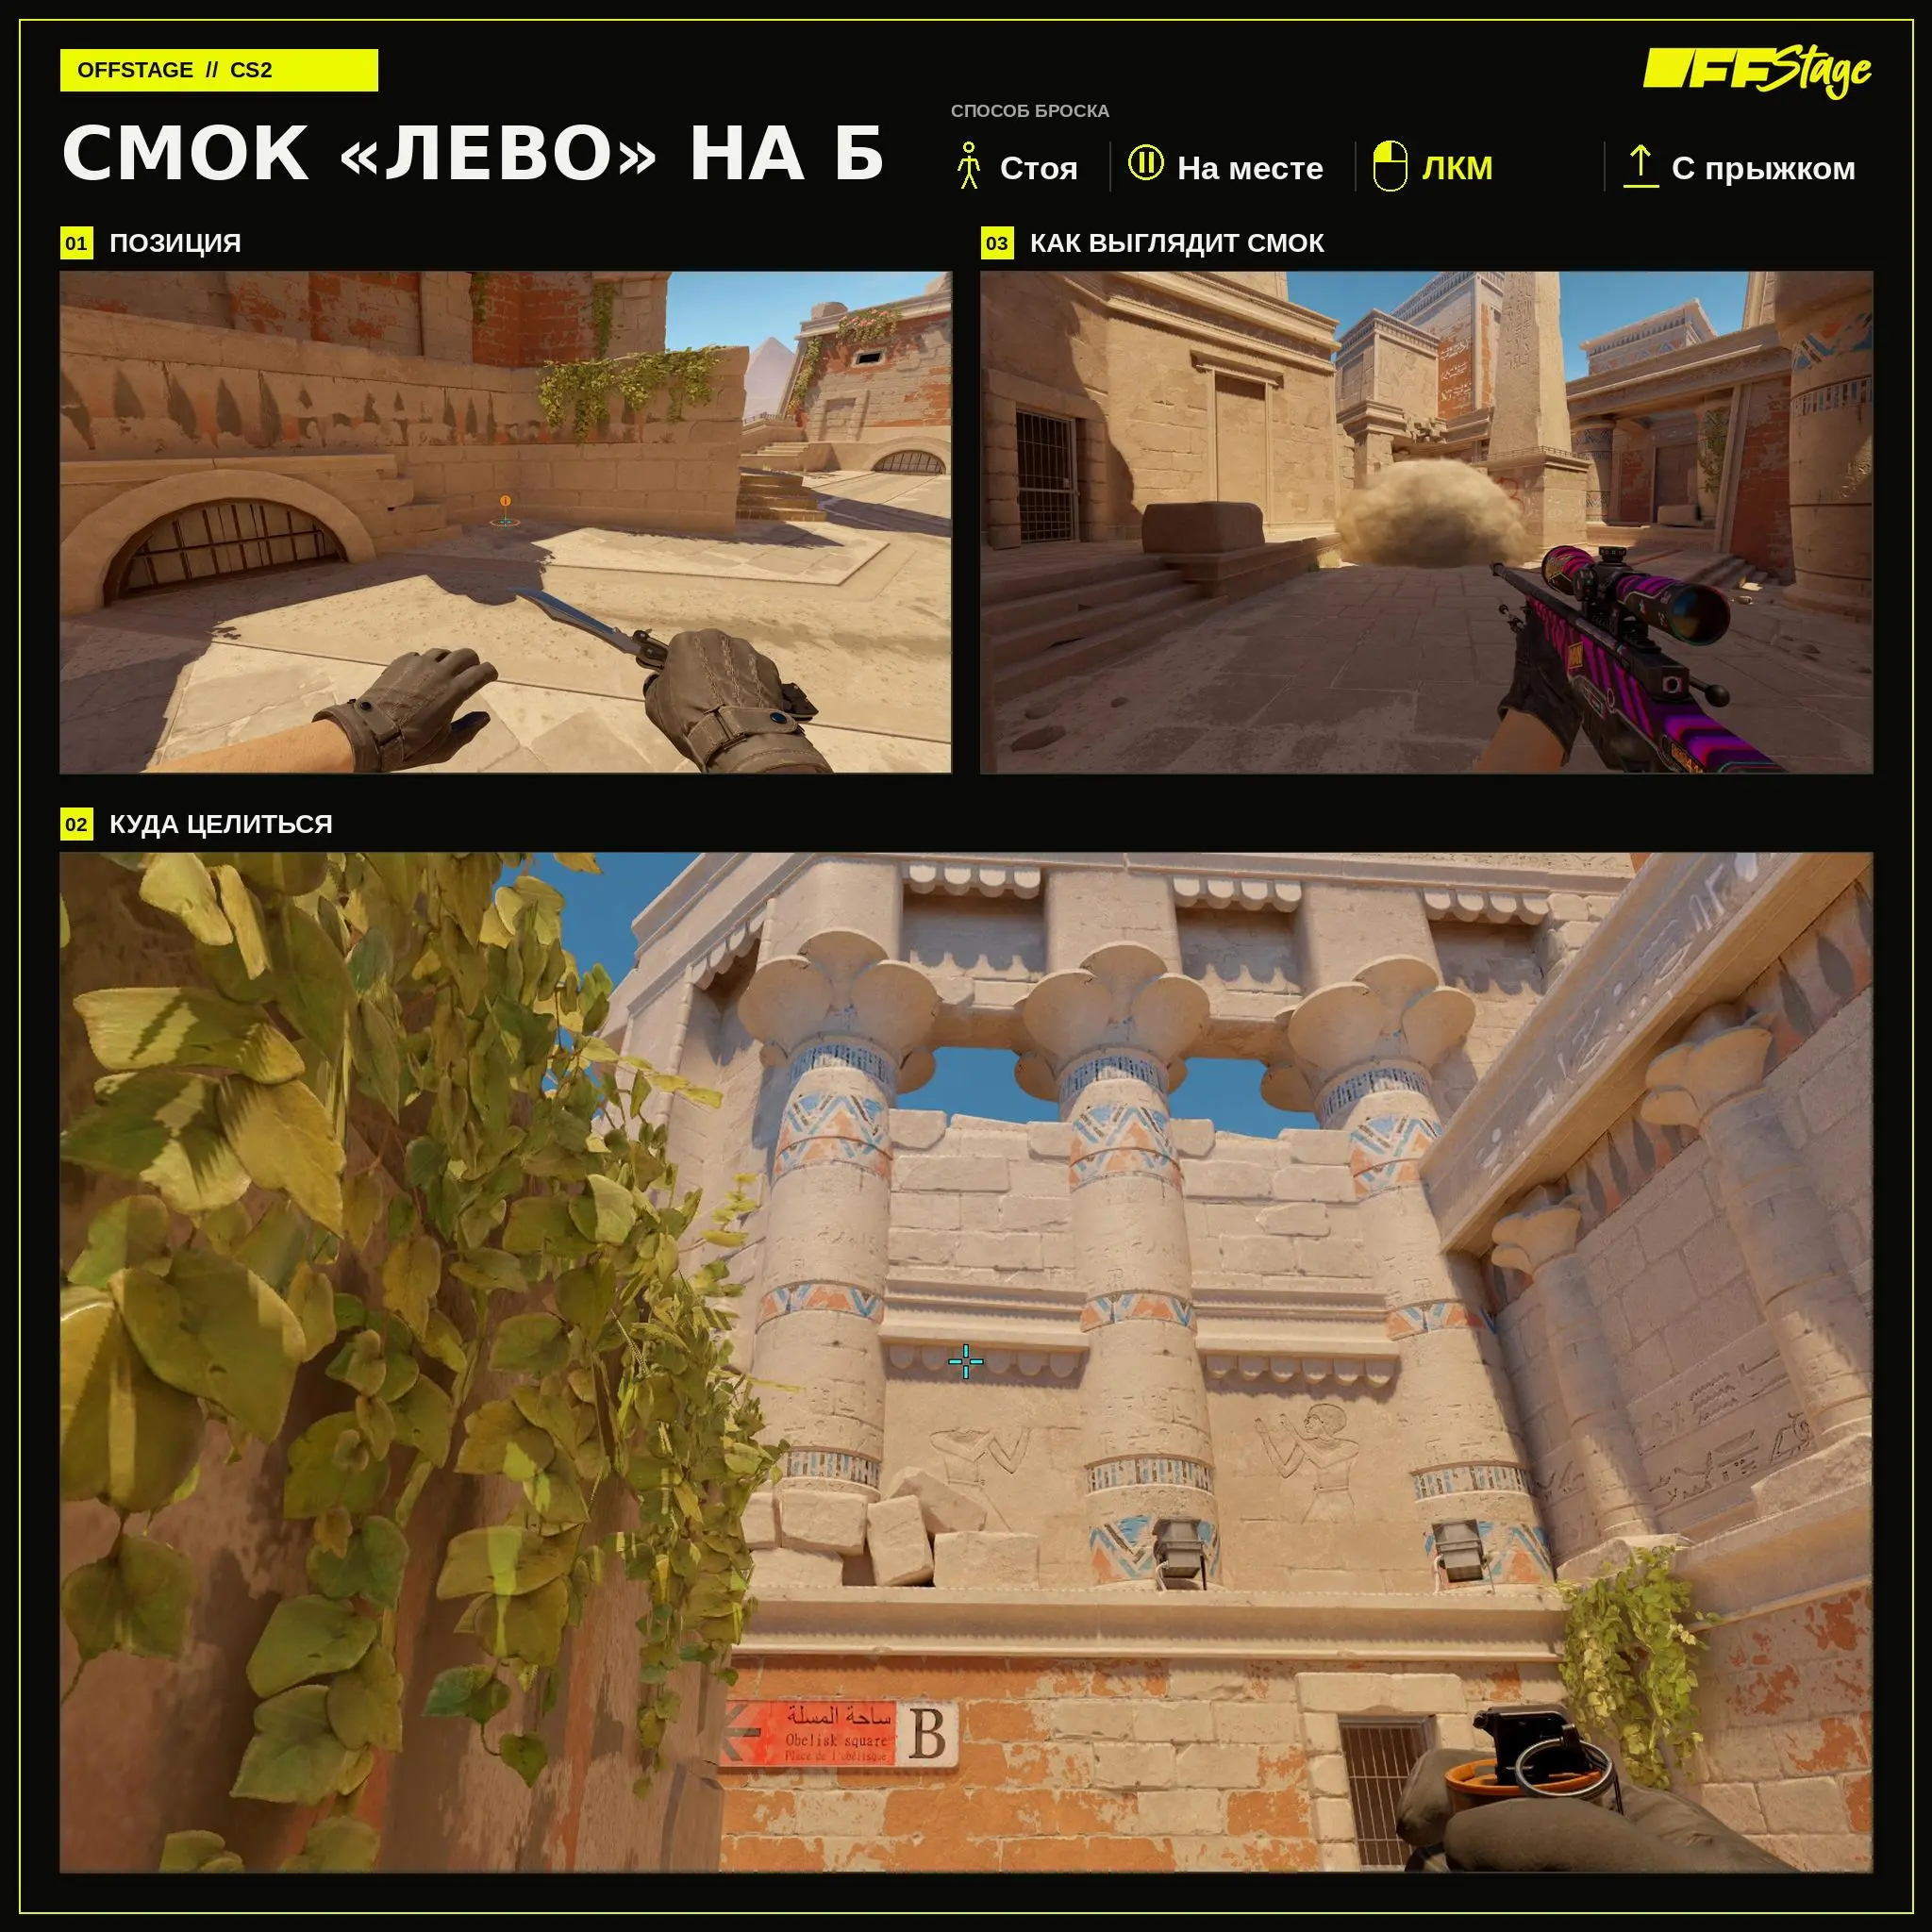
“Left” Smoke at B
The left smoke screen covers one side of point B. It is thrown while standing still using LMB + Jumpthrow. It can be used in combination with the right smoke screen.
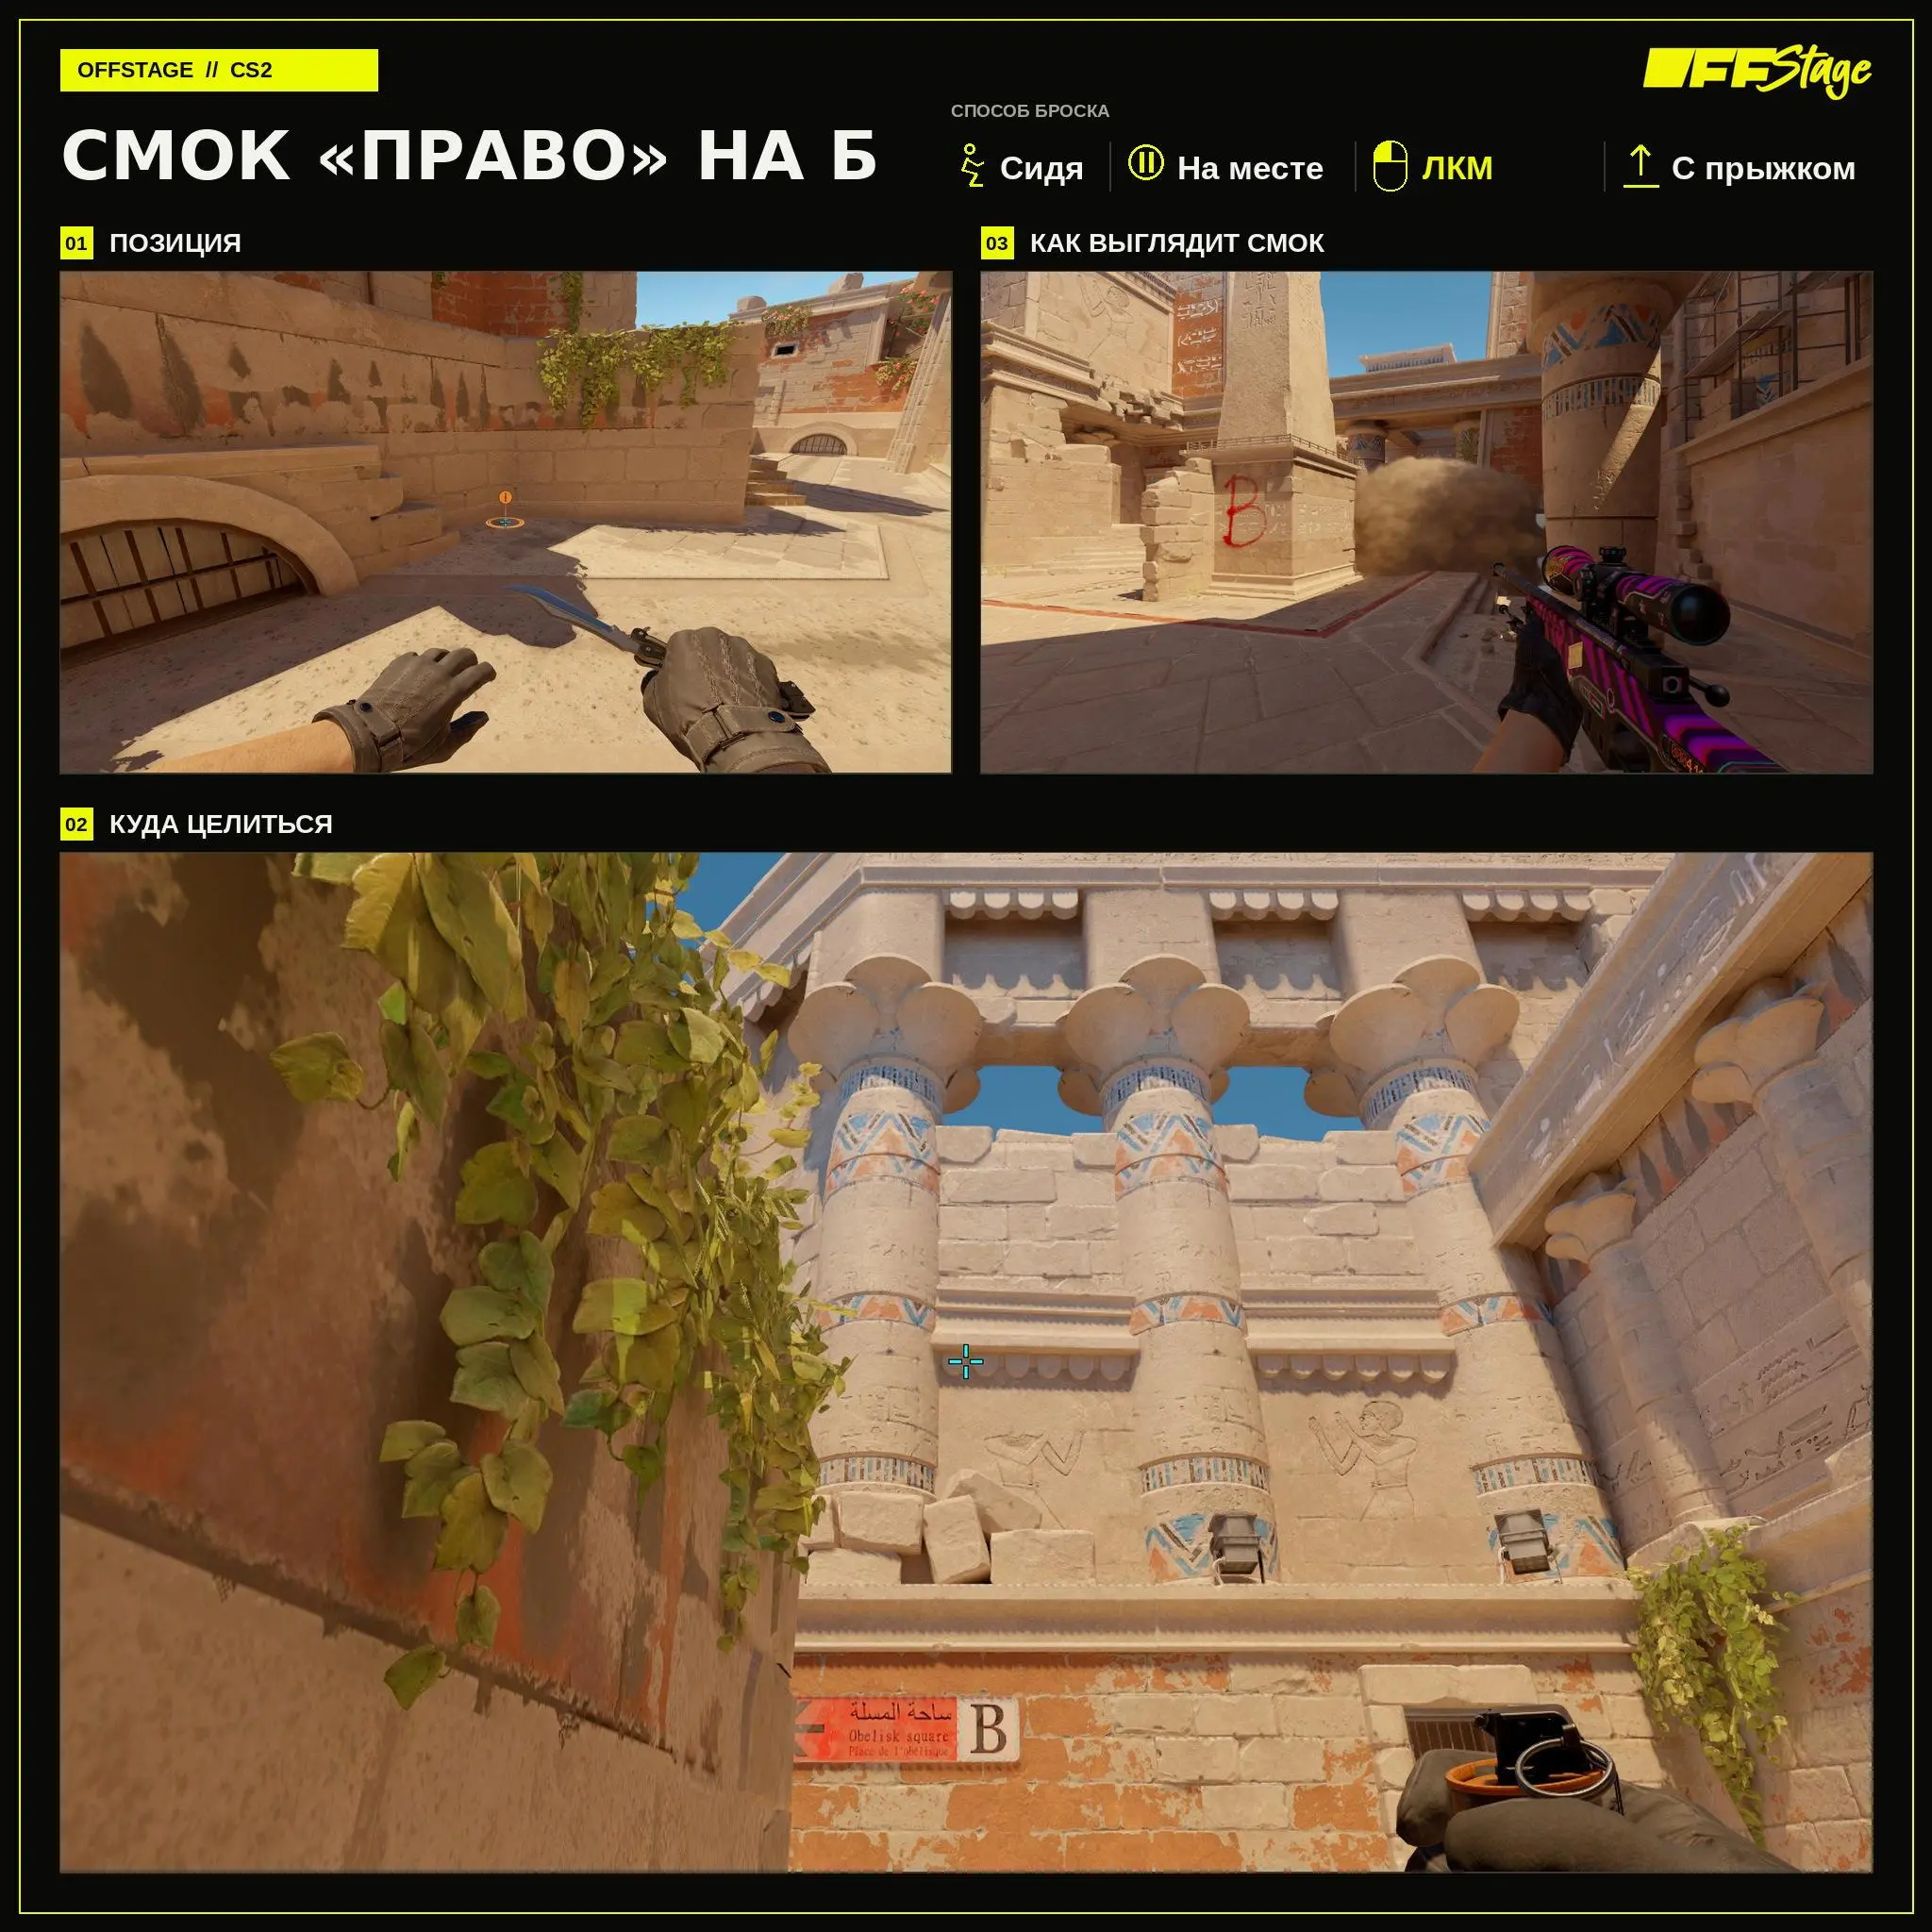
“Right” Smoke at B
The right smoke screen blocks the second part of the view at B. To throw it, sit down, stay still, and press CTRL + Left Mouse Button + Jumpthrow. If you throw it while standing, the grenade will follow a different trajectory.
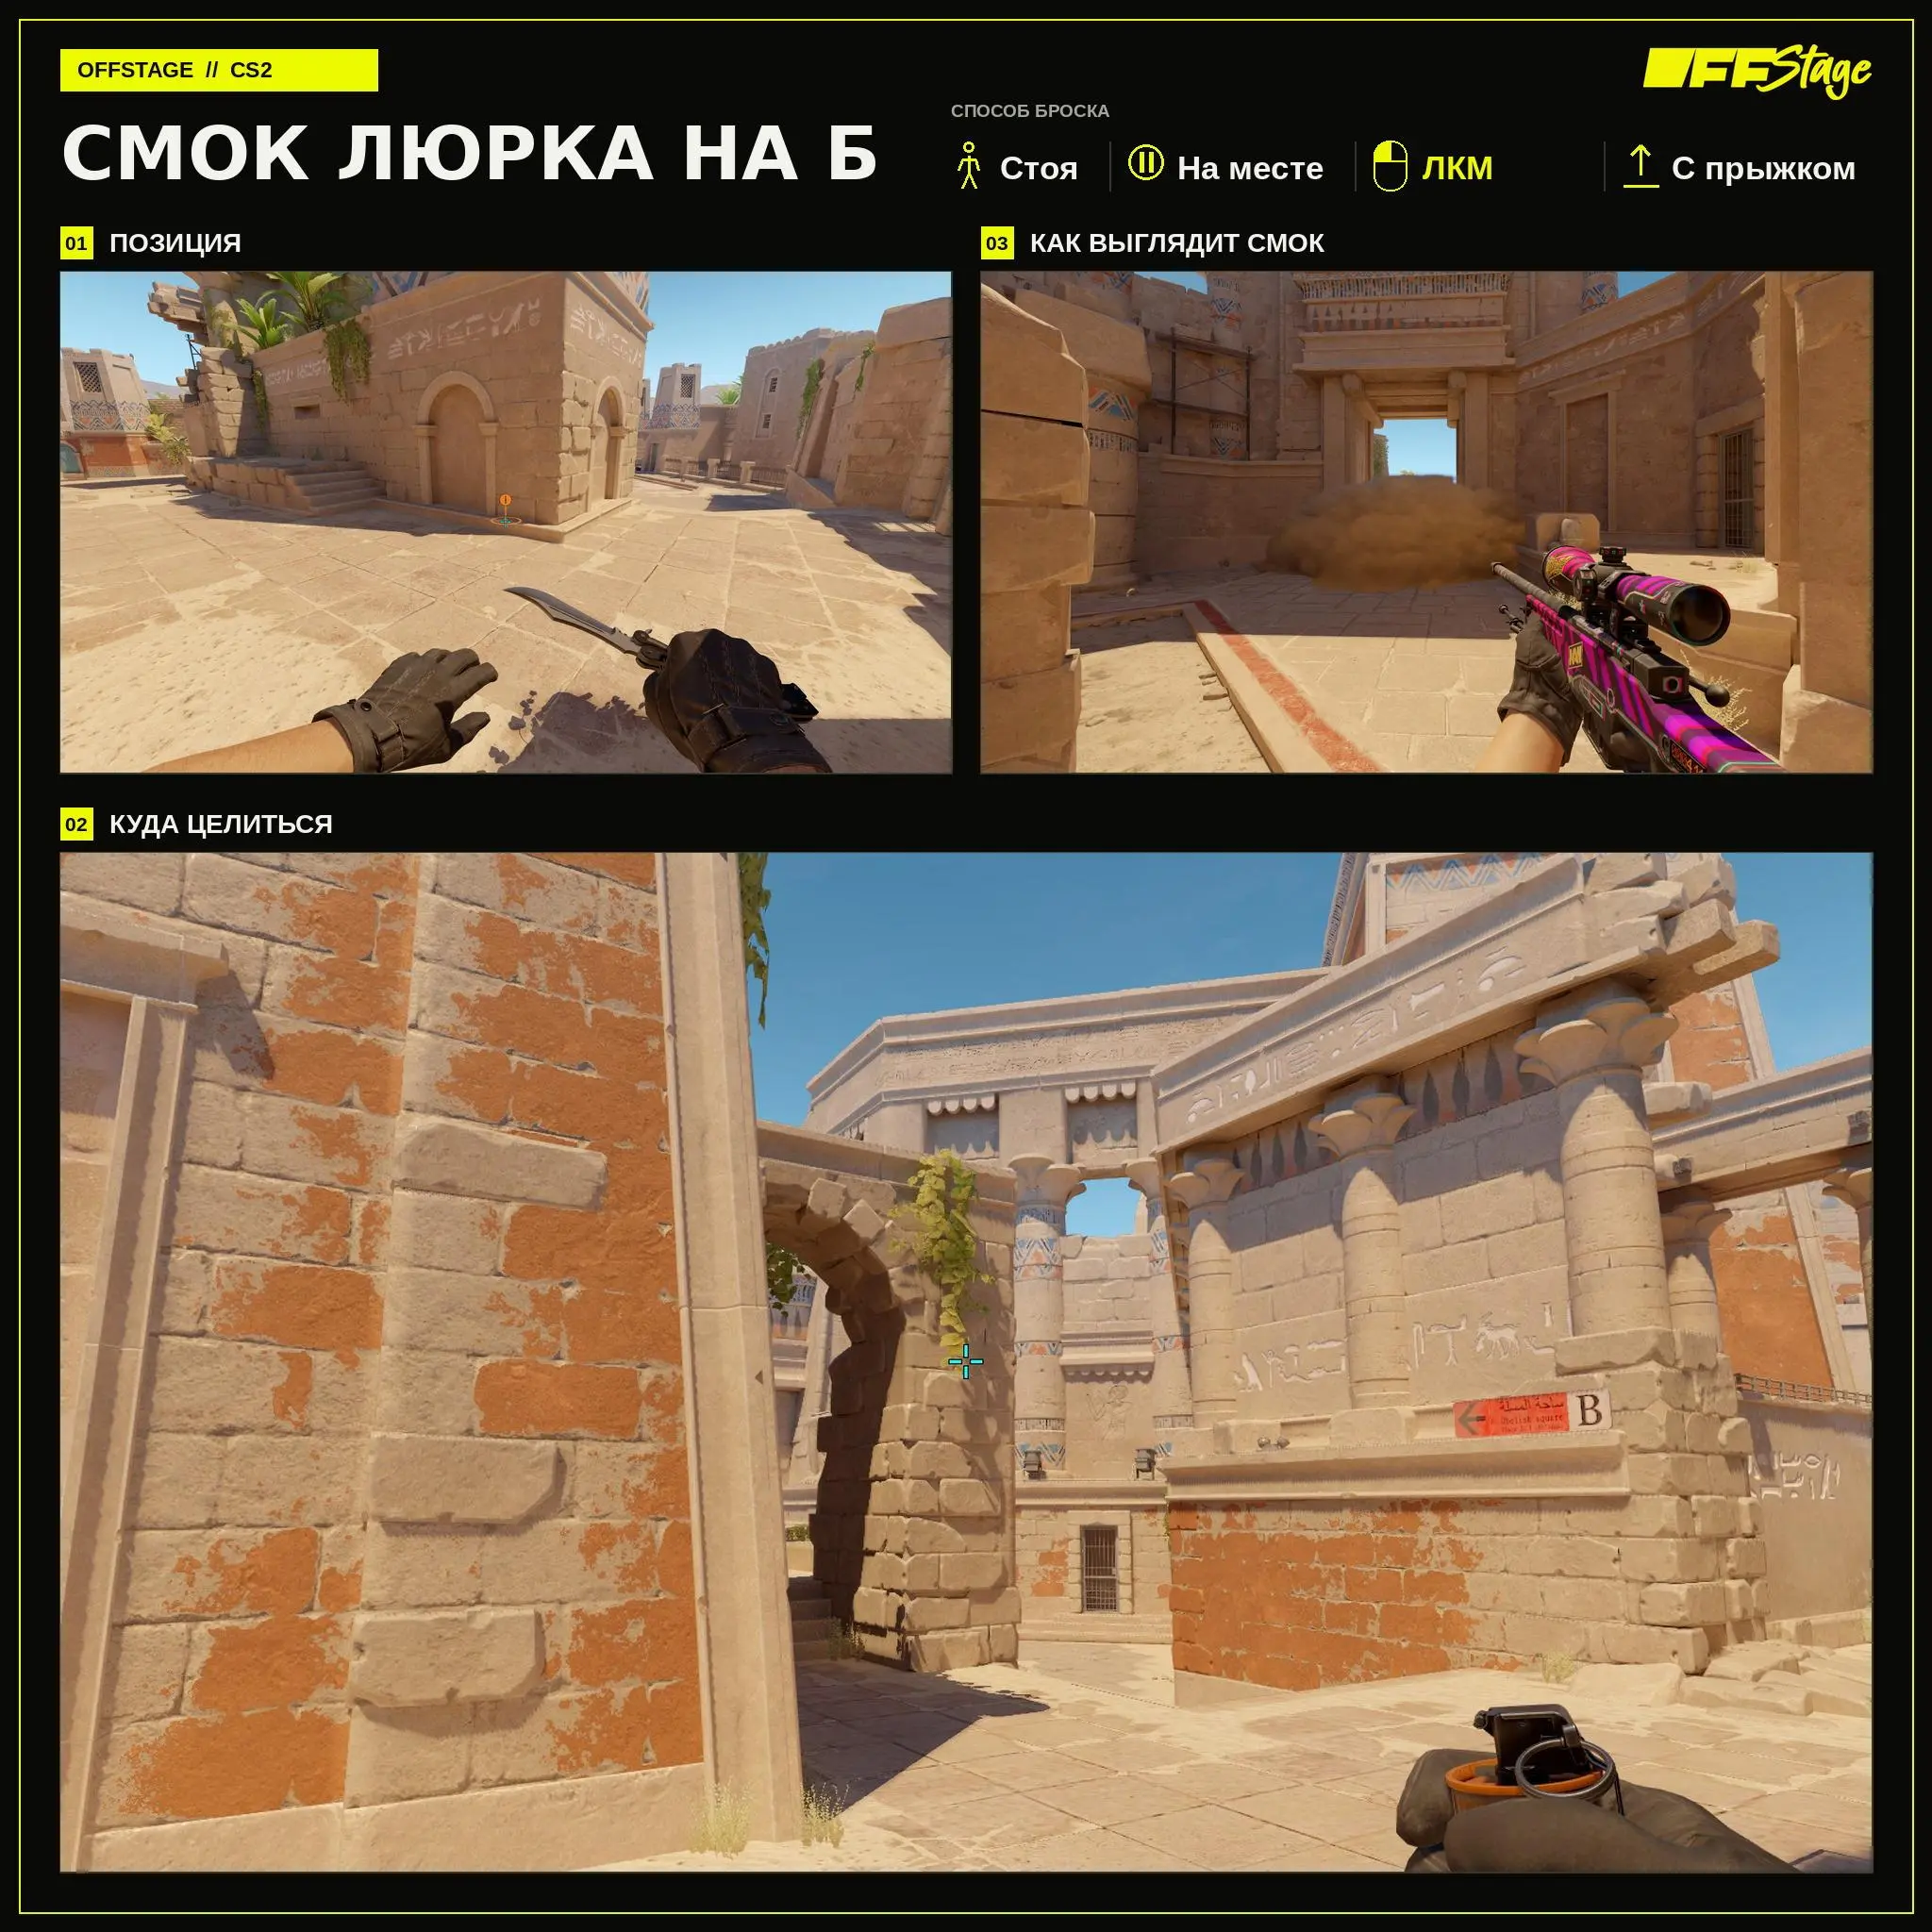
Smoke “Peek” at B
This smoke is used when a player enters B late. Stand at the marked spot and press LMB + Jumpthrow without moving. The timing of the throw depends on the team’s plan for the round.
Smoke Placements for Defense
The two smoke grenades on the Stairs deploy at different depths. Choose the option based on the anchor’s position and the defense plan at the start of the round.
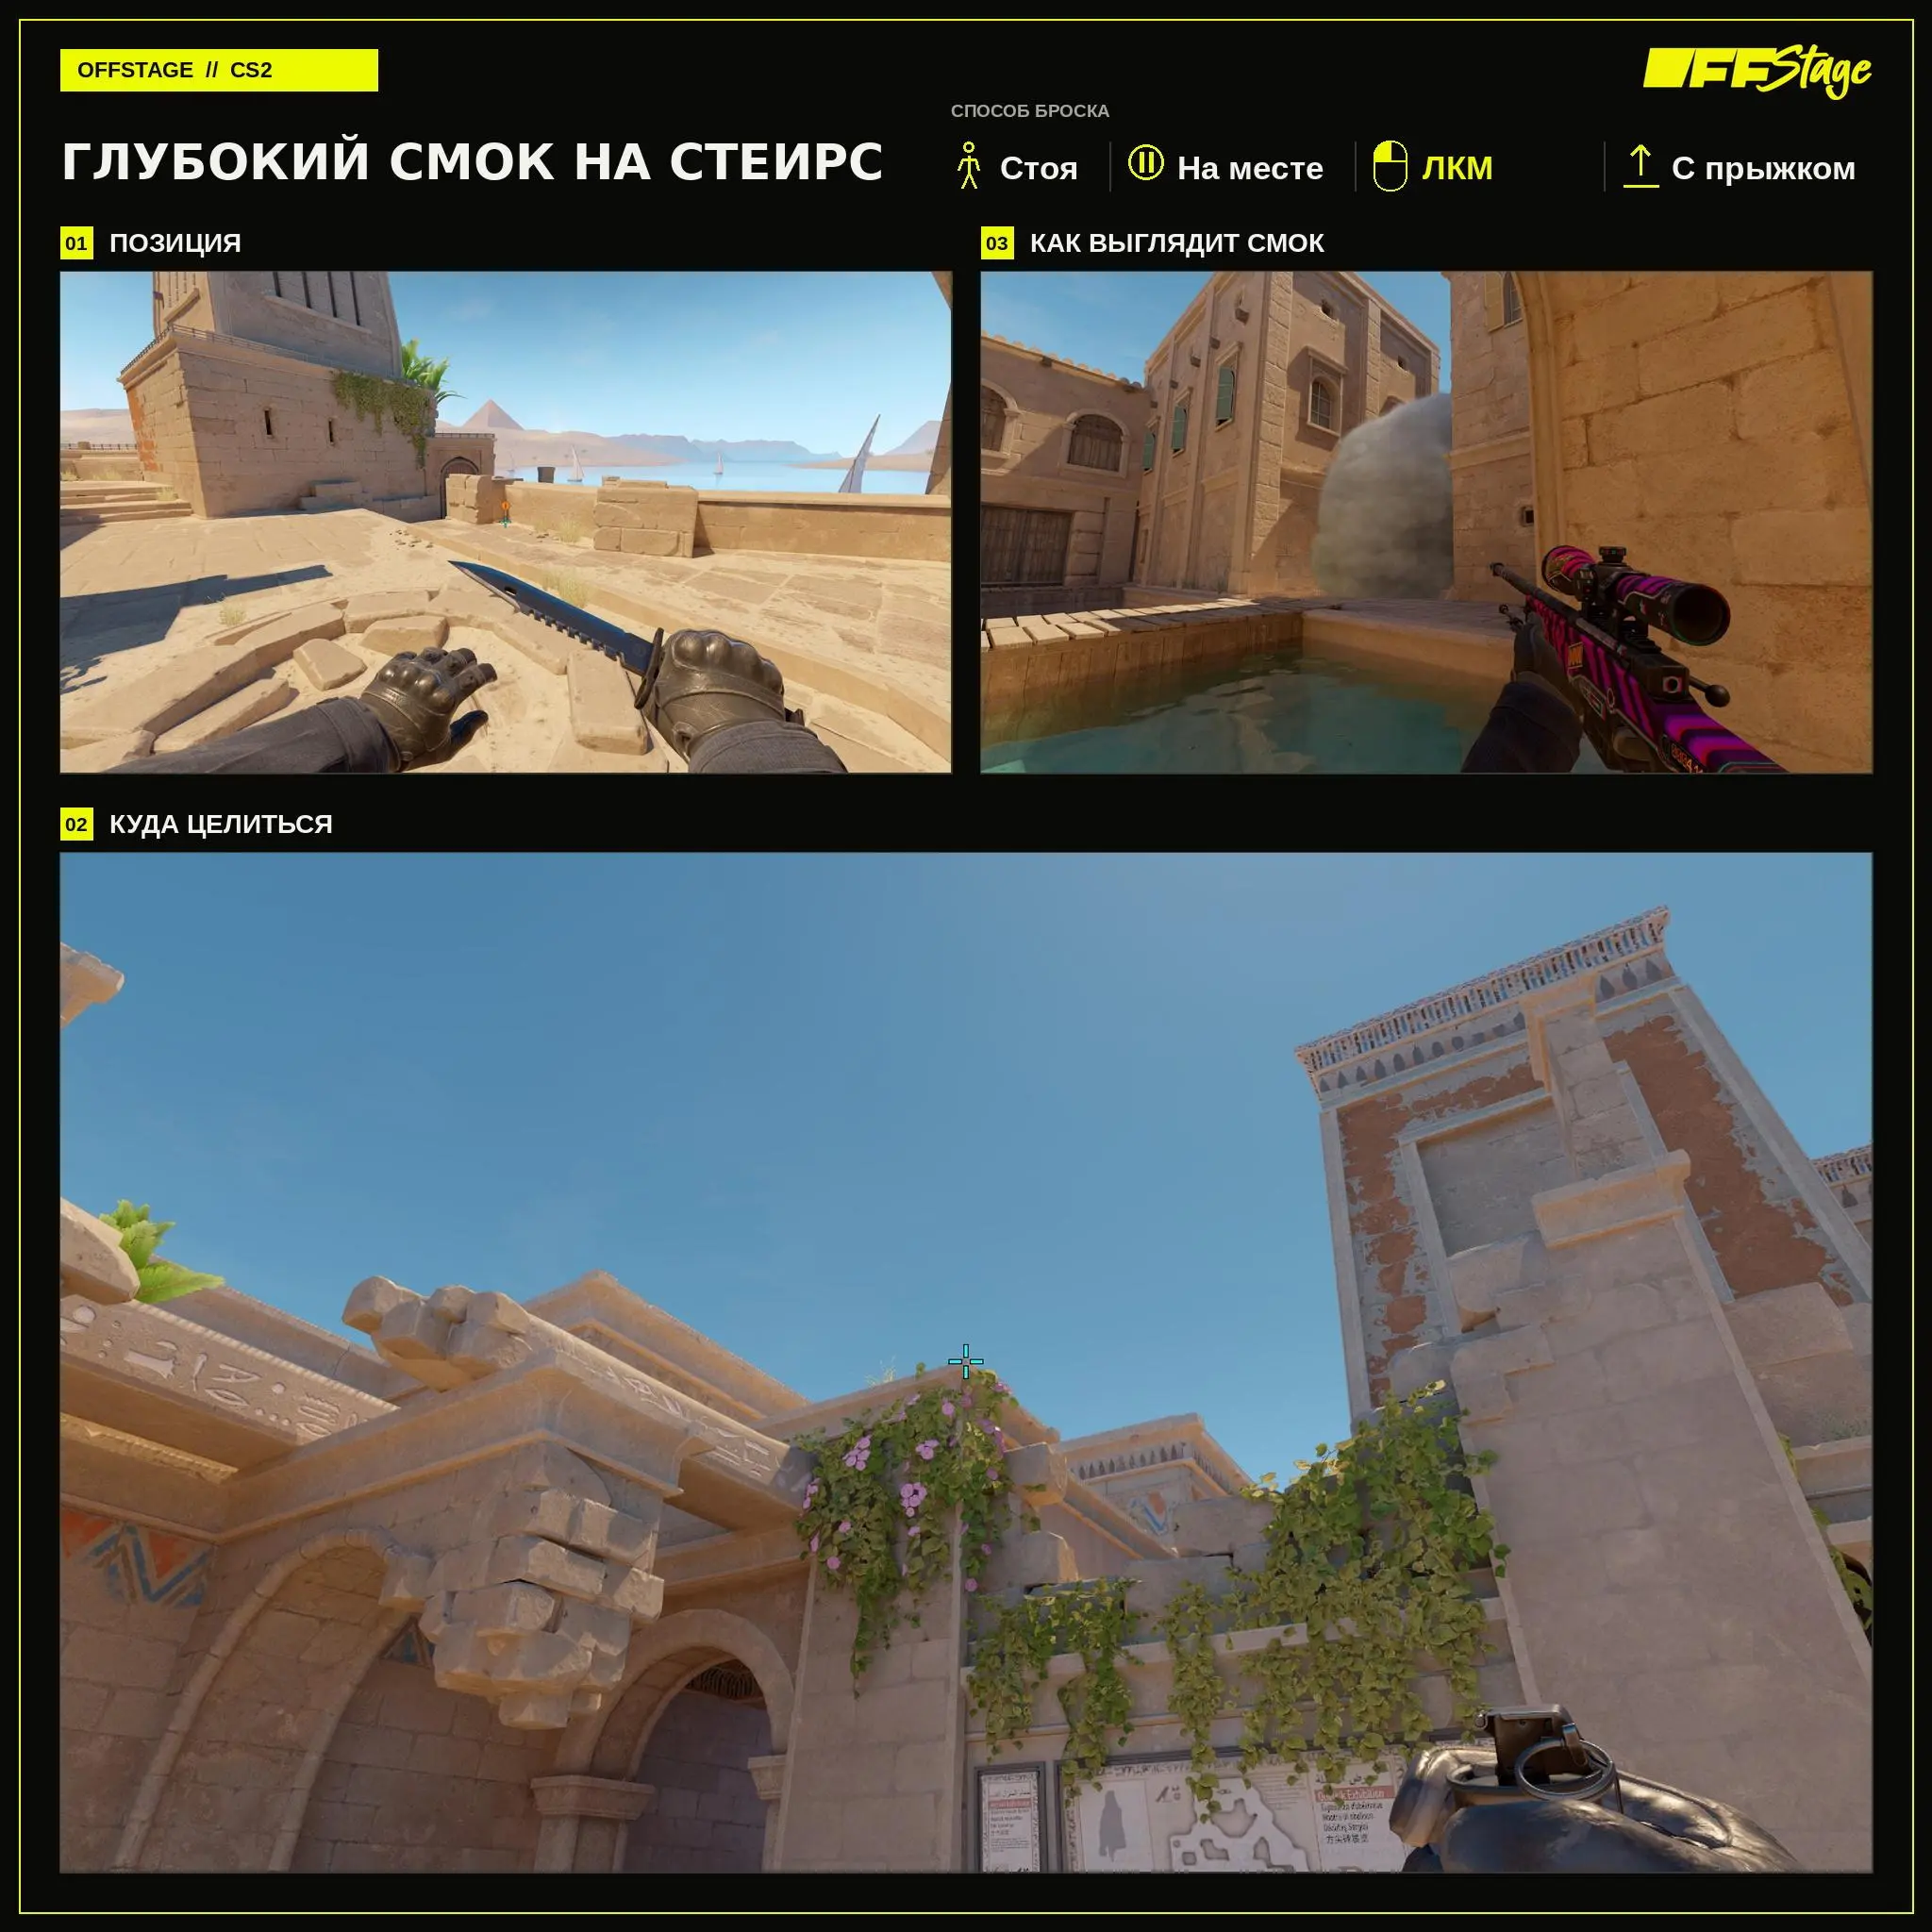
Deep smoke on Stairs
A deep smoke screen blocks the far end of the passage and gives the support player more space in front of the smoke. Stand at the indicated spot and perform LMB + Jump Throw without moving. After throwing, monitor the smoke’s exit at the edge.
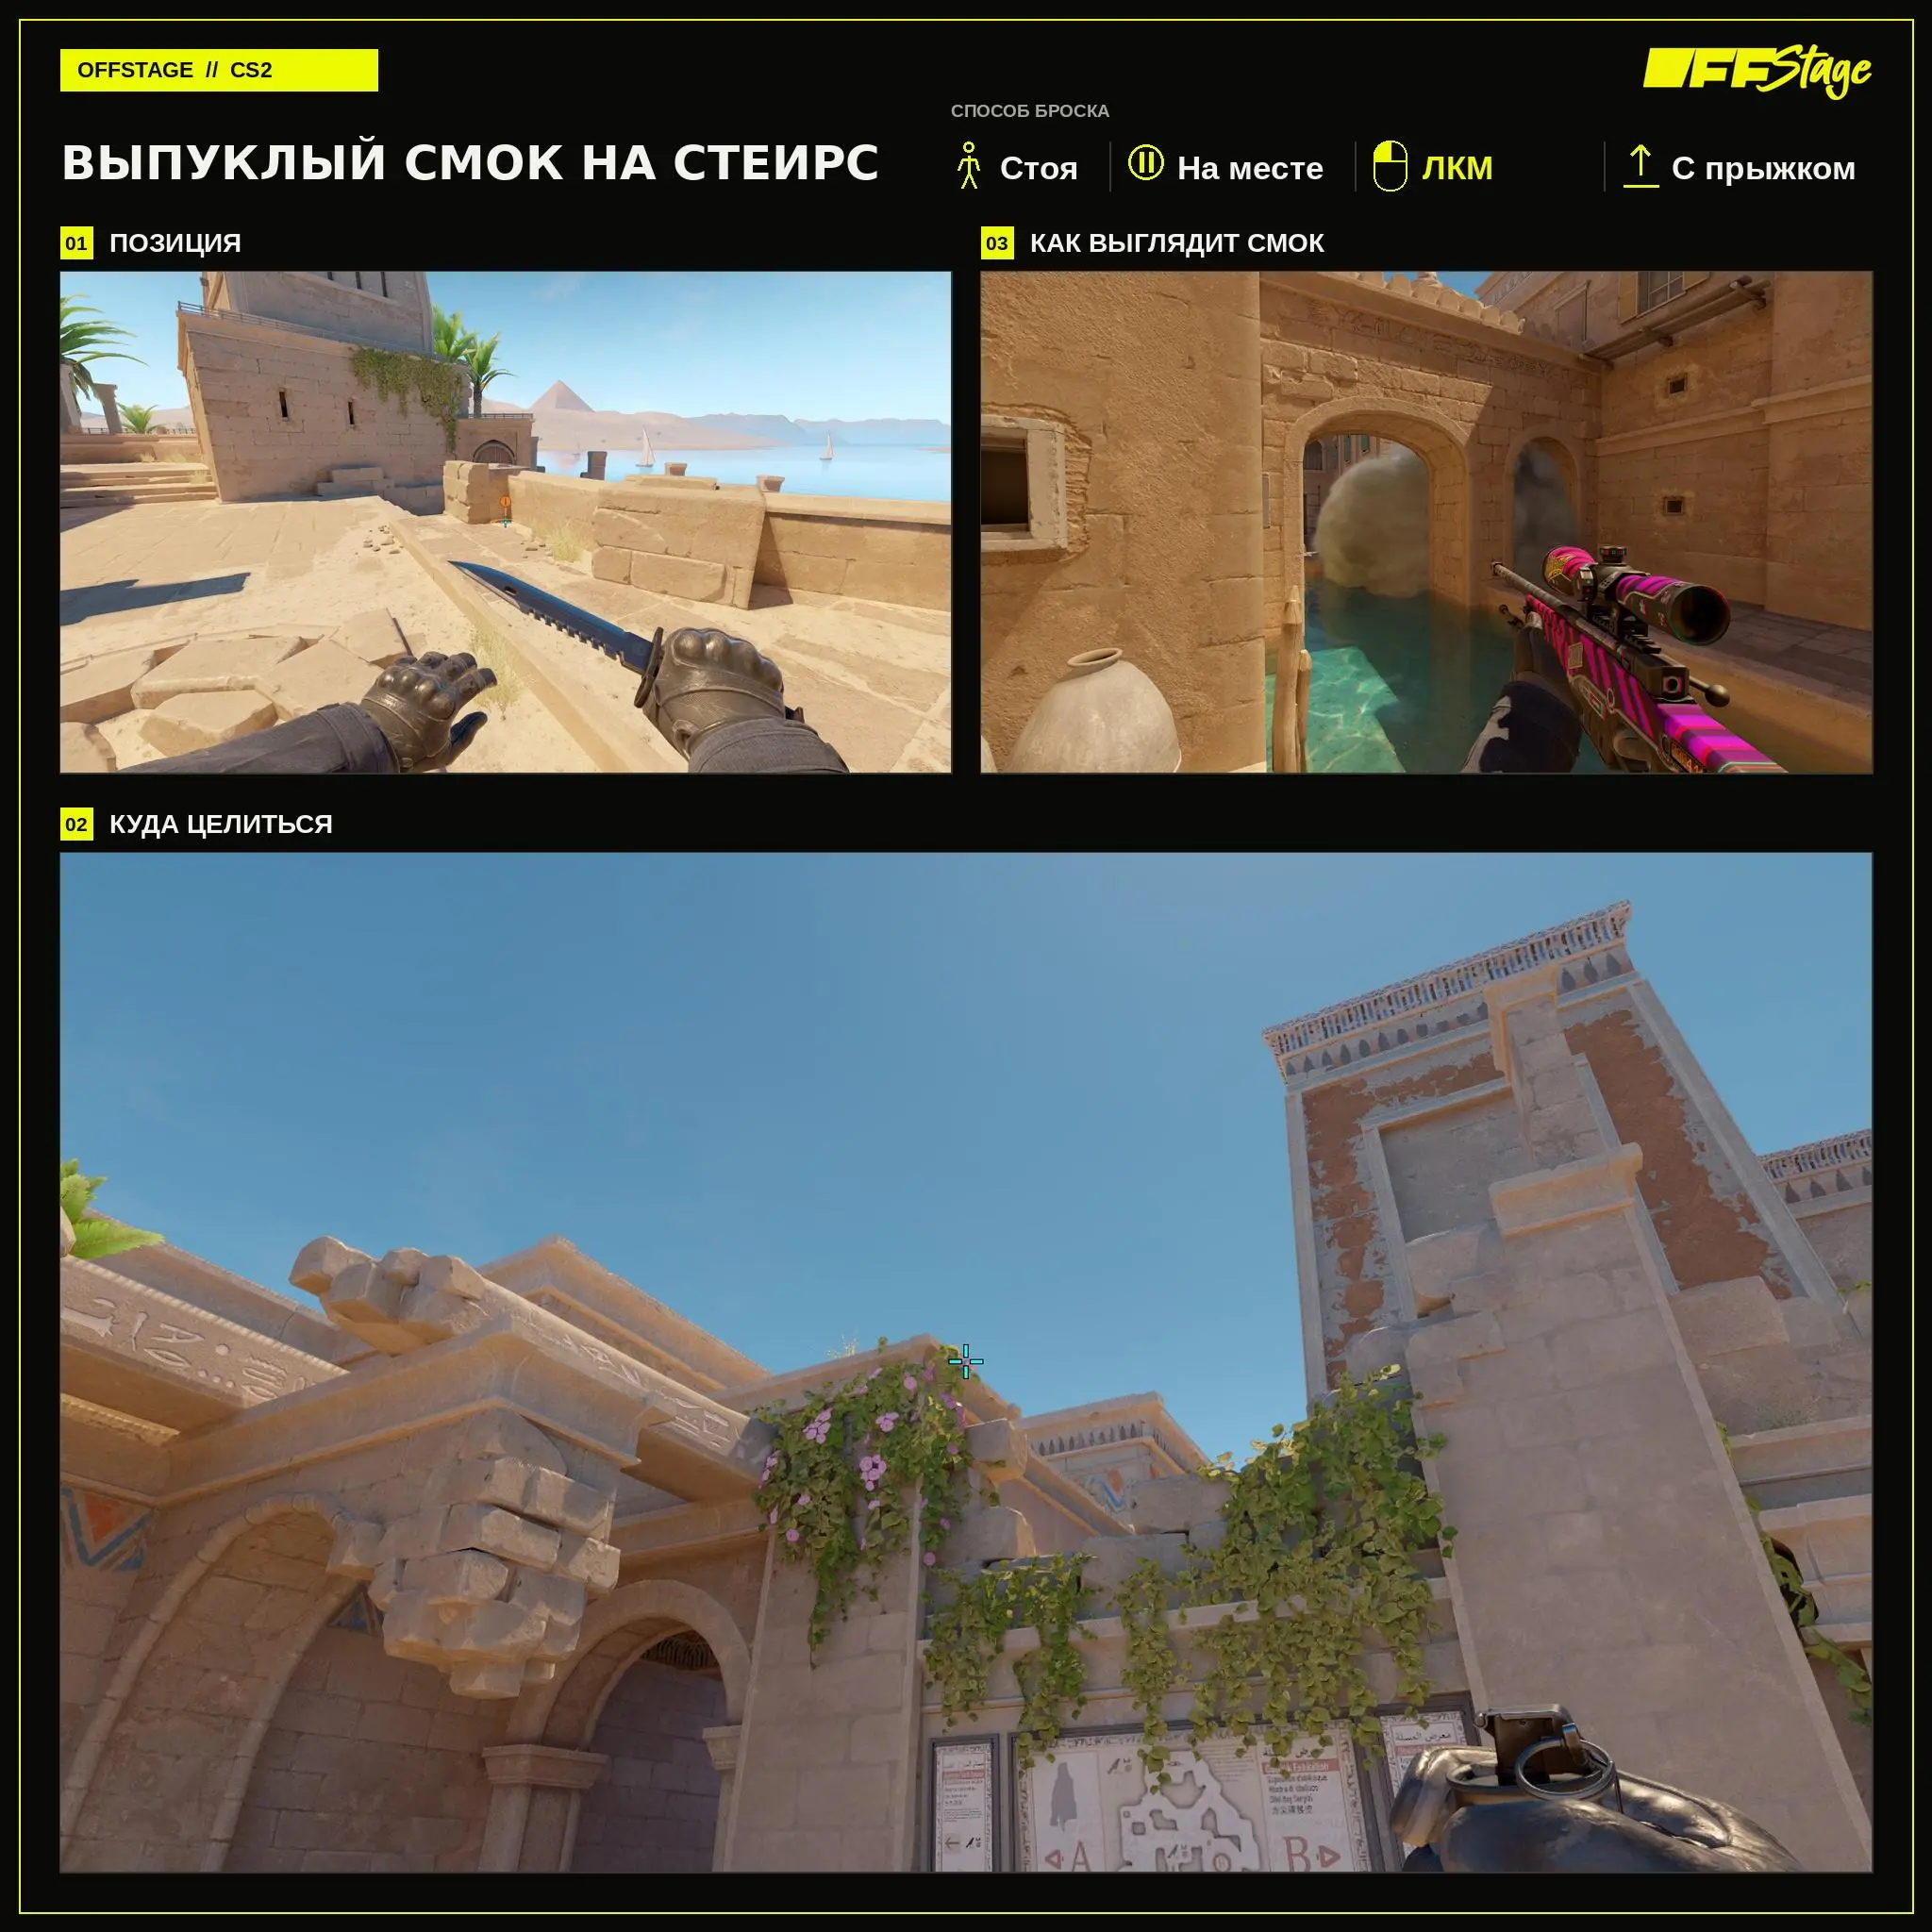
Convex smoke on the stairs
The convex variant opens up closer to the attack. The throw is performed while standing still using LMB + Jump Throw. Before the round starts, agree on who will monitor the exit through the smoke.
How to Build a Basic Set for Anubis
First, master the connector, the window, and two smoke grenades on B. After that, add the doors, the “9,” and grenades for defense. Every smoke placement on Anubis in CS2 should be tied to the team’s next move. Before the round starts, decide who will throw the smoke and when the other players will start their push.
Frequently Asked Questions (FAQ)
Для базового выхода пригодятся левый и правый дымы, а смок люрка можно добавить под позднее появление игрока на точке.
Встаньте в показанную точку, одновременно нажмите W и выполните ЛКМ + Jumpthrow. Разбегаться перед броском не нужно.
Глубокий дым раскрывается дальше и оставляет опорнику больше места. Выпуклый вариант появляется ближе к атаке.