Smoke placements on the Inferno map in CS2

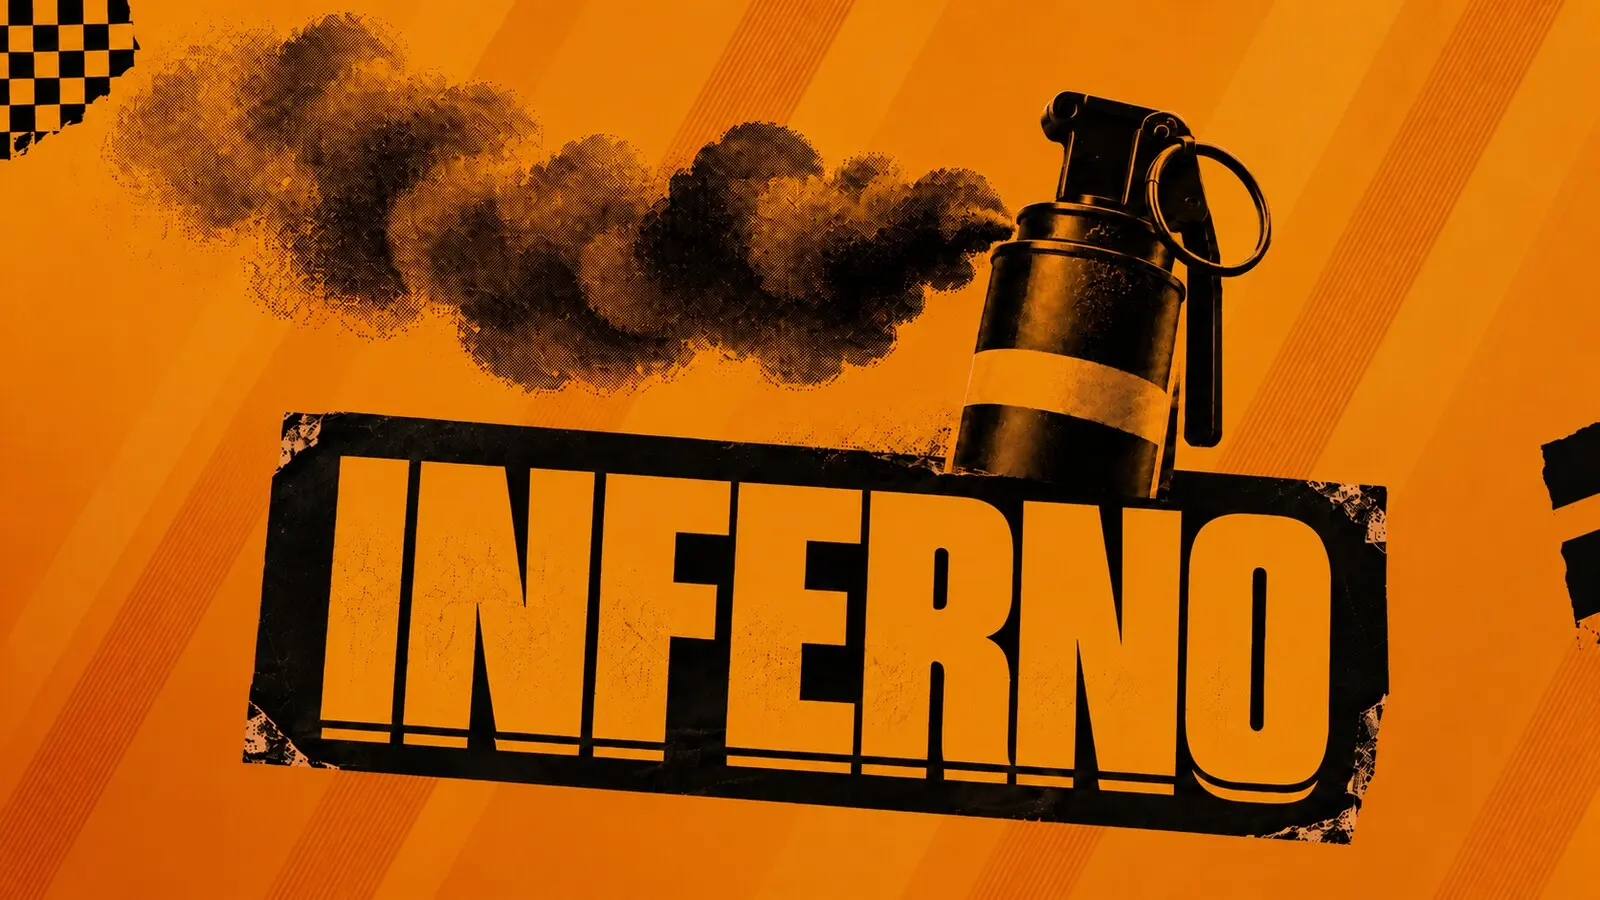
On Inferno, smoke grenades block narrow passages on the Banana, in the center of the map, and near the bomb sites. Smoke grenades in the CT area, on the Coffins, and in the Arch block specific lines of sight during the push.
This article compiles eleven smoke placements for both sides. On the attack, we’ll break down the smoke placements used by Mike and G2 Esports: in the CT area, on the coffins, in the arch, the long, and the short routes. For defense—two smoke grenades on the Banana, including the Natus Vincere variant, and a grenade for retaking the truck.
Some throws are performed with a standard left-click. Practice Mike’s smoke with W separately, the CT variant using left-click + right-click + Jumpthrow, and the car retake by pressing both mouse buttons simultaneously.
Smoke Placements for Attack
For attacks, smoke grenades should be deployed before the team starts moving forward. If the grenade lands too early, the support player will have time to change position before contact.
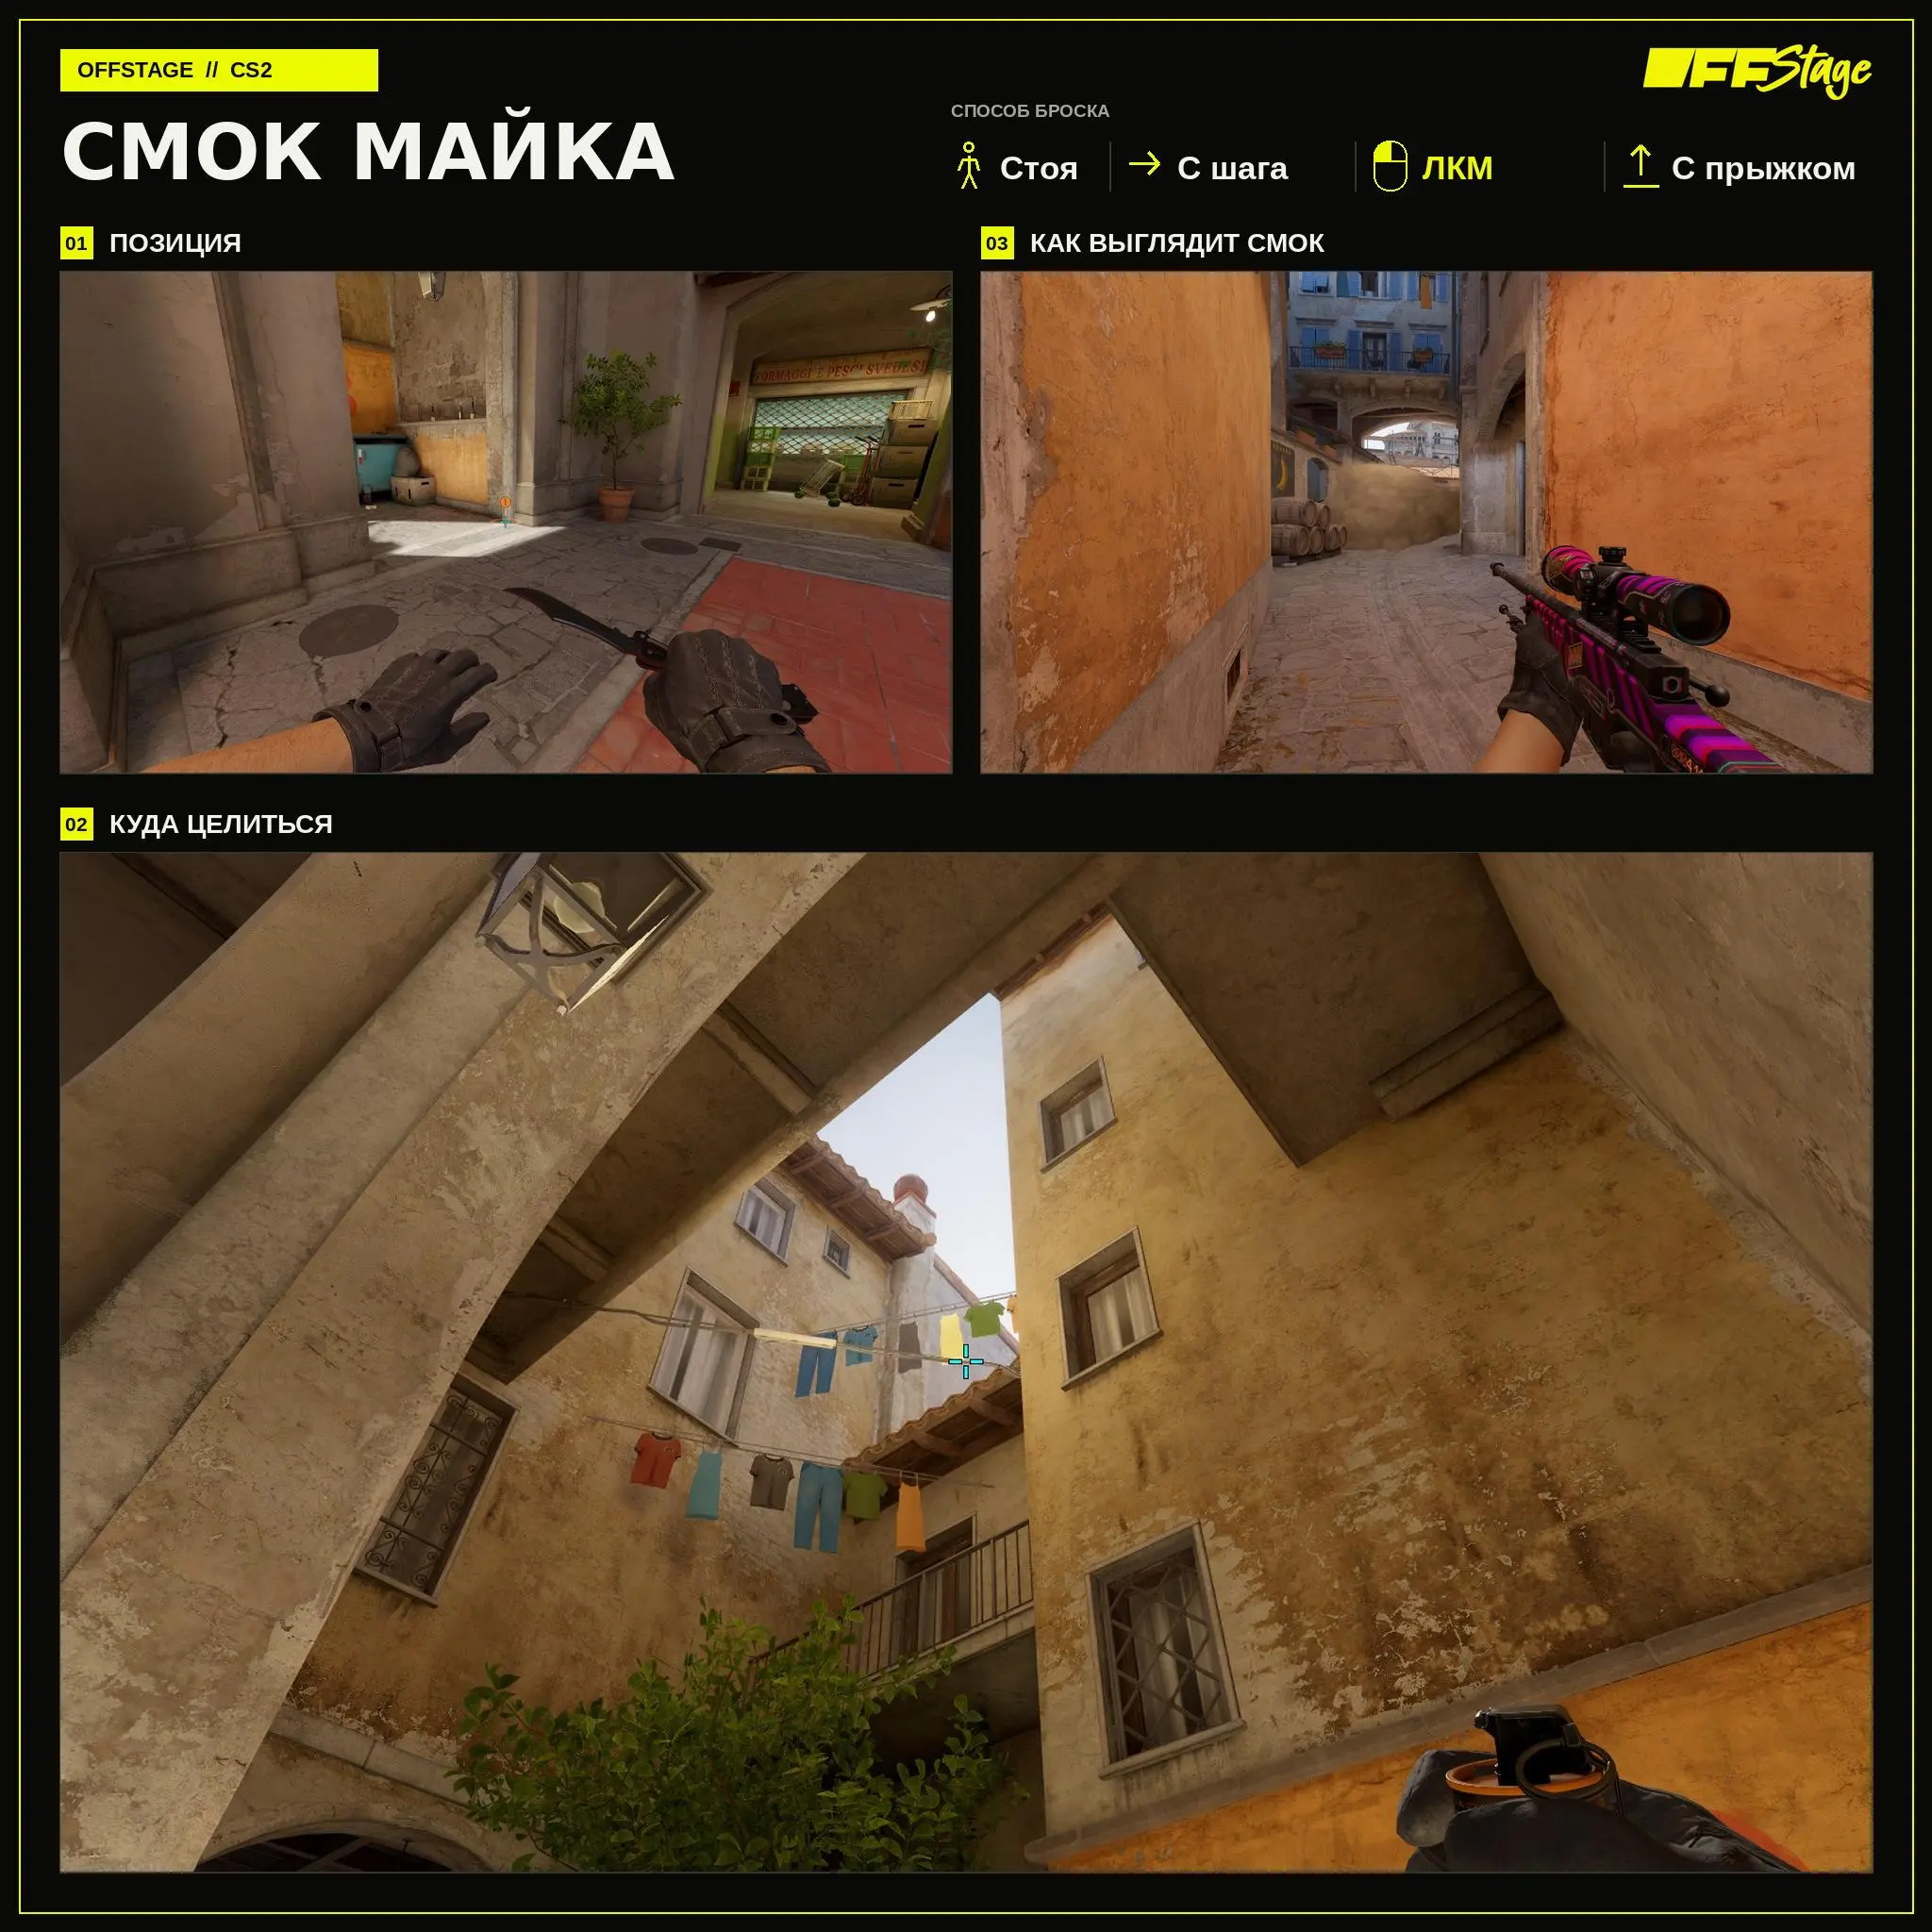
Mike’s Smoke
Mike’s throw covers the shown line during the run-up. Stand at the starting point, press W simultaneously, and perform LMB + Jumpthrow. If you start moving too early, the trajectory will change.
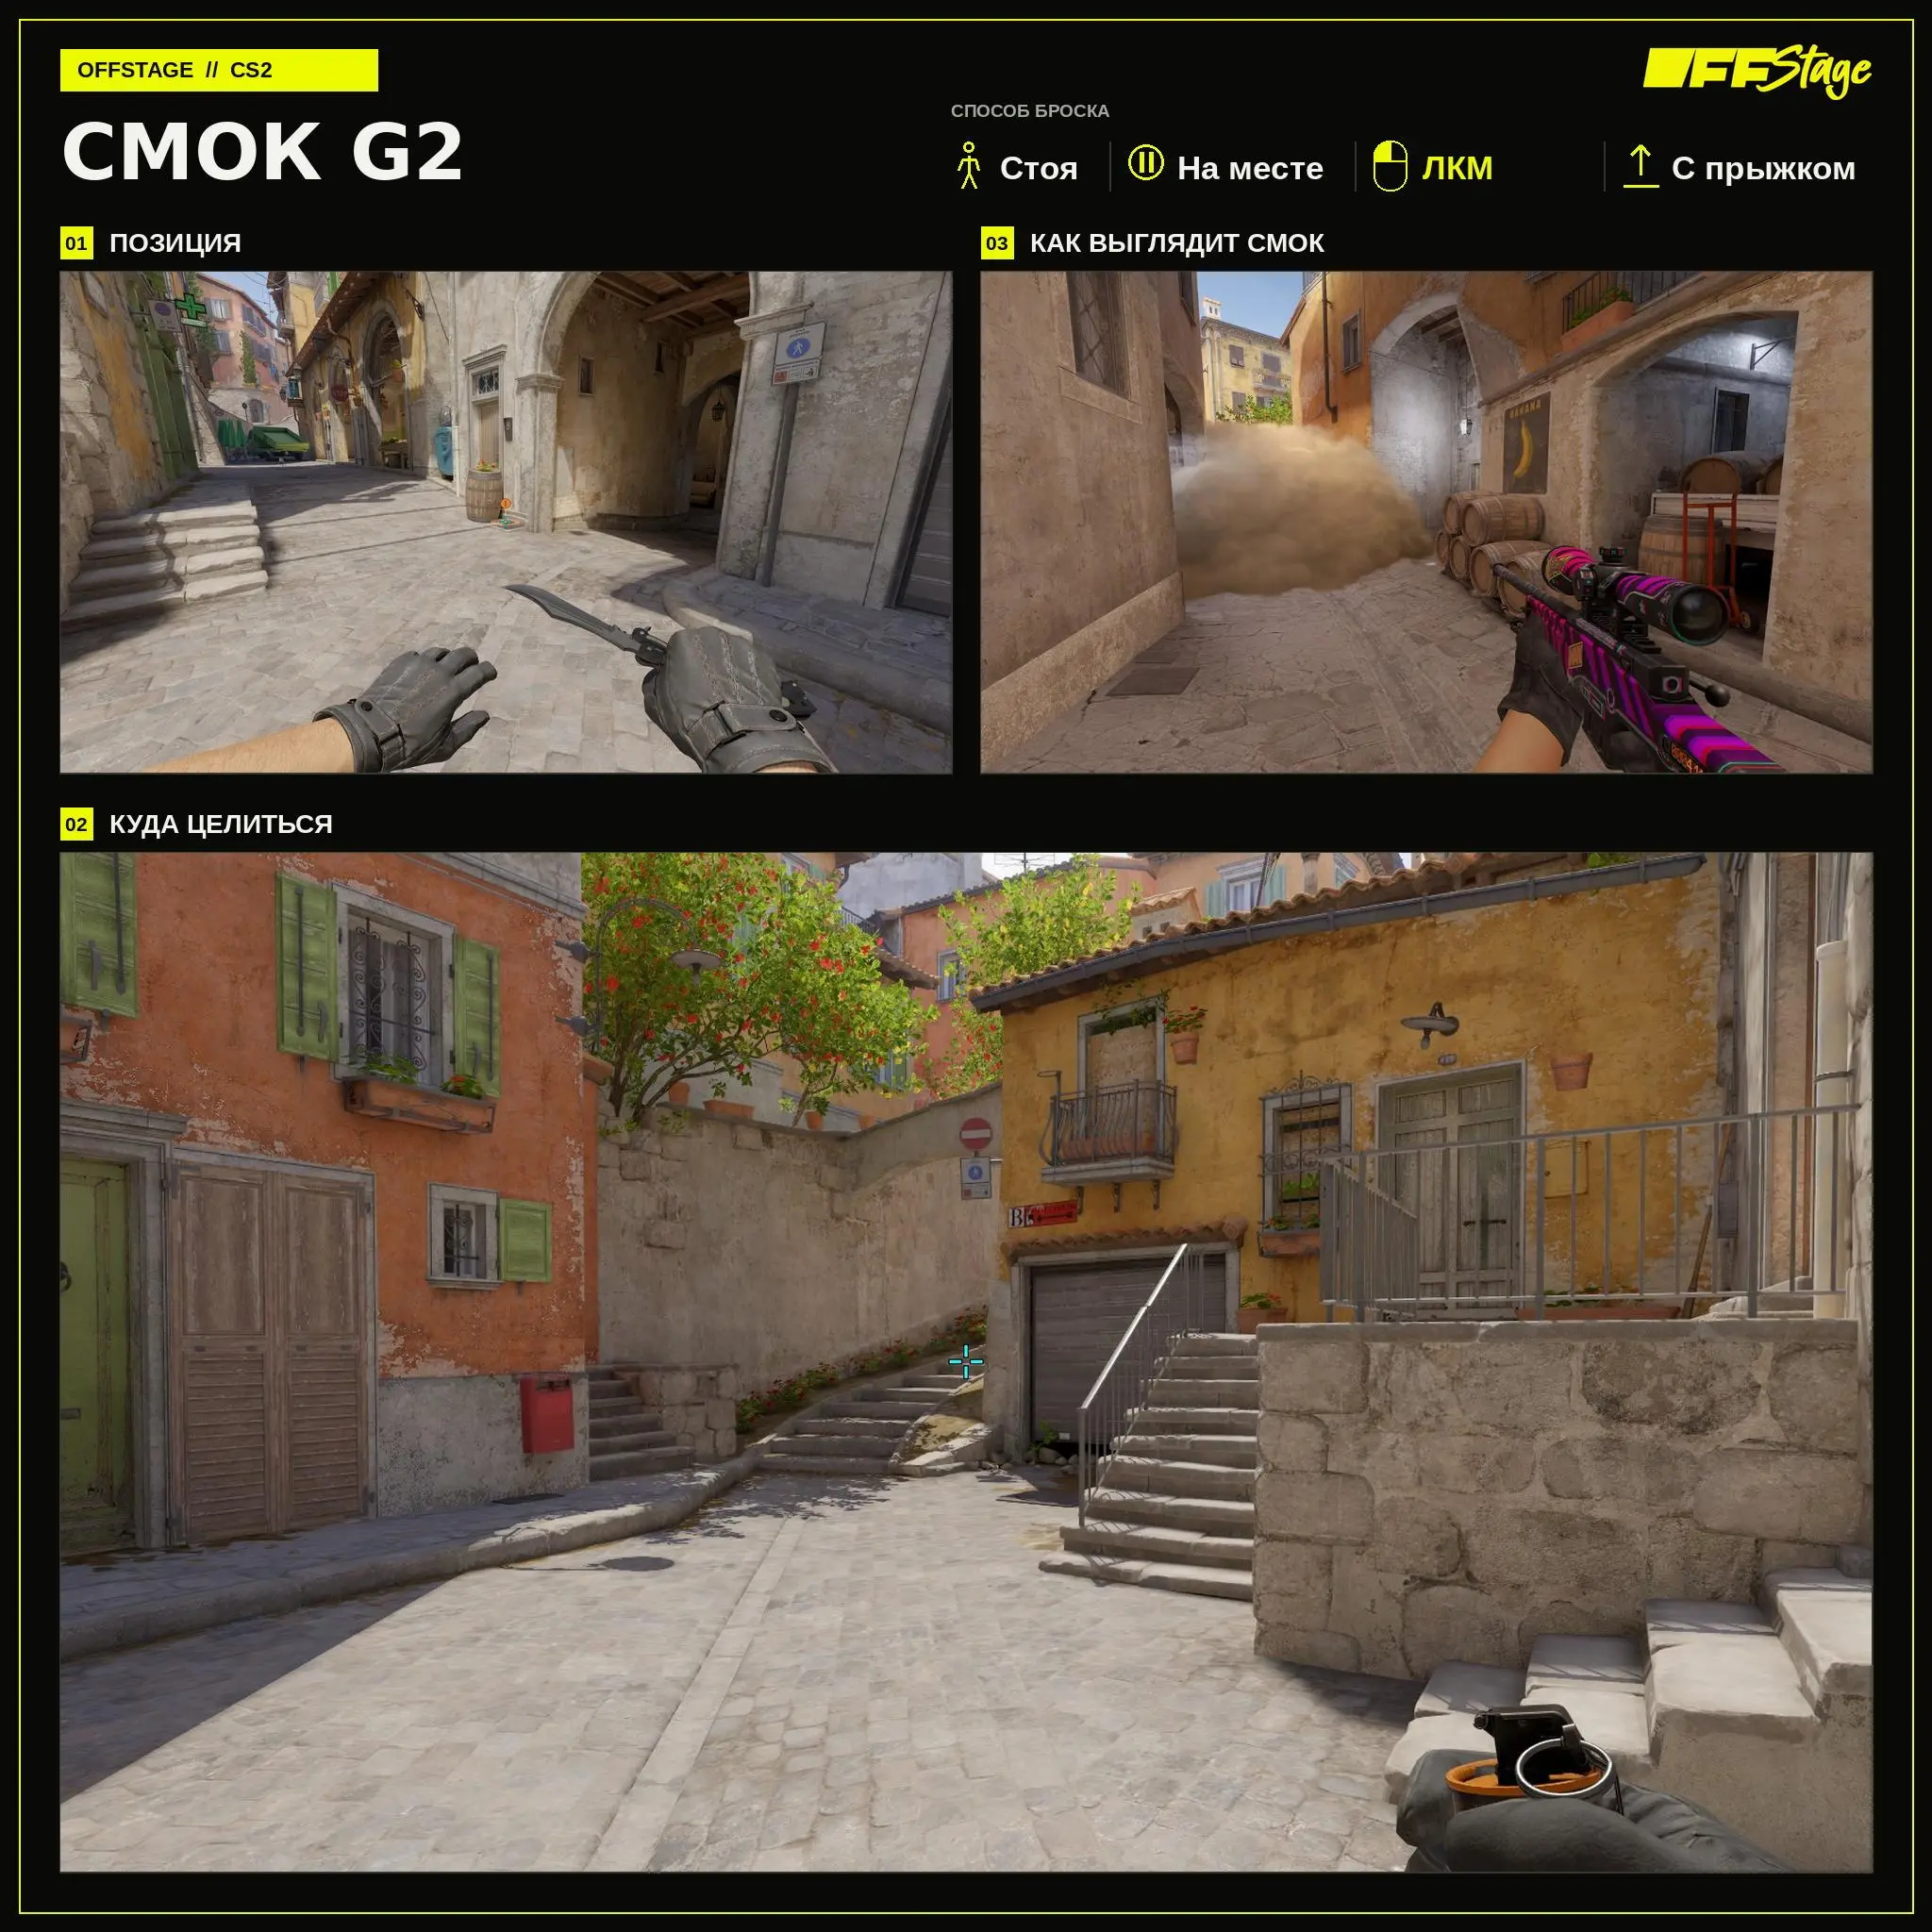
G2 Smok
G2’s smoke is thrown from a standing position. Stand in the starting frame, aim at the reference point, and press LMB + Jumpthrow without moving. The team can begin their advance after the smoke has cleared.
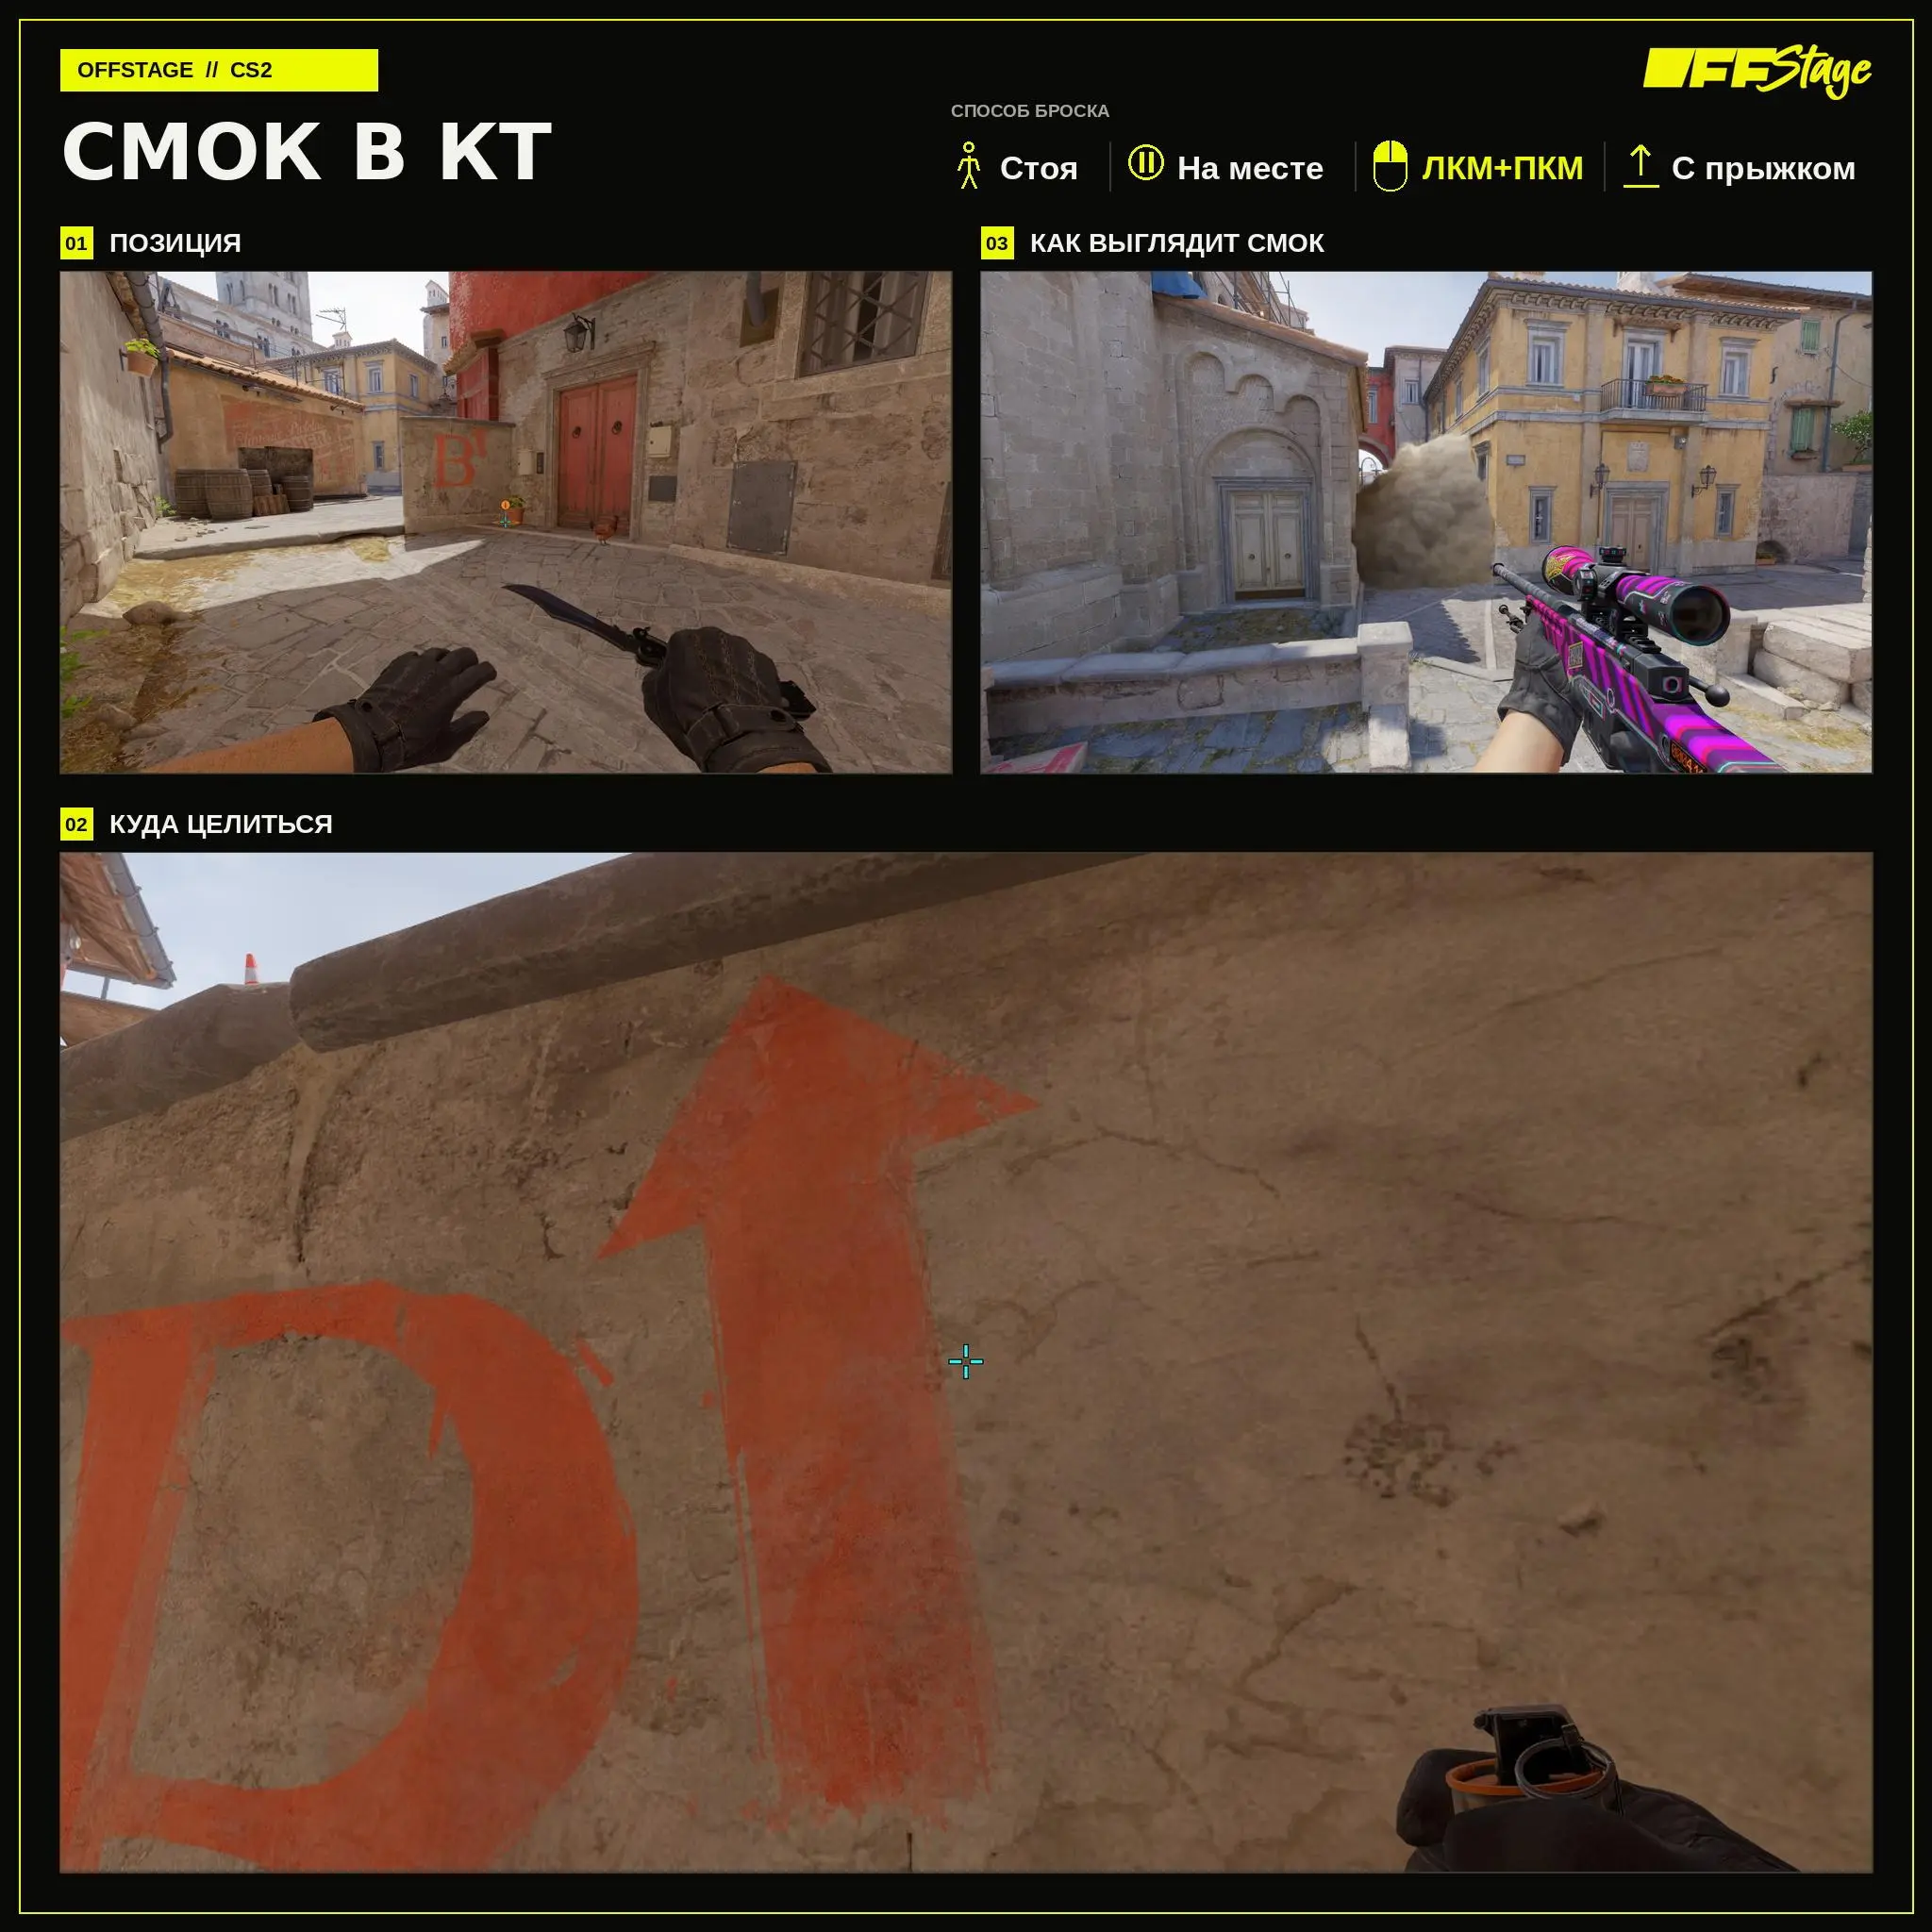
Smoke in CT via Jump Throw
This variant covers the CTs when they push to B. The throw is performed from a standing position using LMB + RMB + Jump Throw. Both mouse buttons must be pressed simultaneously.
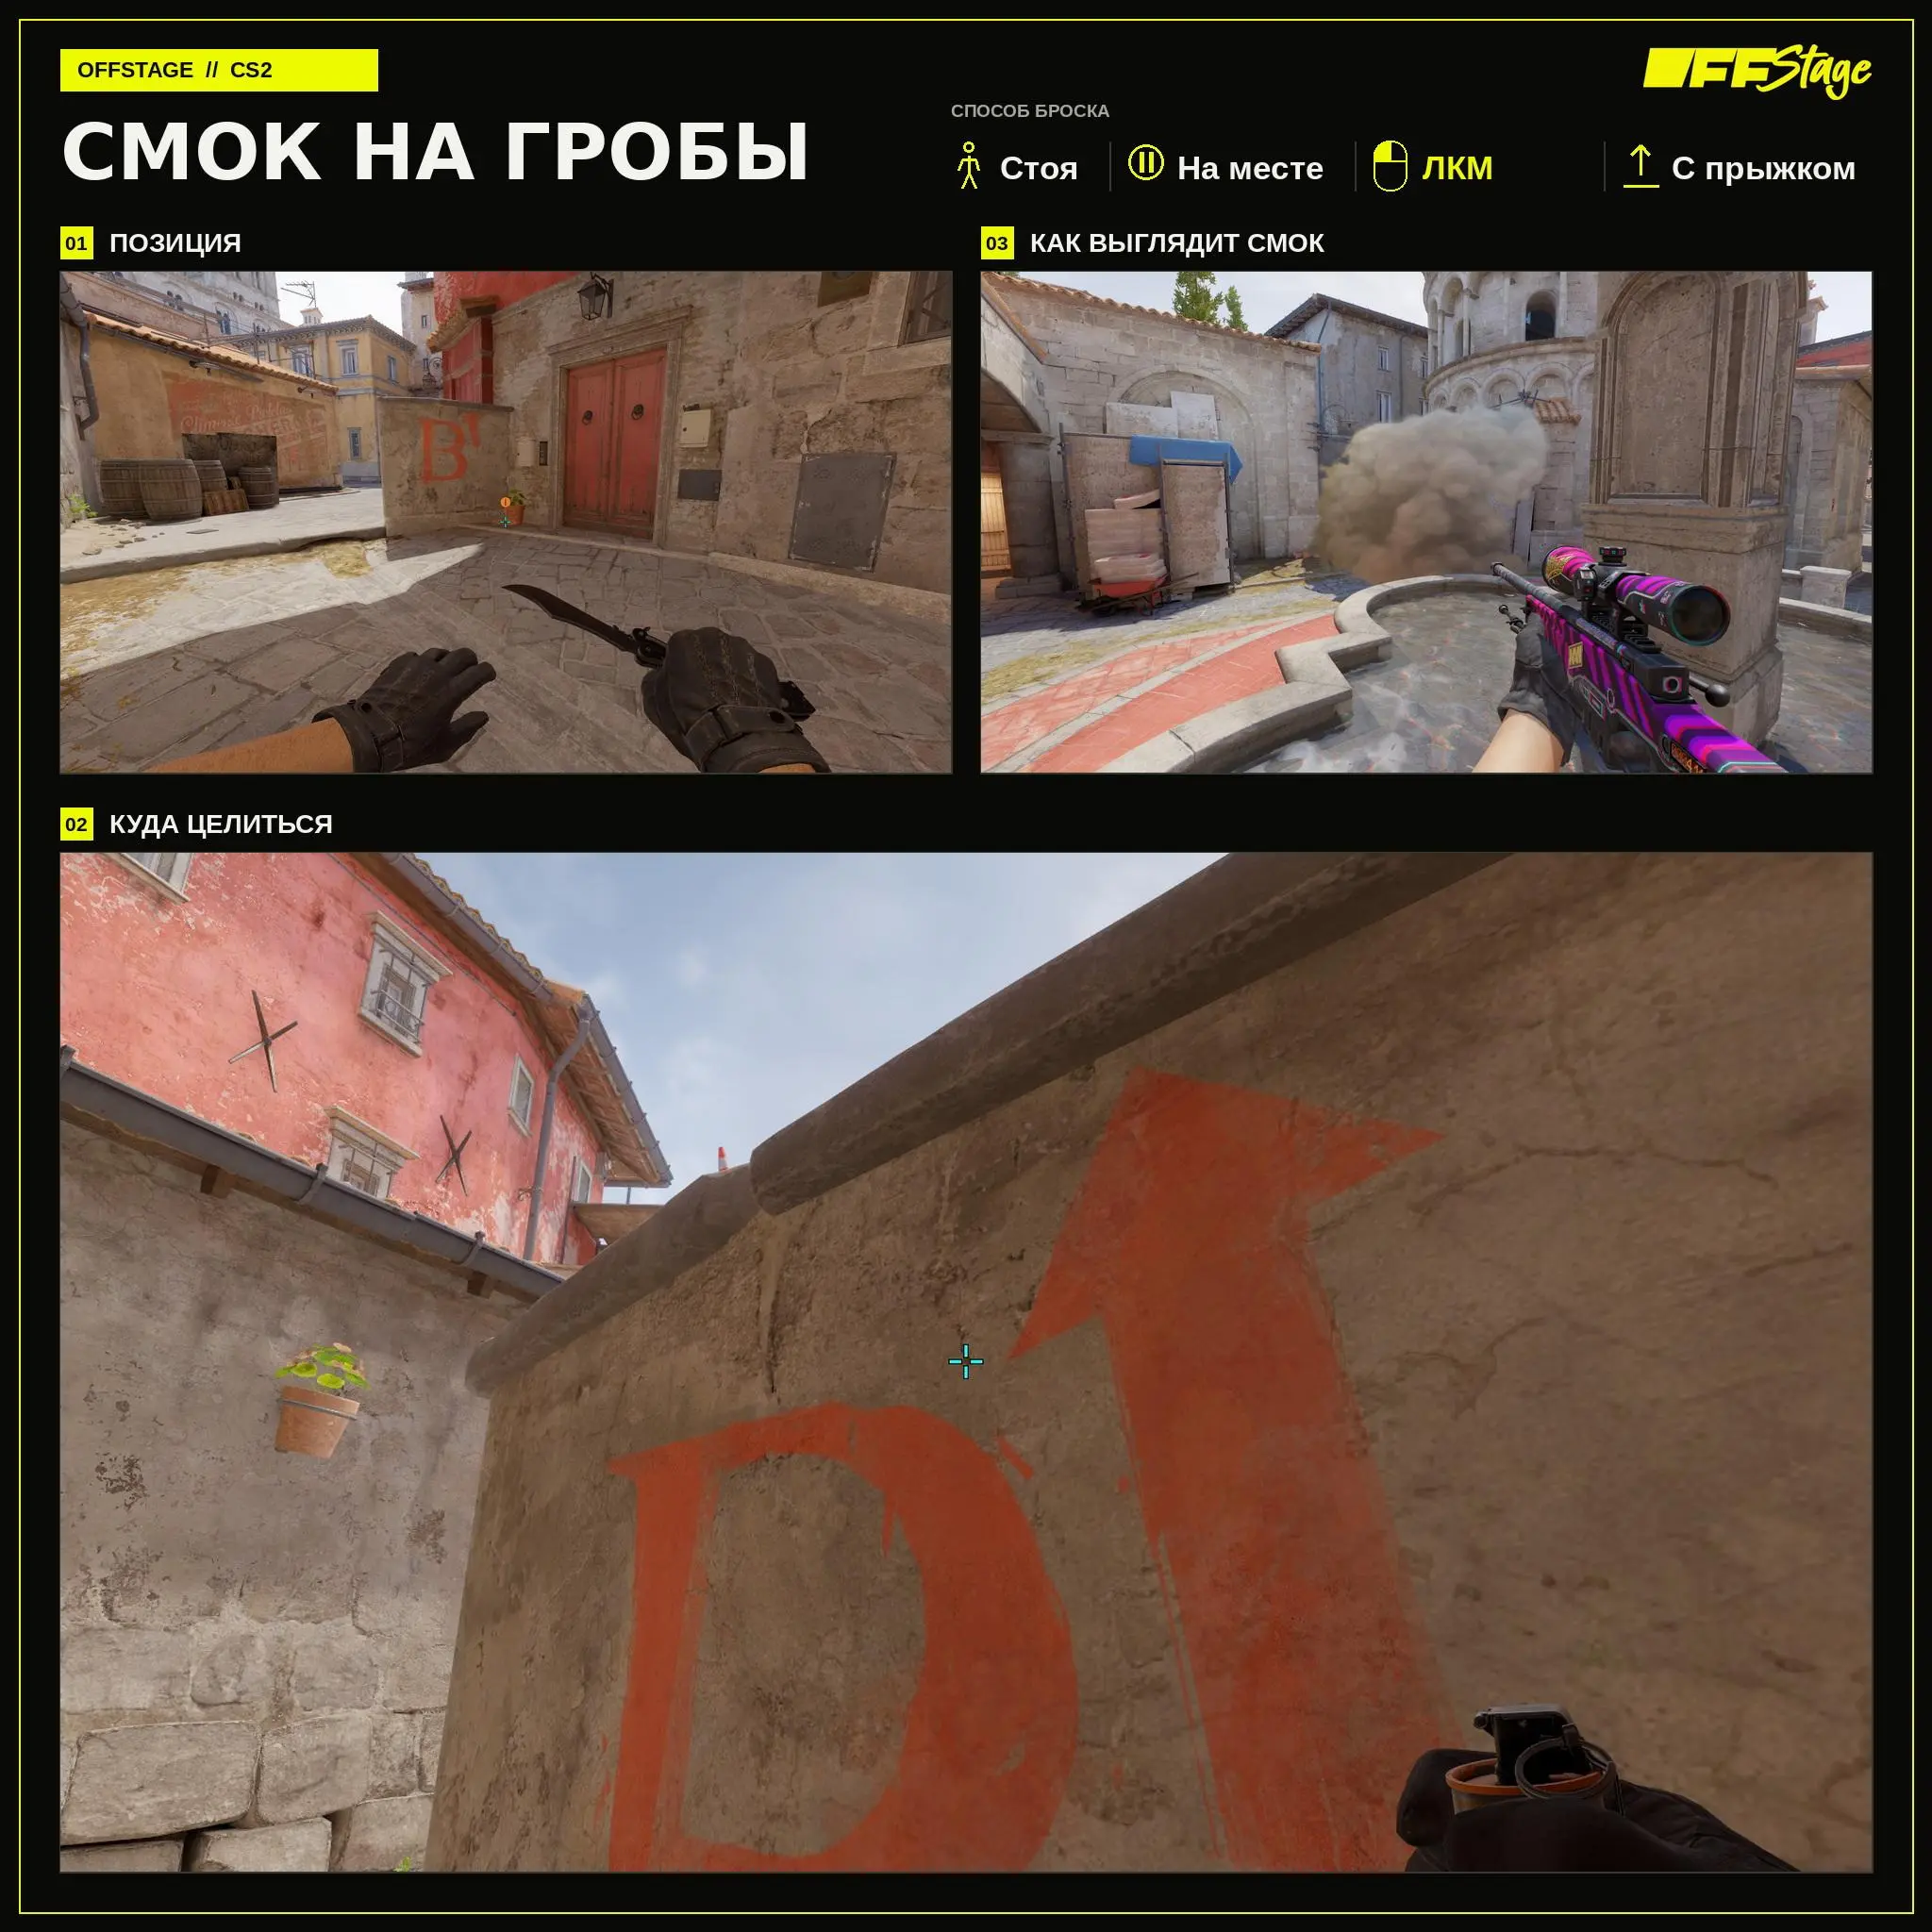
Smoke on the coffins
Smoke on the coffins covers this position and complements the grenade on the CT side. Stand on the marker and press LMB + Jumpthrow without moving. When executed together, both smoke screens should deploy almost simultaneously.
Smoke in CT with LMB
This is the second option for smoke in CT. The grenade is thrown with a standard left-click without moving or jumping. Choose one throwing method and memorize the corresponding reference point.
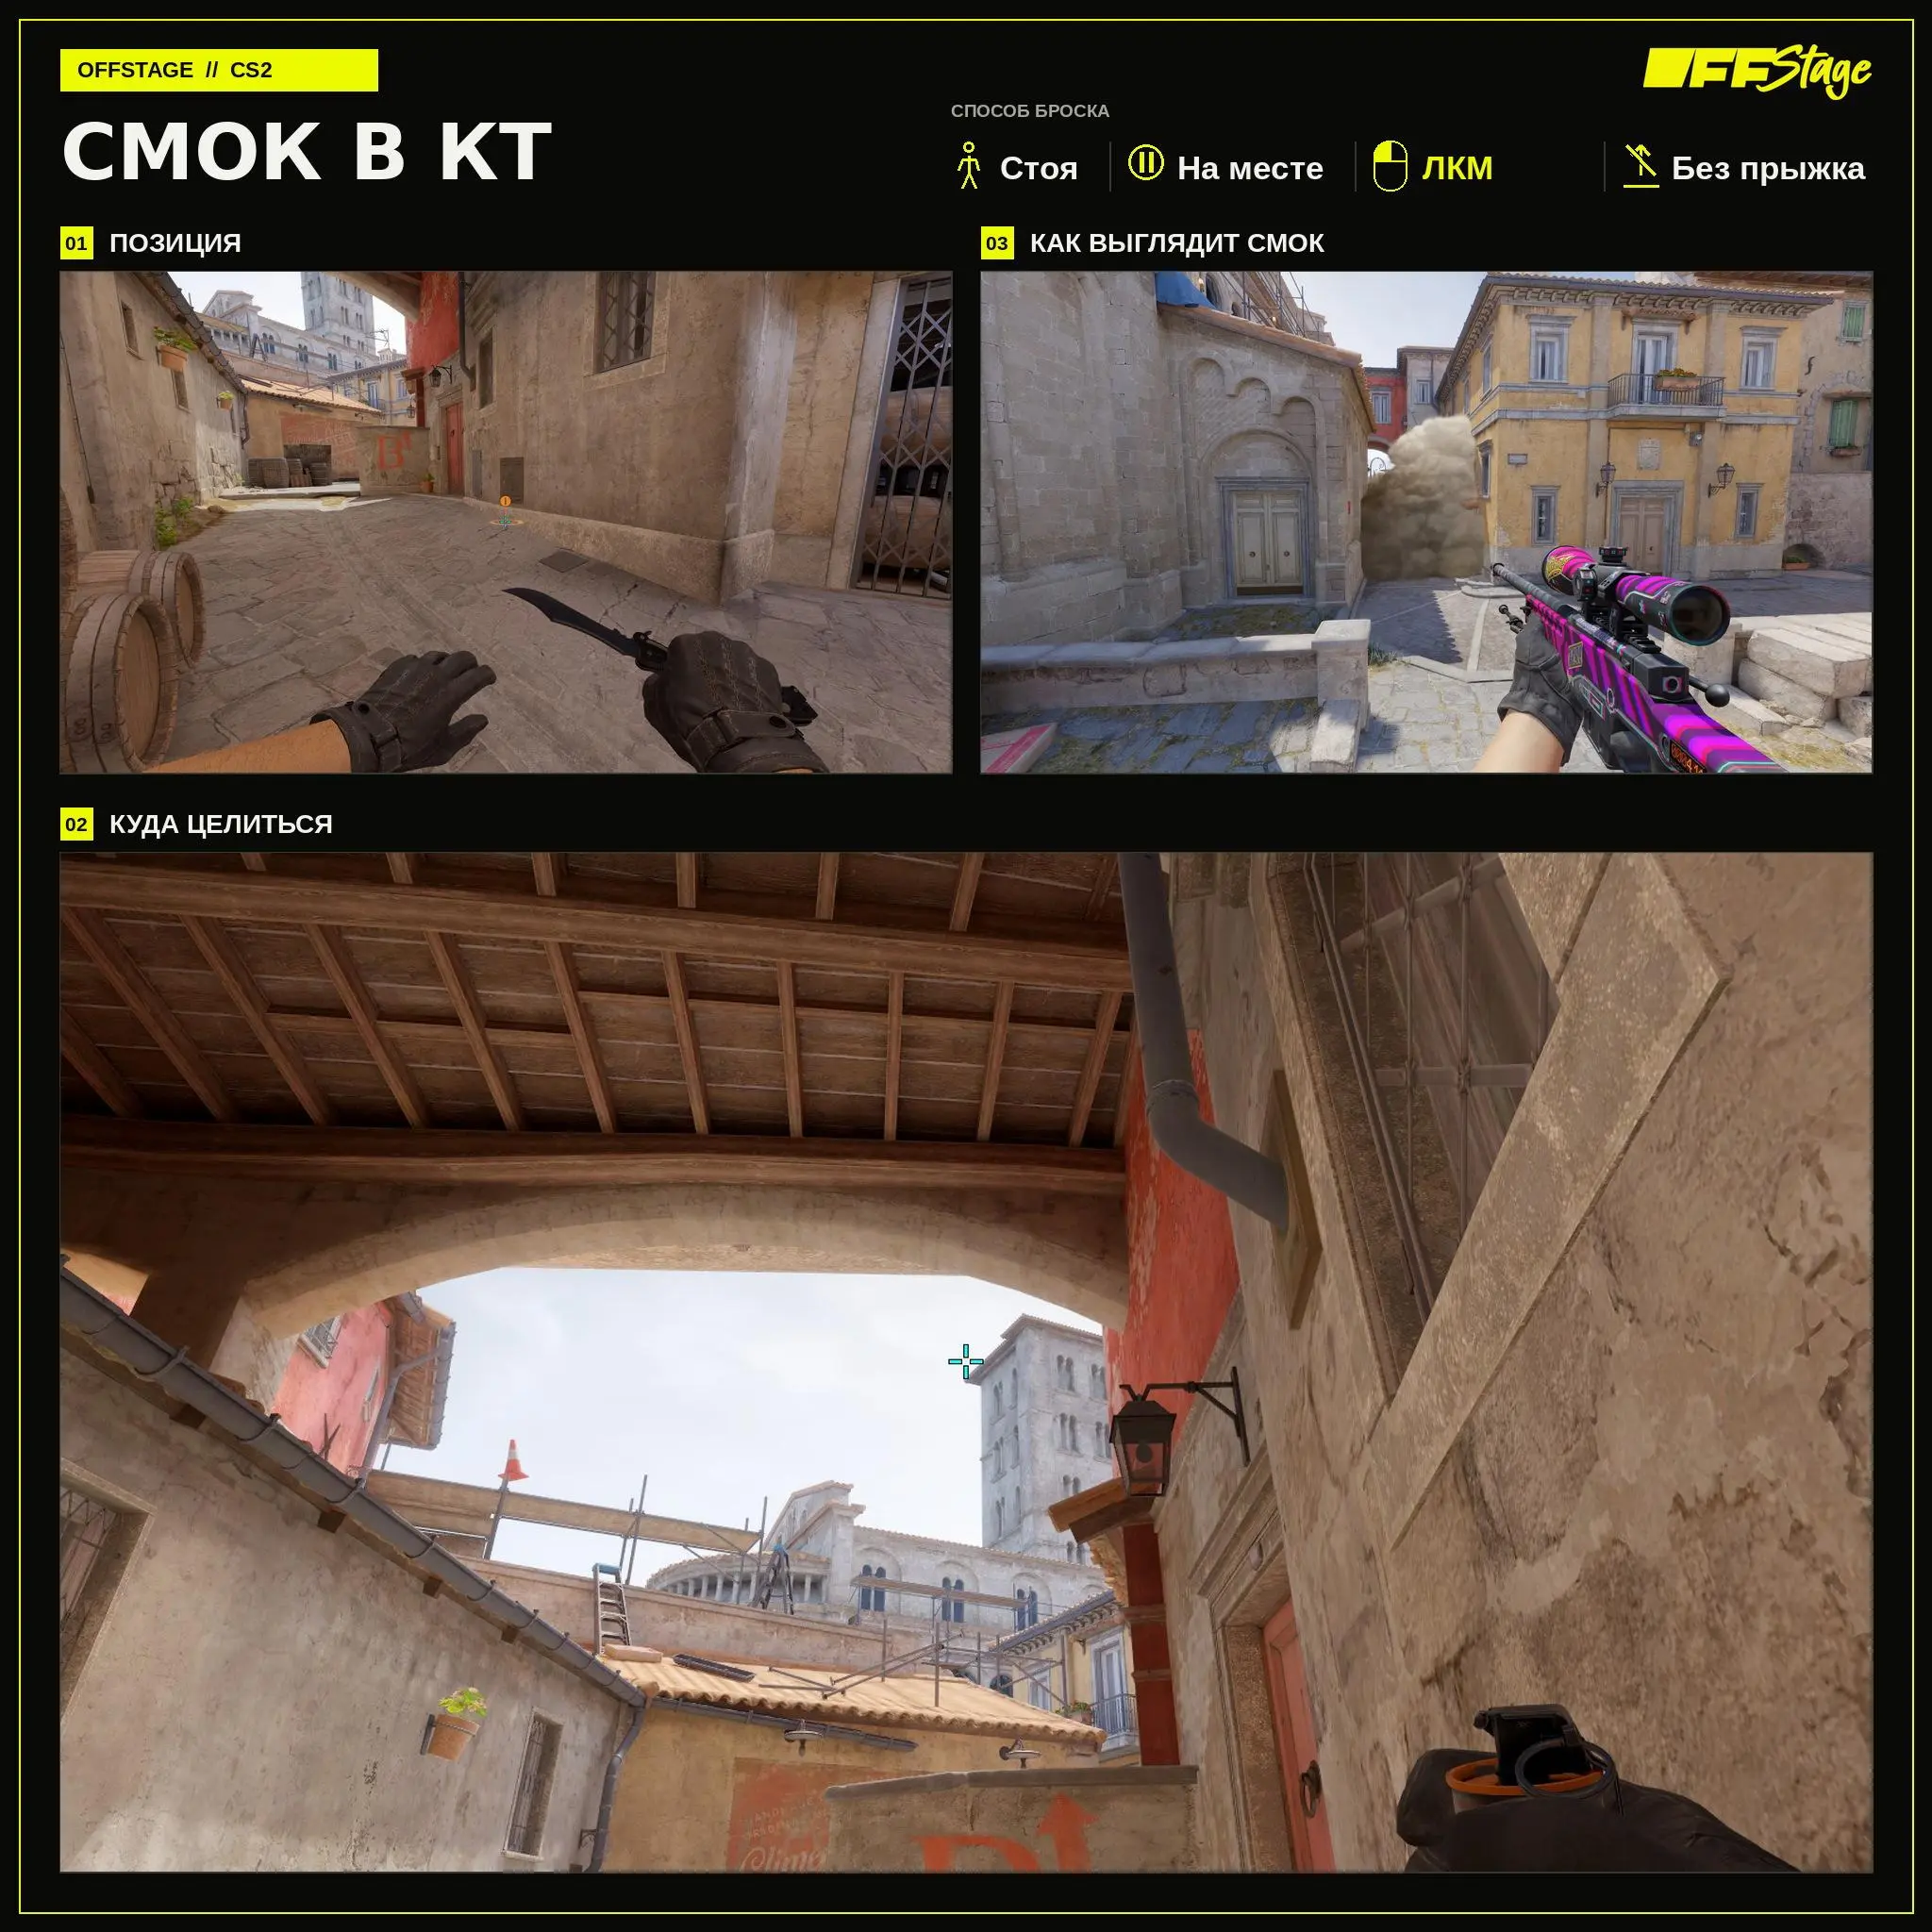
Smoke in the Arch
Smoke in the arch blocks the view from this passageway. Stand at the indicated spot and throw the grenade with a standard left-click without moving or jumping. After it deploys, keep an eye on the near edge of the smoke.
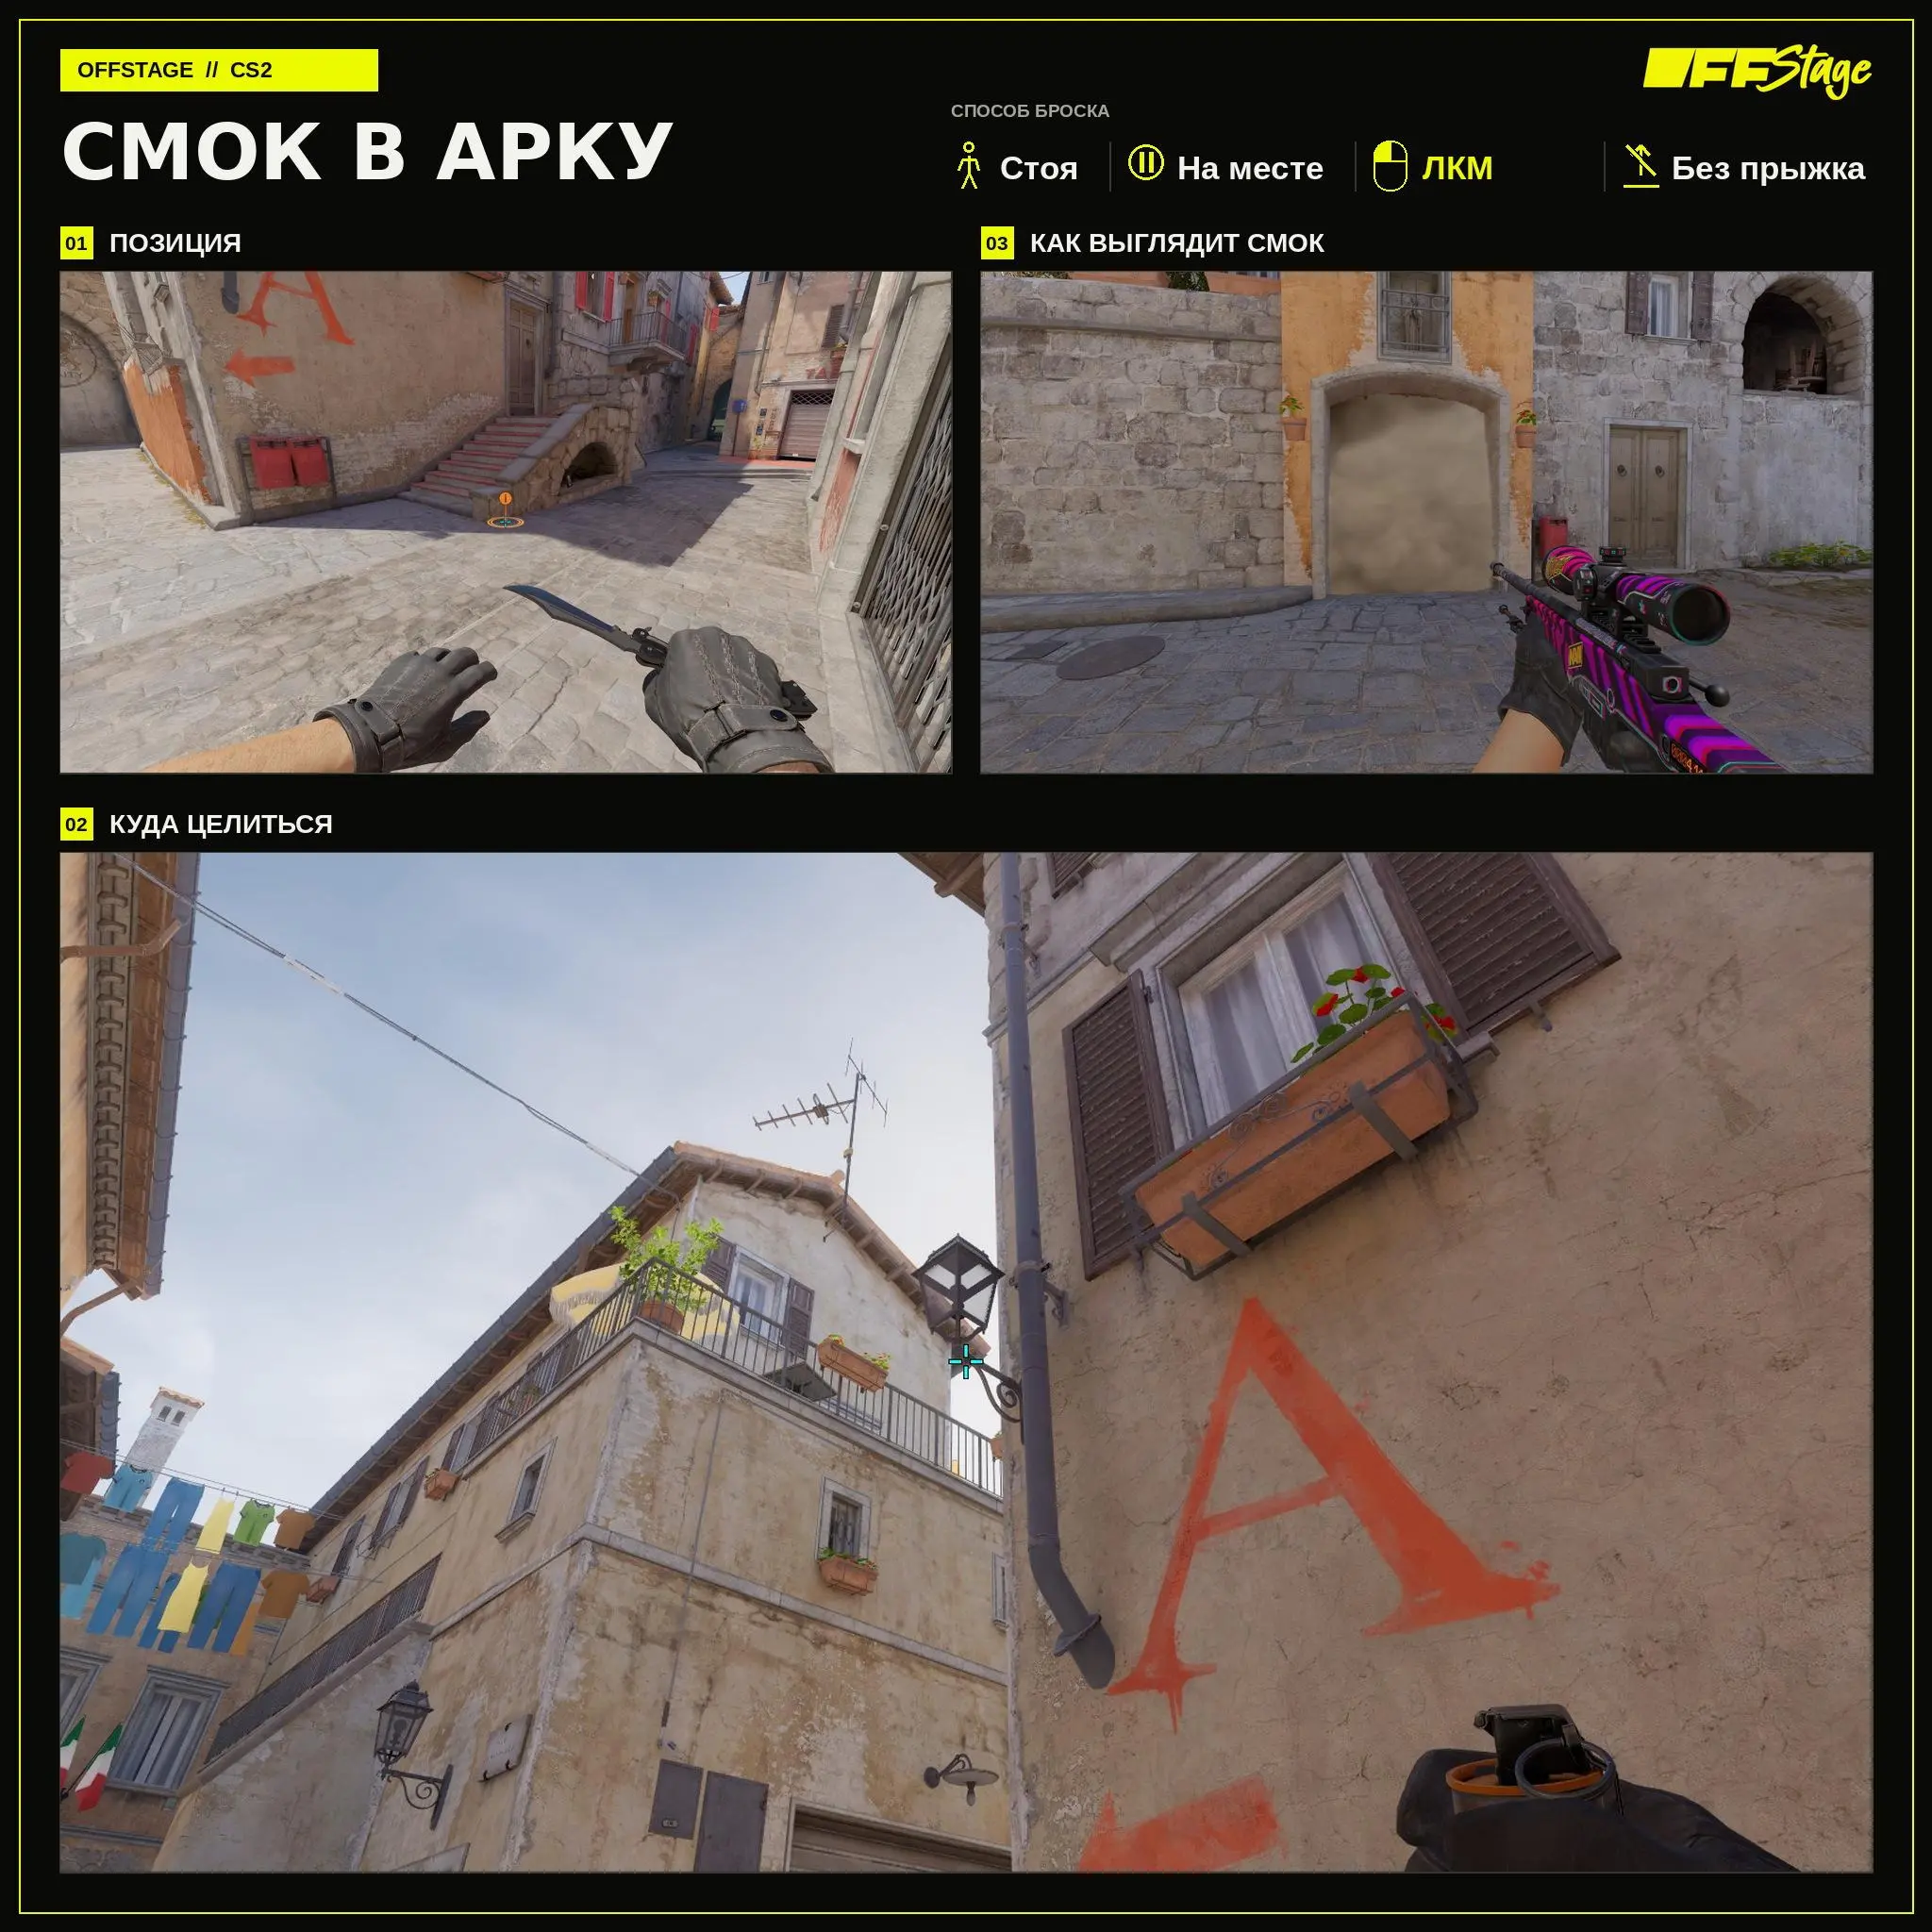
Smoke into the long
A smoke grenade in the long lane blocks this line when exiting toward Side A. Throw it with a standard left-click without moving or jumping. The other direction remains open.
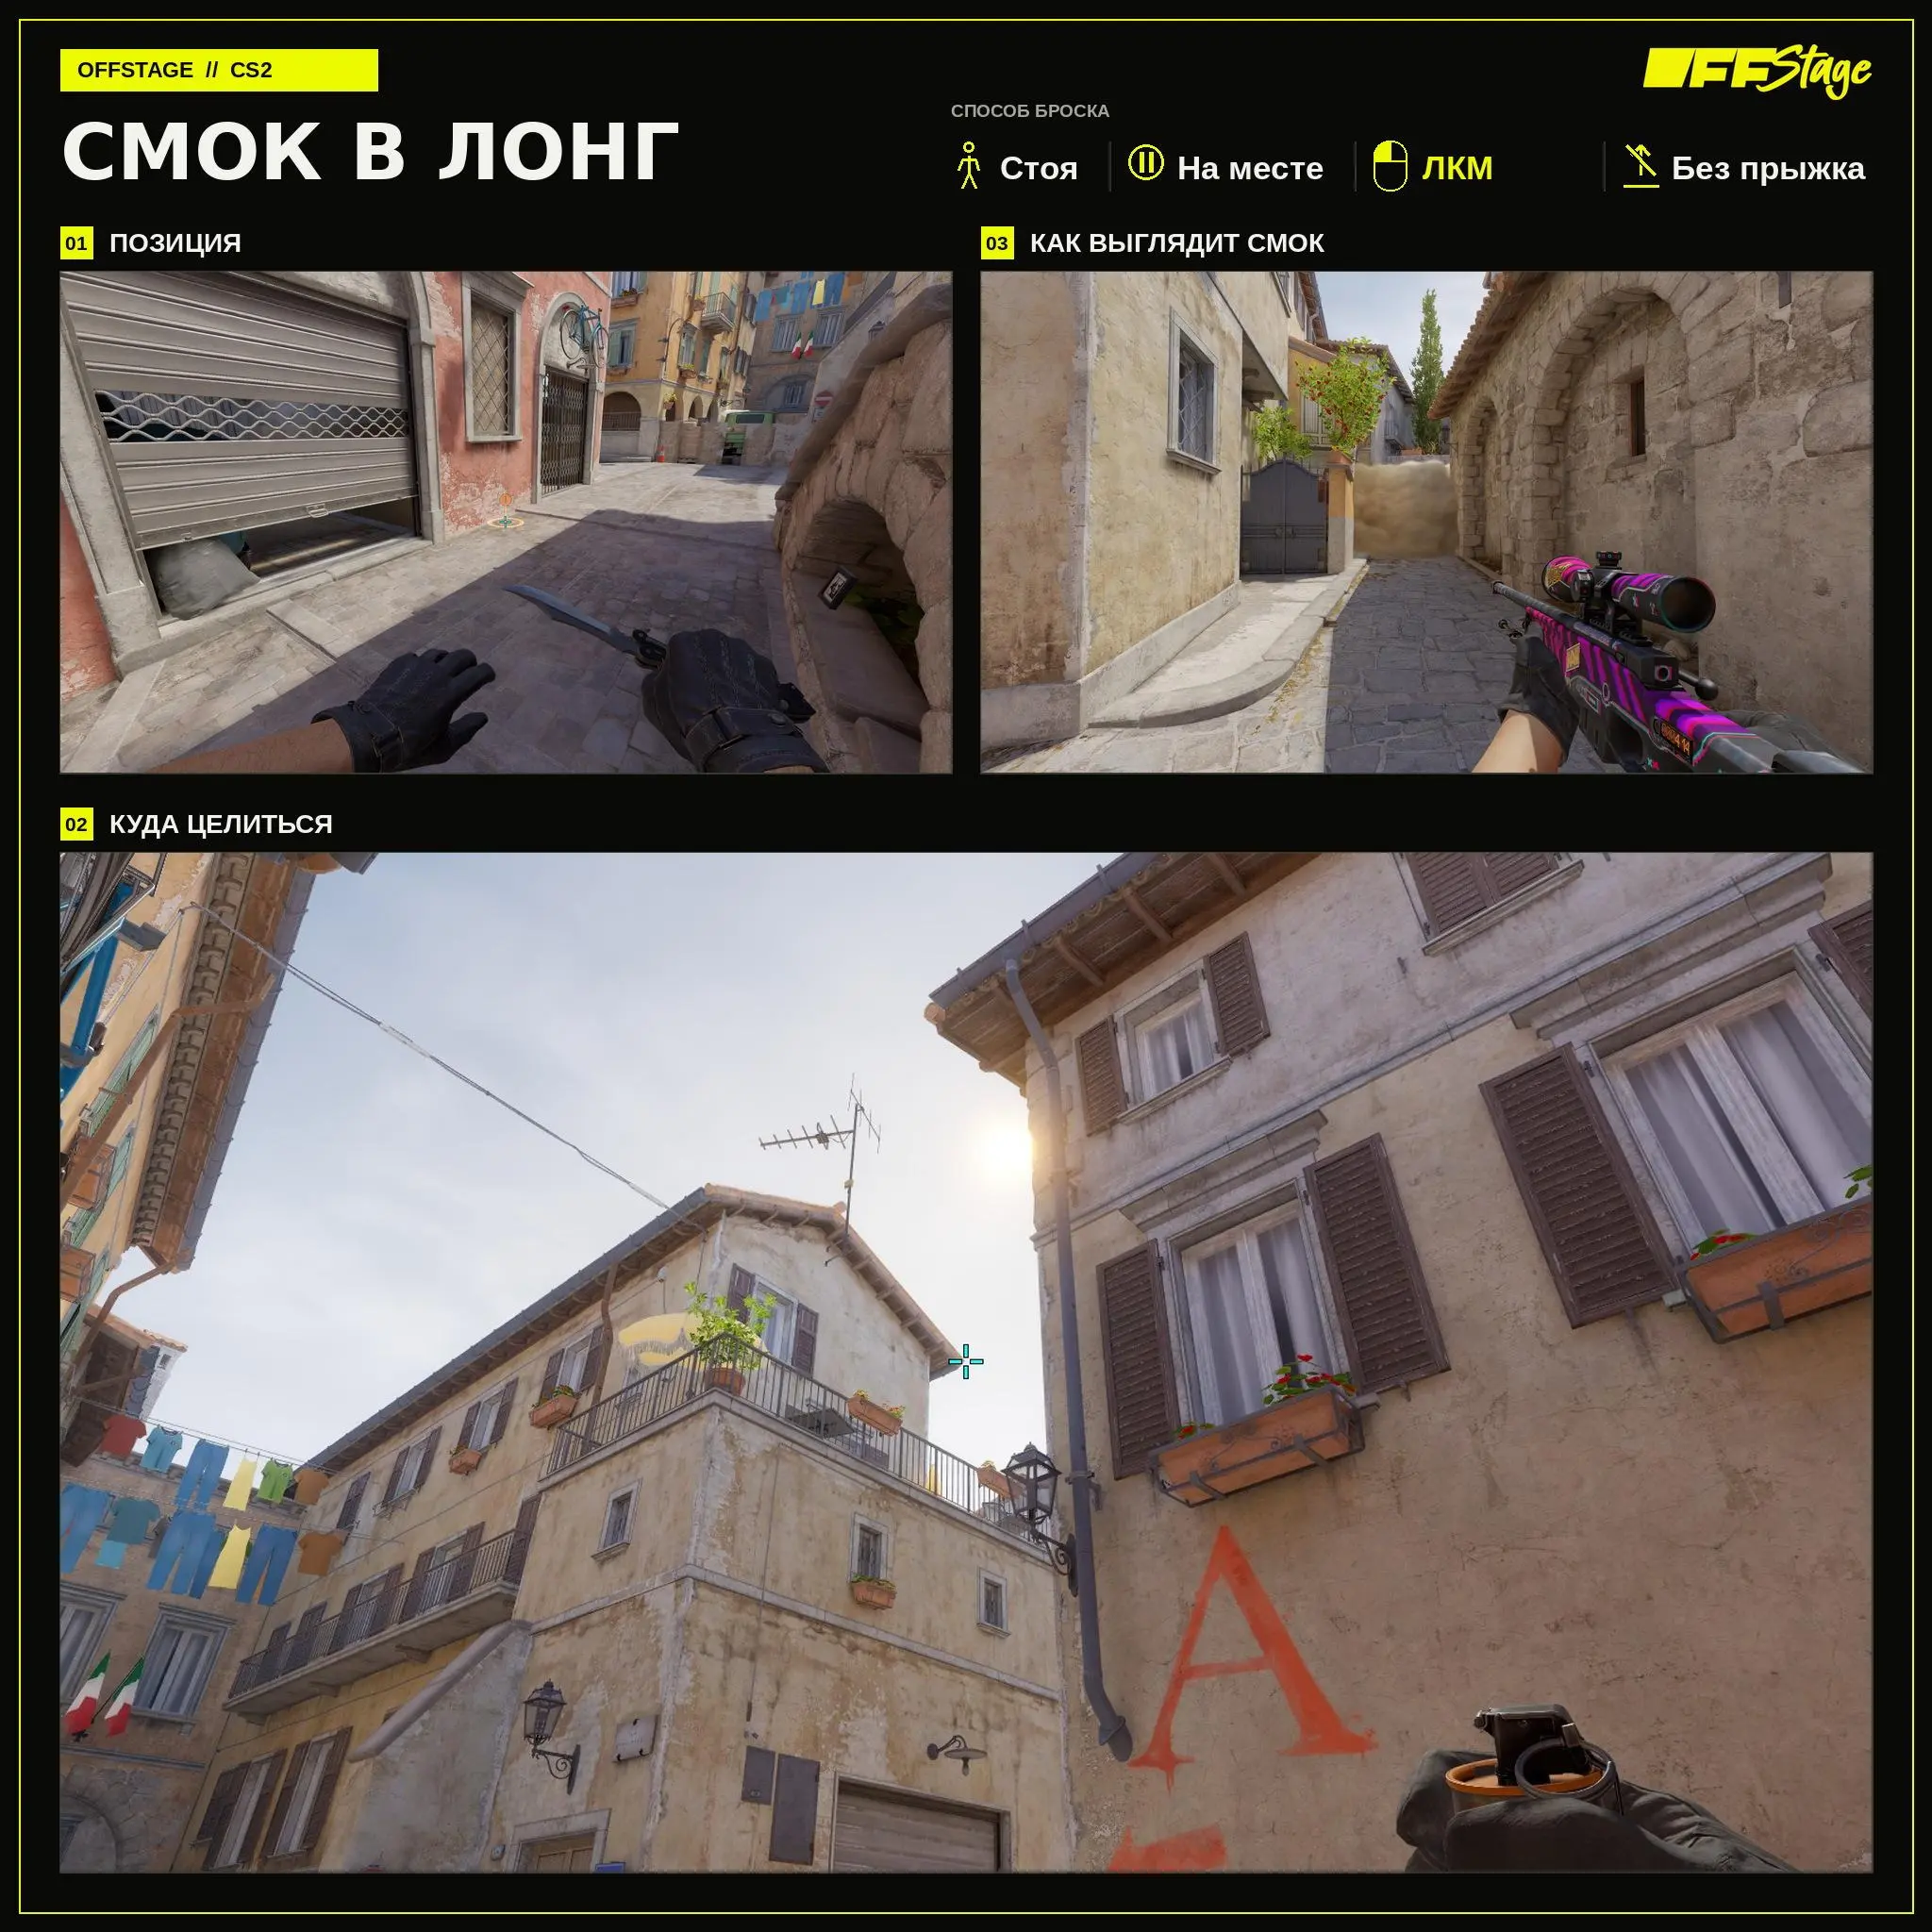
Smoke into the short
Smoke into the small area covers this position next to A. Stand at the indicated spot and perform a left-click + jump throw without moving. After the throw, watch for a possible exit at the edge of the smoke.
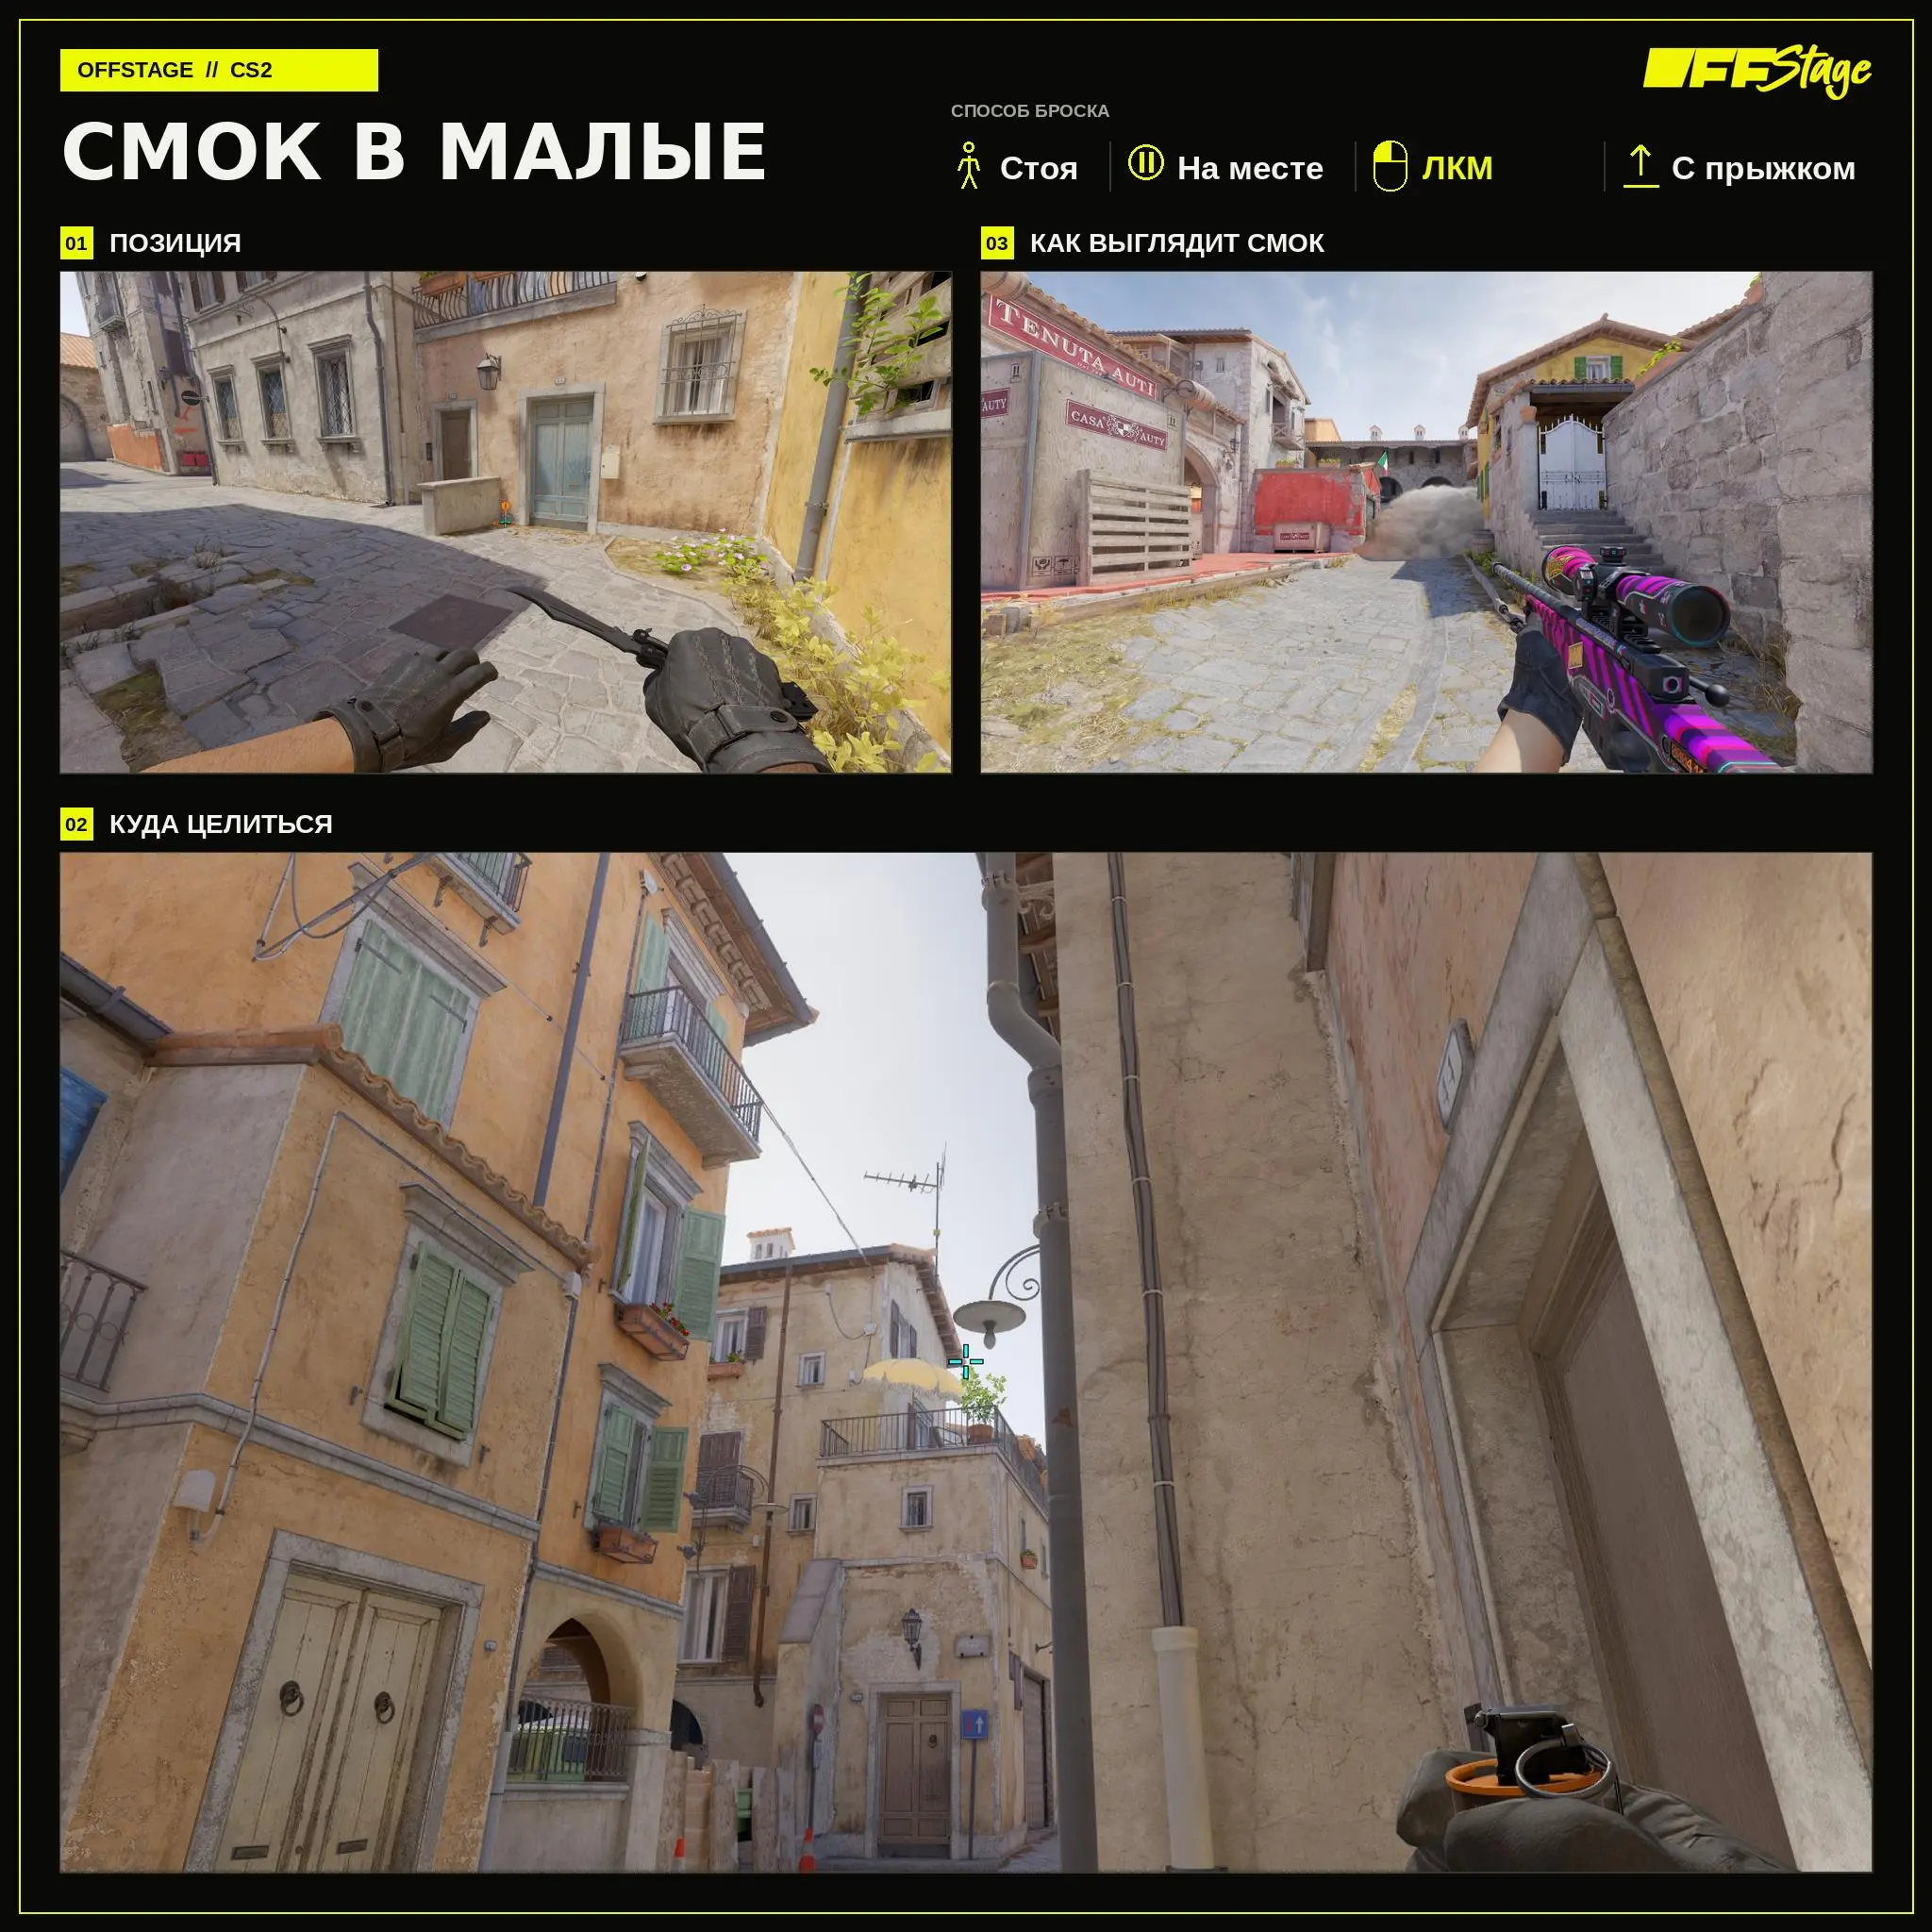
Defensive Throws
On defense, smoke on the Banana map delays the attack’s early advance. Before the round starts, decide who will control the exit through the smoke and who will retreat to Point B.
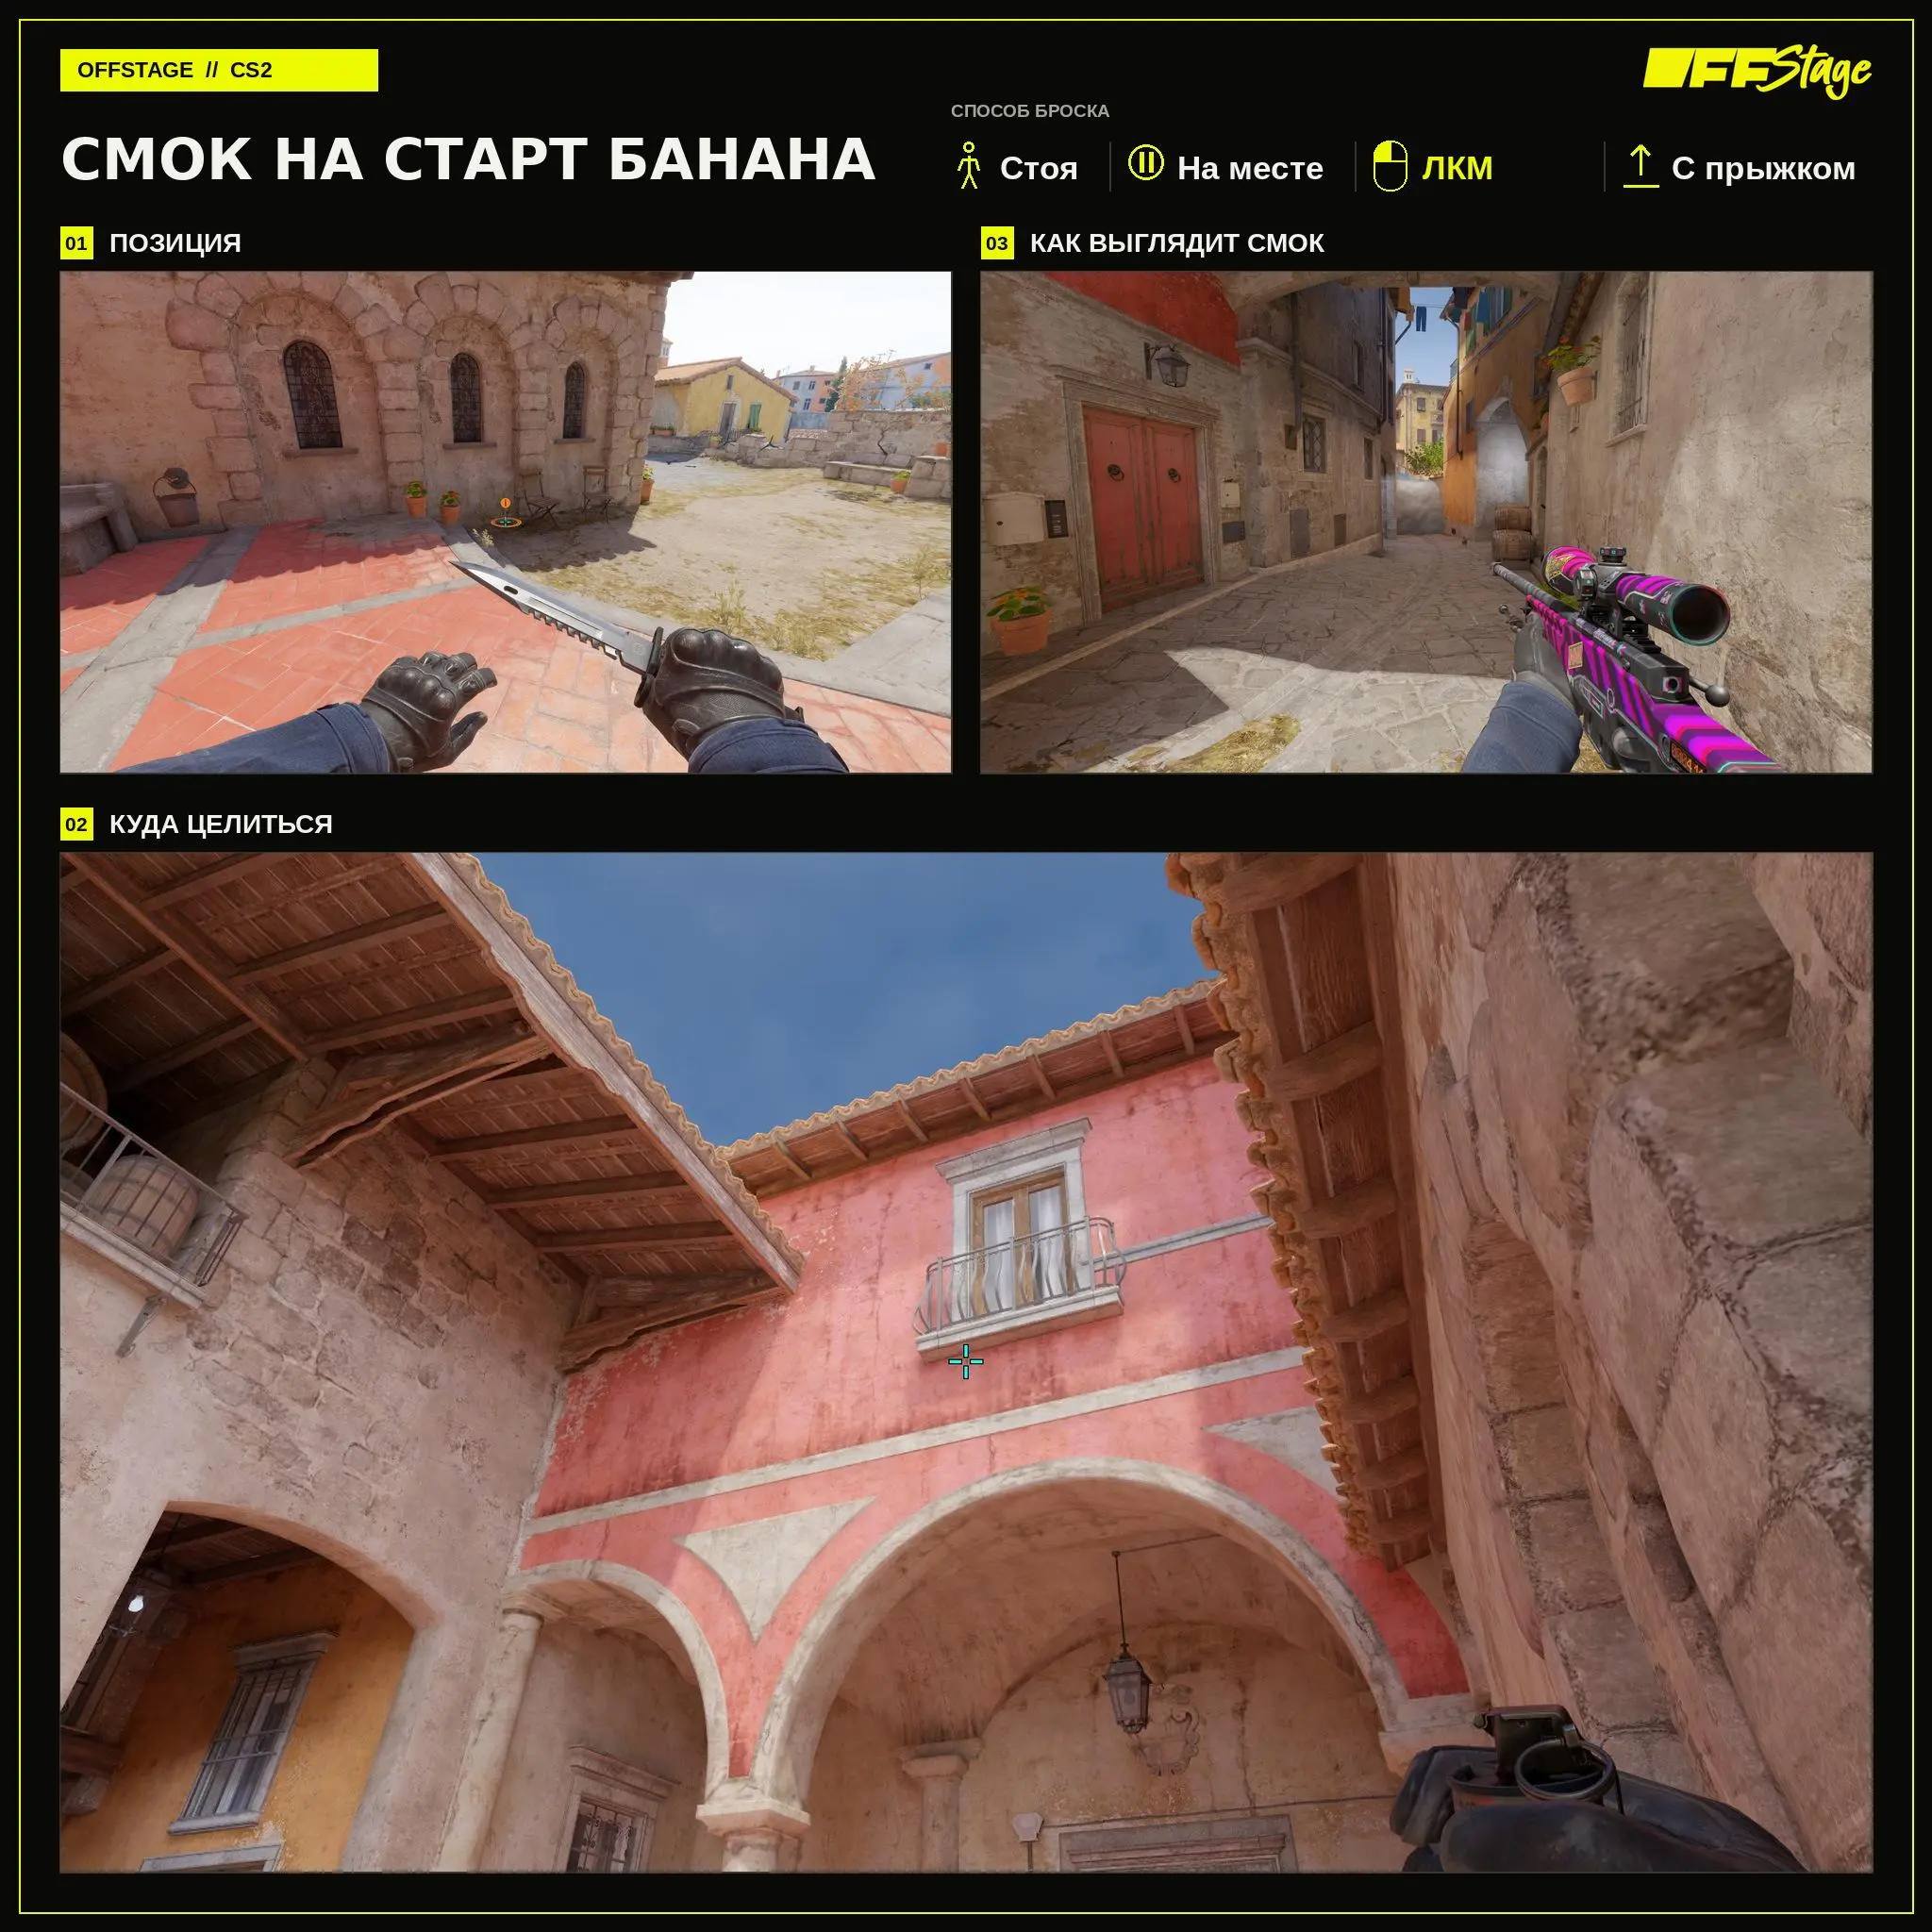
Smoke at the start of the Banana
An early smoke at the start of the banana prevents the attack from immediately securing that part of the map. The throw is performed while standing still using Left Click + Jump Throw. After the smoke clears, the support player must monitor the exit through the smoke.
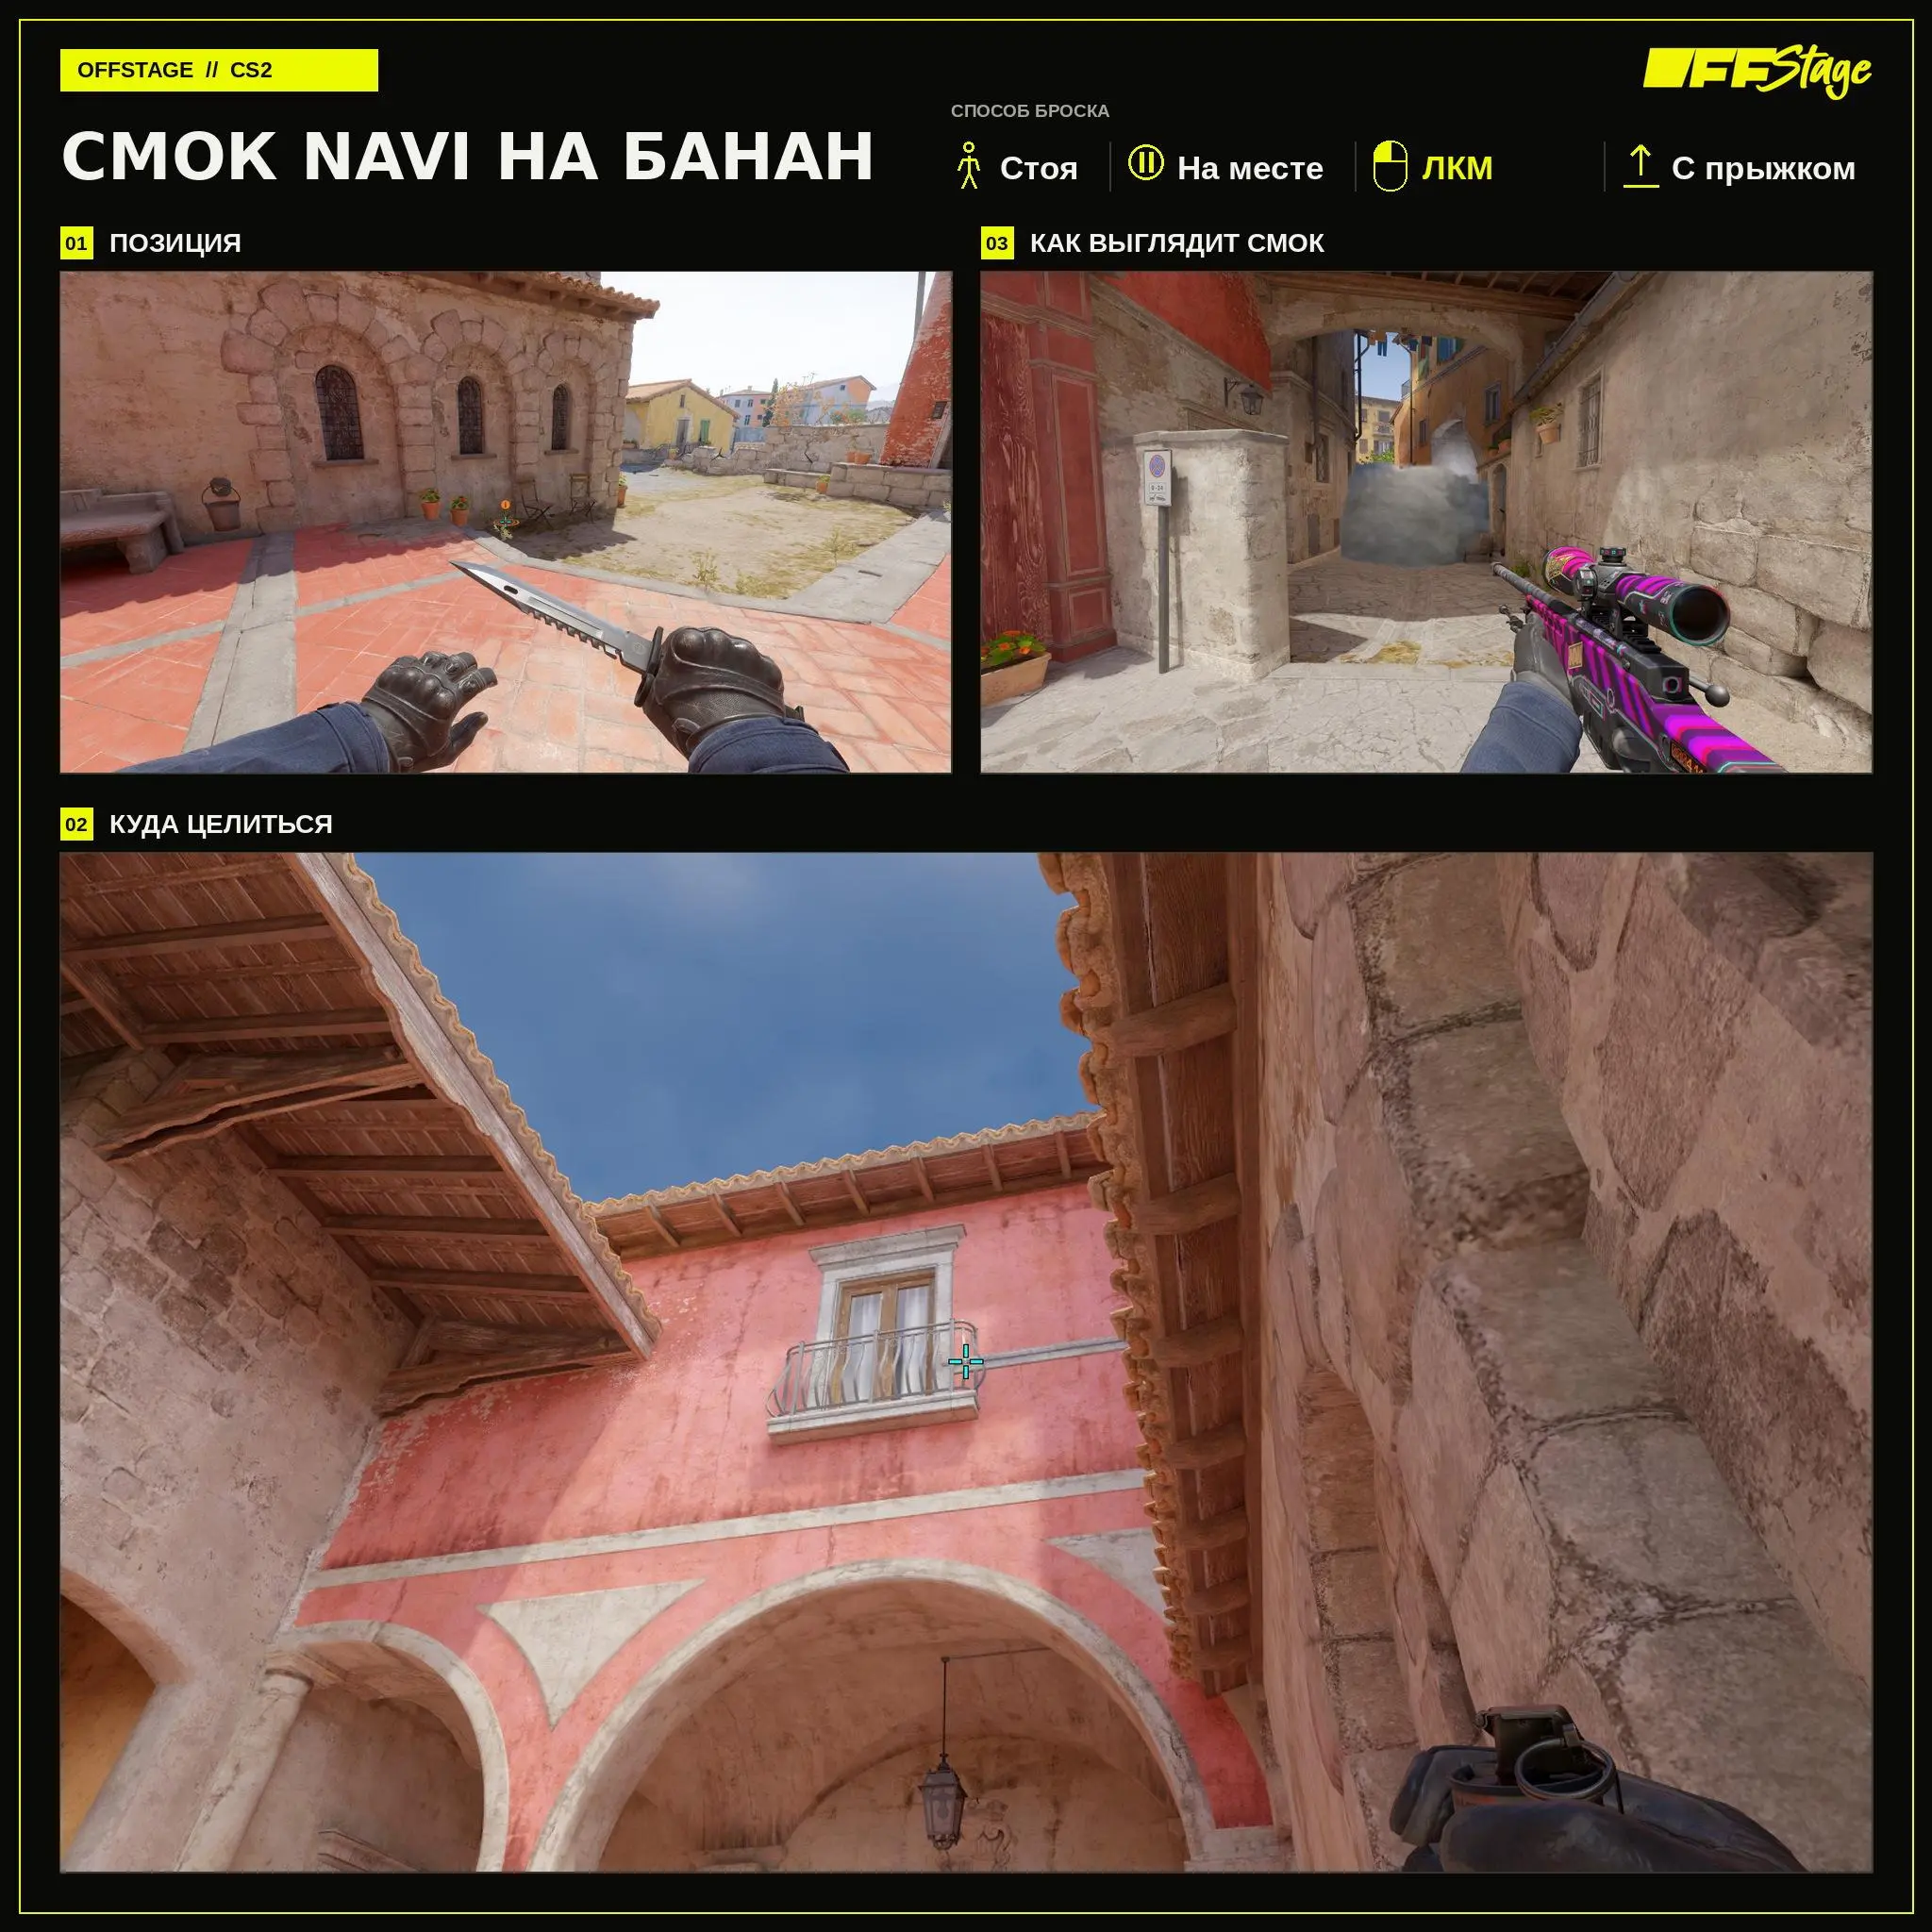
NAVI smoke on the banana
The NAVI variant is executed at a different depth on the banana. Position yourself at the first frame and perform LMB + Jumpthrow without moving. The choice between the two smoke throws depends on the support players’ starting positions.
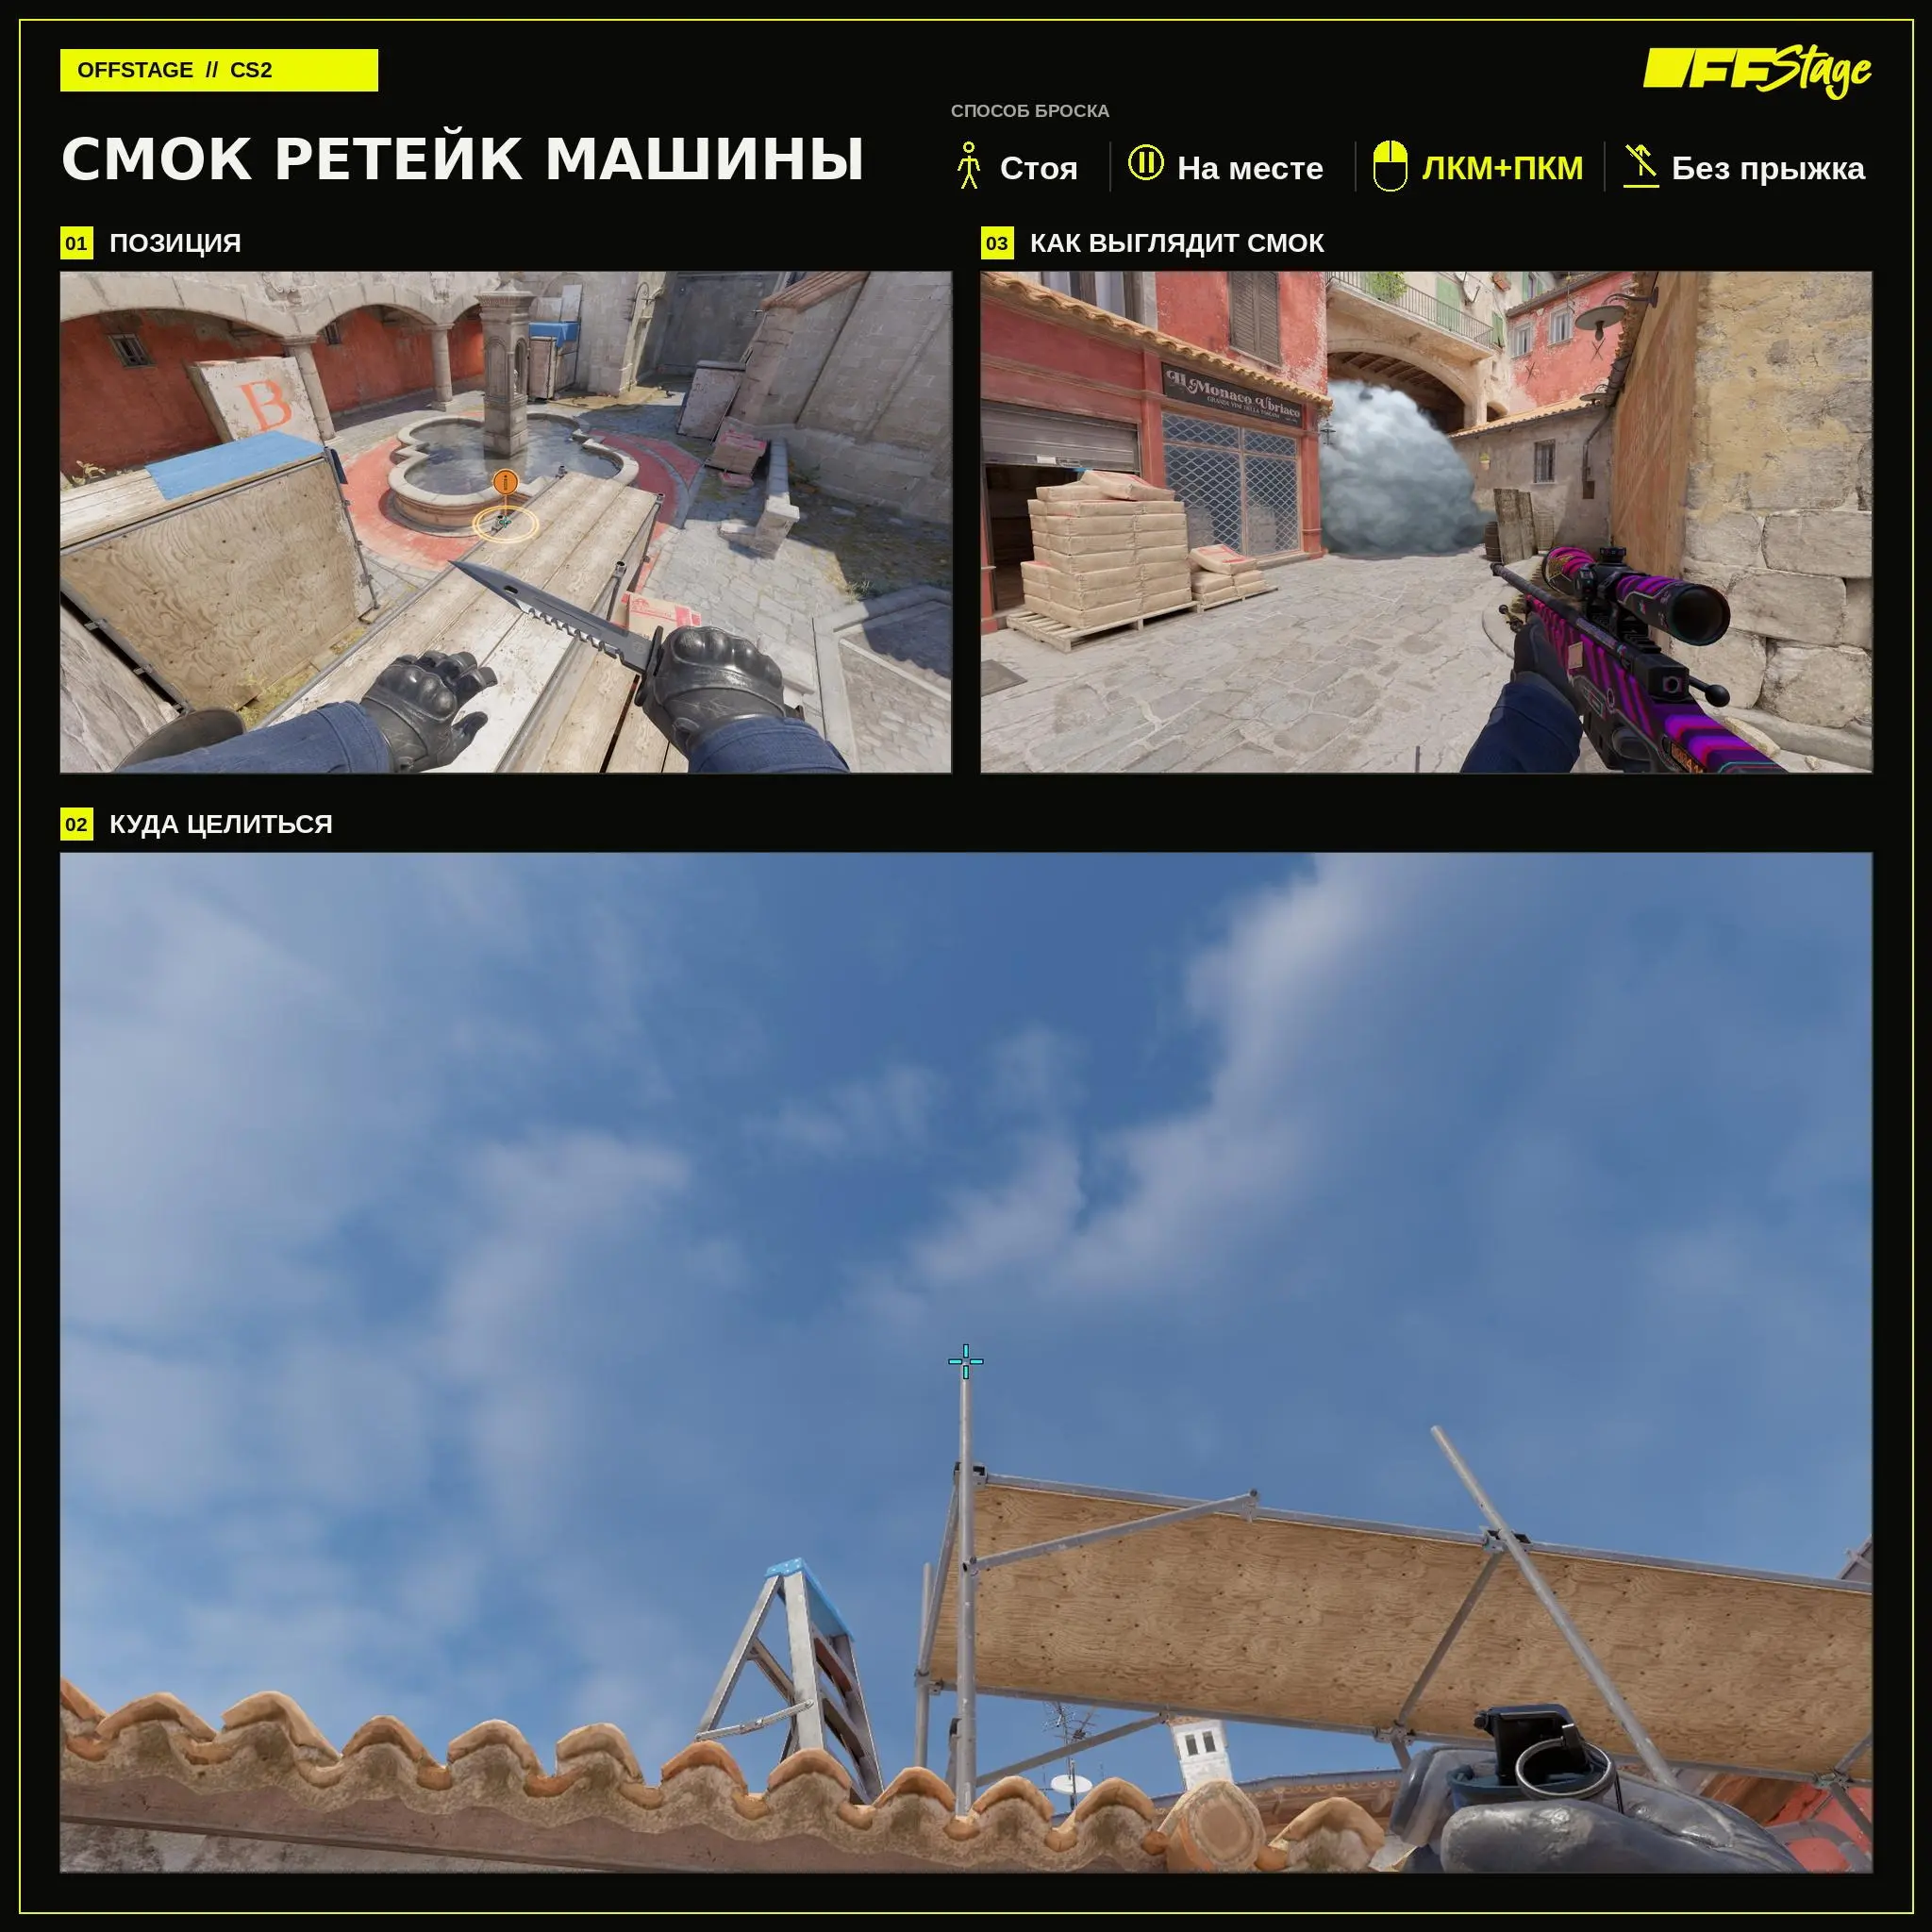
Smoke for retaking the car
This smoke grenade blocks the car during the return to B. Stand at the marked spot and, without moving, press LMB + RMB without jumping. Throw the smoke before the defense team exits en masse.
Basic Smok Set for Inferno
For the attack, start by learning the CT route, the coffins, the arch, and one smoke for A. For defense, start with one smoke variant for the banana. This set is sufficient for basic pushes and defending against attacks.
Before the round, distribute the grenades among the players and coordinate the throw timing. While one player throws the smoke, the others take up positions for the push or prepare flashbangs.
Frequently Asked Questions (FAQ)
Базовая пара закрывает КТ и гробы. Оба дыма лучше бросать так, чтобы они раскрылись перед началом выхода команды.
Один вариант выполняется через ЛКМ + ПКМ + Jumpthrow, второй — обычным ЛКМ без движения и прыжка. Для каждого броска используется свой ориентир.
Выбор зависит от начальной позиции опорника и нужной глубины дыма. Перед раундом команда должна решить, кто контролирует выход через смок.